다양한 조건에서 요소의 모양과 동작을 변경하여 요소에 상호 작용성을 도입할 수 있습니다.
이 교육 세션 내에서:
- 다양한 조건에서 요소를 디자인하세요
- 기본 조건 스타일로 되돌리기
- 조건에서 요소의 스타일 삭제
- 링크 요소의 현재 상태를 설계합니다.
- 상속된 스타일의 기원을 이해하다
다양한 조건에서 요소를 디자인하세요
호버 조건과 같이 다양한 조건에서 요소에 다양한 스타일을 구현하려면 스타일 패널 내의 선택기에서 조건 드롭다운 목록을 열고 스타일을 적용할 조건을 선택합니다.
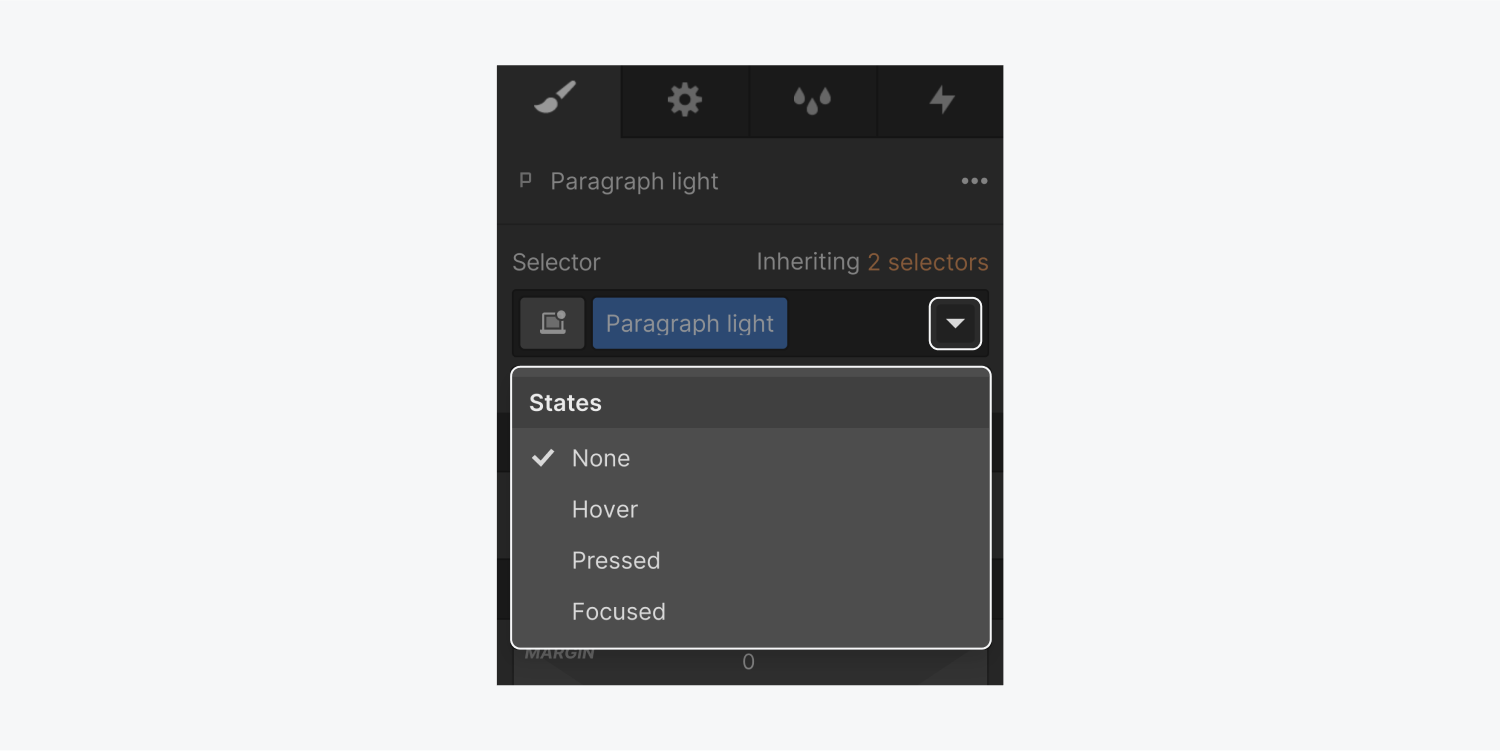
선택기의 조건 드롭다운 목록에서 조건을 선택하면 녹색 상태 클래스(pseudo-class라고도 함)가 선택기 필드의 끝에 표시됩니다. 이는 현재 요소에 대해 해당 조건을 스타일링하고 있다는 표시 역할을 합니다.
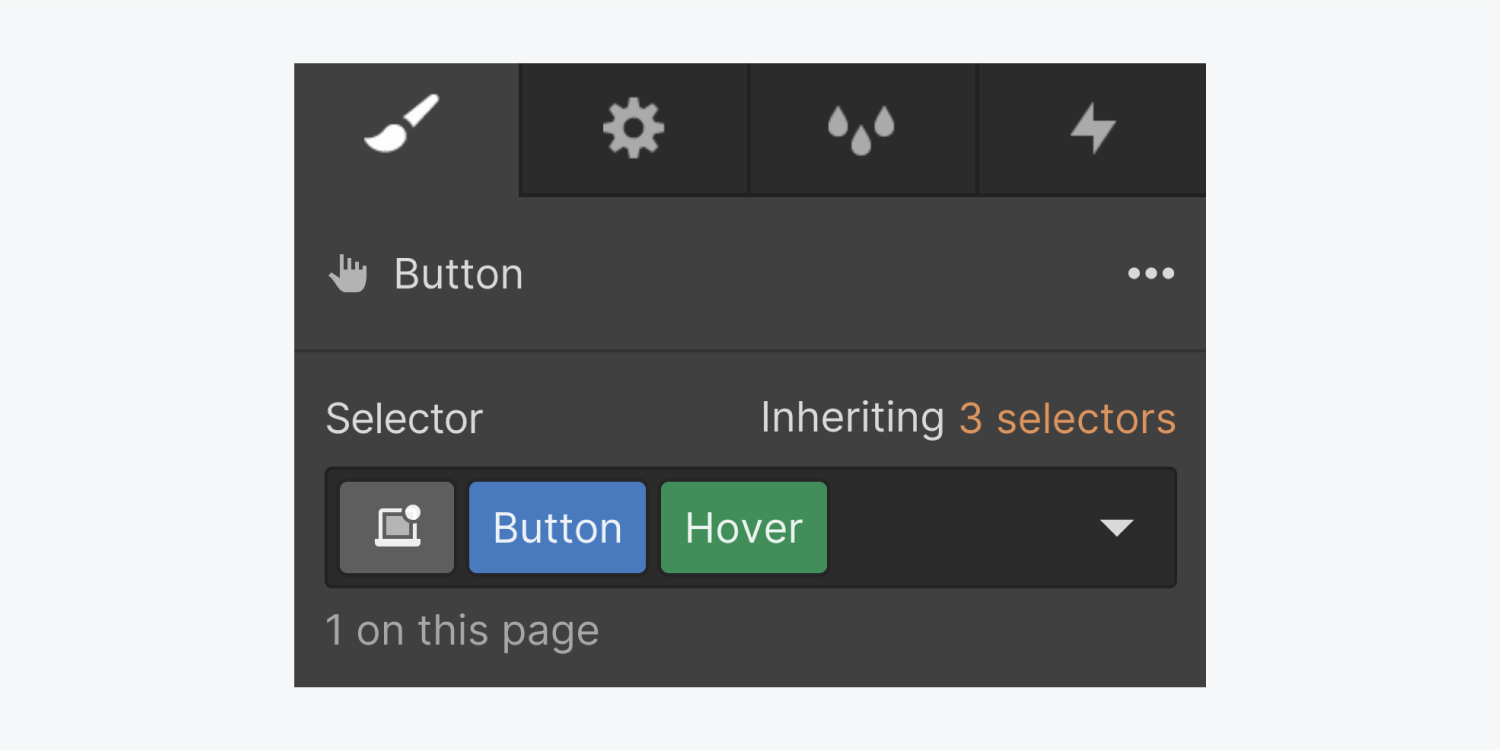
여러분은 수많은 스타일링 선택을 할 수 있는 자유가 있습니다. 여러분이 여기에 적용하는 변경 사항은 최종 사용자가 이 요소와 상호 작용할 때 관찰하게 될 것입니다.
현재 조건과 관계없이, 조건을 선택 취소하거나 다른 곳으로 이동할 때까지 구현한 수정 사항은 캔버스에서 눈에 띄게 표시됩니다.
조건 메뉴(드롭다운)
드롭다운 메뉴에서 스타일을 지정할 조건을 선택합니다. 그 후, 스타일 패널에서 조정한 내용은 선택한 조건에 대해 보존됩니다.
기본 조건
기본 조건은 요소의 초기 상태를 나타냅니다. 이는 요소의 고유한 모습입니다.
다른 조건을 사용자 지정한 후 조건 드롭다운 메뉴에서 "없음"을 선택하여 기본 조건의 스타일을 되돌릴 수 있습니다.
호버 조건
마우스 포인터가 요소 위로 호버링될 때 호버 조건이 분명해집니다. 호버링은 대부분의 터치 지원 기기에서 실행 가능하지 않을 수 있으므로 더 작은 뷰포트를 위한 디자인을 제작할 때 이 점을 염두에 두십시오.
활성화된 조건
활성화된 상태는 요소를 클릭하거나 탭할 때 나타나는 것입니다. 이 상태는 활성화가 본질적으로 호버 상태의 확장이기 때문에 호버 조건의 스타일을 상속합니다.
집중된 조건
키보드를 사용하여 탐색하면 버튼과 링크와 같은 특정 대화형 요소에 집중할 수 있으며, 트리거하지 않아도 됩니다. 마우스나 포인터를 사용하여 대화형 요소를 클릭하거나 참여하면 초점과 활성화가 모두 달성됩니다. 이 조건은 대화형 요소가 키보드, 마우스 또는 터치 상호 작용을 통해 초점이 맞춰지는 경우를 시뮬레이션합니다.
포커스(키보드) 조건
초점 조건과 유사하게, 이 상태는 활성화(예: 키보드 탐색)를 필요로 하지 않고 대화형 요소의 초점을 에뮬레이트합니다. 일반적으로 초점이 맞춰졌을 때 텍스트 입력 필드에 적용되며 초점 방법(예: 마우스, 키보드 등)과 무관합니다.
키보드 기반 탐색에 의존하는 방문자를 위한 웹사이트 접근성을 향상시키려면 대화형 요소가 페이지에서 쉽게 식별될 수 있도록 이 조건을 스타일링하는 것이 중요합니다. 요소의 레이아웃에 영향을 미치지 않으므로 대화형 요소에 개요를 추가하는 것이 좋습니다.
방문한 상태
방문한 조건은 이전에 본 링크의 상태를 나타냅니다. 이 상태는 기본 "없음" 조건의 스타일을 상속합니다.
방문한 조건에 대해 텍스트 색상, 배경 색상, 테두리 색상을 수정할 수 있습니다. 배경 색상은 다른 조건에서 다르게 설정된 경우에만 표시됩니다.
플레이스홀더
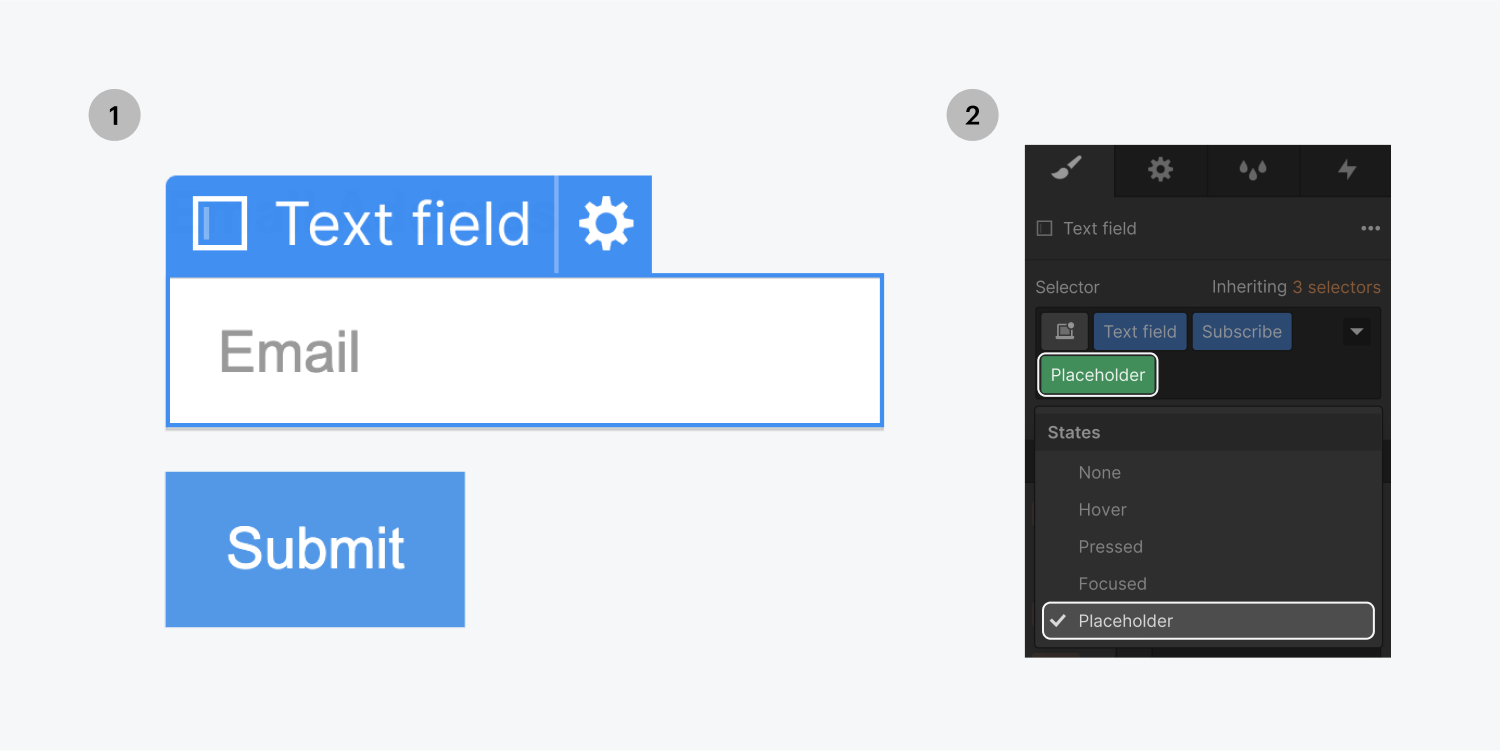
이 조건은 양식 필드의 조건 드롭다운 목록에서 사용할 수 있습니다. 이를 통해 기본 조건의 인쇄 스타일을 상속하는 입력된 텍스트와 별도로 플레이스홀더 텍스트의 스타일을 지정할 수 있습니다.
플레이스홀더 텍스트와 관련하여 타이포그래피, 배경 및 그림자를 사용자 정의할 수 있습니다.
확인된 상태
이 조건은 폼 checkboxes 및 Element 설정에서 사용자 지정 스타일이 활성화된 라디오 버튼의 조건 드롭다운 목록에서 액세스할 수 있습니다. 이를 통해 checkbox 또는 라디오 버튼의 체크된 상태를 스타일 지정할 수 있습니다.
기본 조건 스타일로 되돌리기
조건에 대한 스타일 수정을 완료한 후 다음 작업 중 하나를 실행하여 기본 "없음" 조건으로 되돌릴 수 있습니다.
- 조건 드롭다운 메뉴에서 "없음"을 선택하세요
- 키보드에서 ESC를 누르세요(현재 요소의 선택도 해제됩니다)
- 다른 요소를 선택하세요
조건에서 요소의 스타일 삭제
조건에서 사용자 지정 스타일이나 모든 스타일을 제거하려면:
- 요소를 클릭하세요.
- 조건 드롭다운 메뉴에서 조건을 선택하세요
- 기존 스타일을 삭제합니다(파란색)
링크 요소와 탭의 현재 상태를 디자인합니다.
링크 요소는 현재 상태도 가지고 있습니다. 사용자 지정 스타일이 현재 상태에 적용되면 사용자가 해당 상태에 있을 때 링크 요소의 모양이 반영됩니다.
현재 상태(선택기의 녹색 태그)
현재 조건은 해당 요소가 현재 페이지, 섹션 또는 탭과 연관되어 있는 경우 모든 링크 태그 또는 선택한 링크 요소의 클래스에 자동으로 할당됩니다.
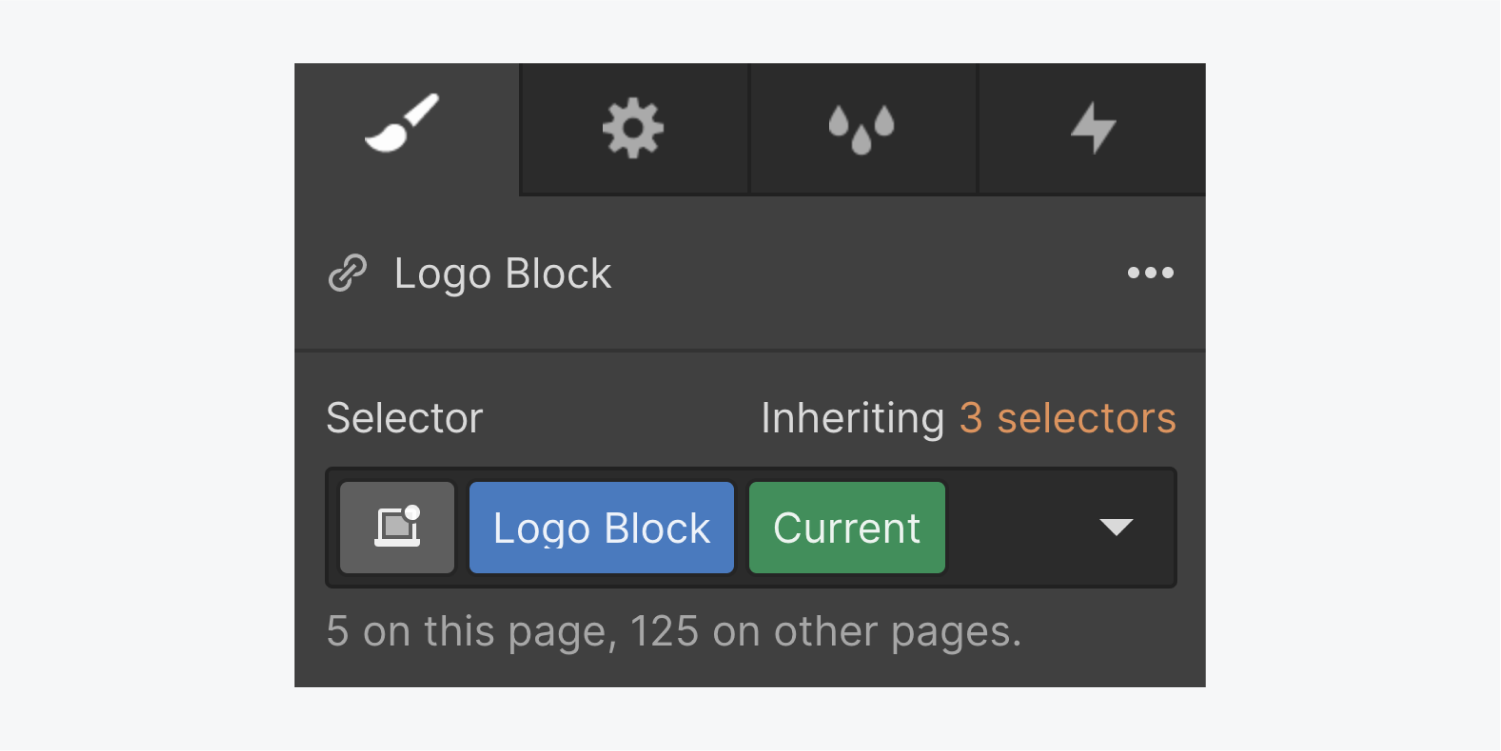
현재 조건은 기본 "없음" 조건의 모든 스타일을 상속합니다.
링크의 현재 상태 선택
모든 링크 블록, 텍스트 링크, 버튼, 탐색 링크의 현재 상태에 접근하려면:
- 링크 요소를 선택하고 D를 눌러 링크 설정을 엽니다.
- 페이지 옵션을 선택하고 드롭다운에서 현재 페이지를 선택합니다(링크가 홈페이지에 있는 경우 홈페이지를 선택합니다)
- S를 눌러 스타일 패널로 이동합니다. 링크에 클래스를 적용한 경우 선택기 필드에서 녹색 현재 조건이 활성화된 것을 볼 수 있습니다. 그렇지 않은 경우 선택기를 클릭하고 열리는 드롭다운에서 "모든 링크" 태그를 선택합니다. 현재 조건도 태그에 적용됩니다.
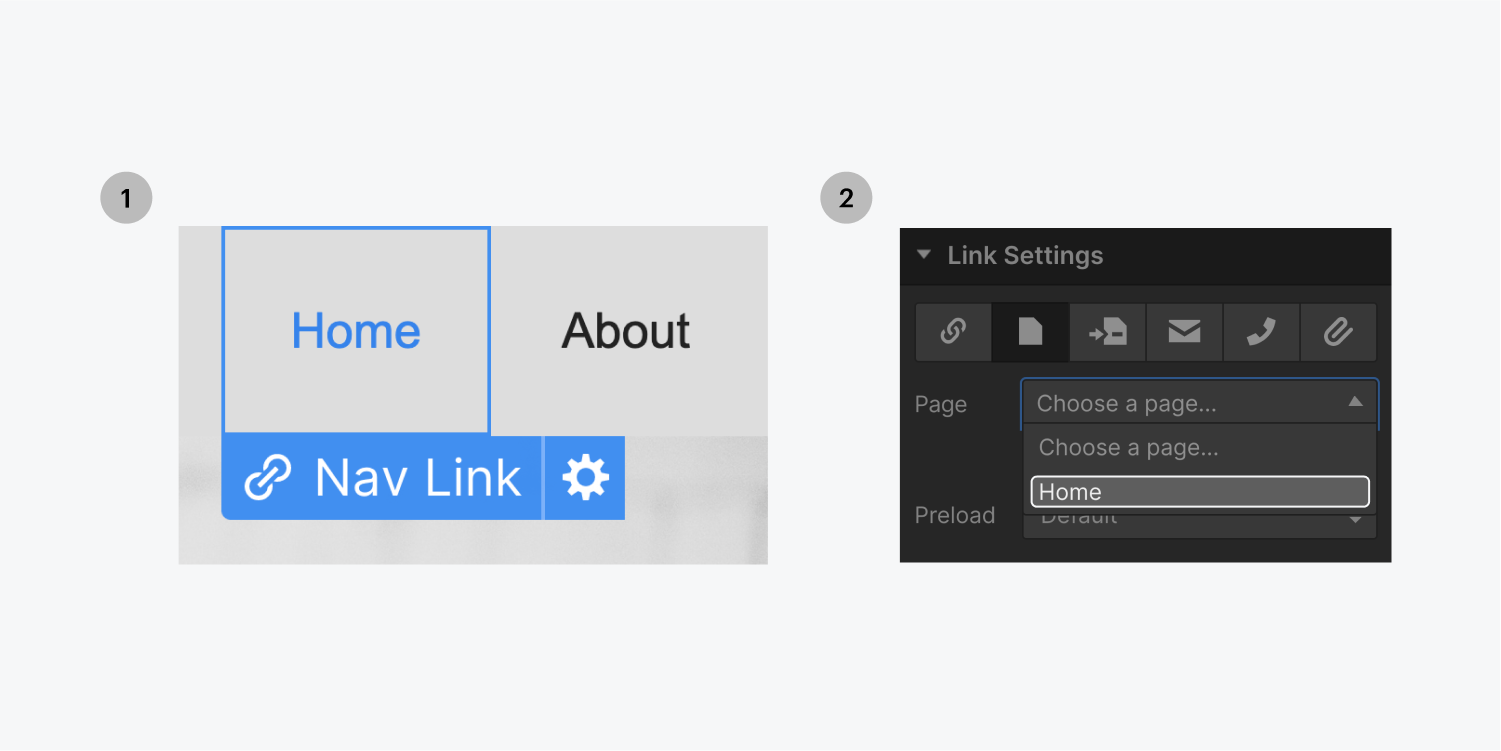
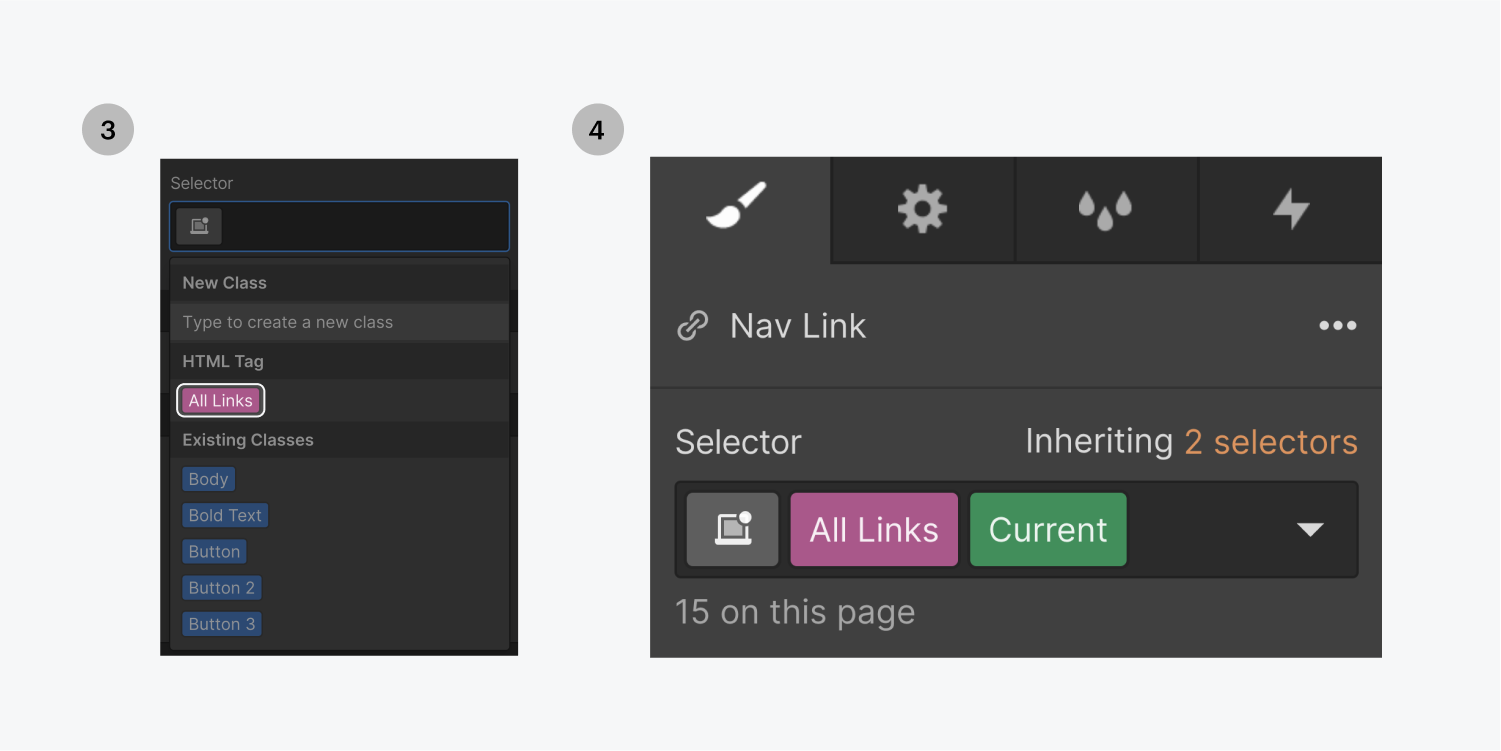
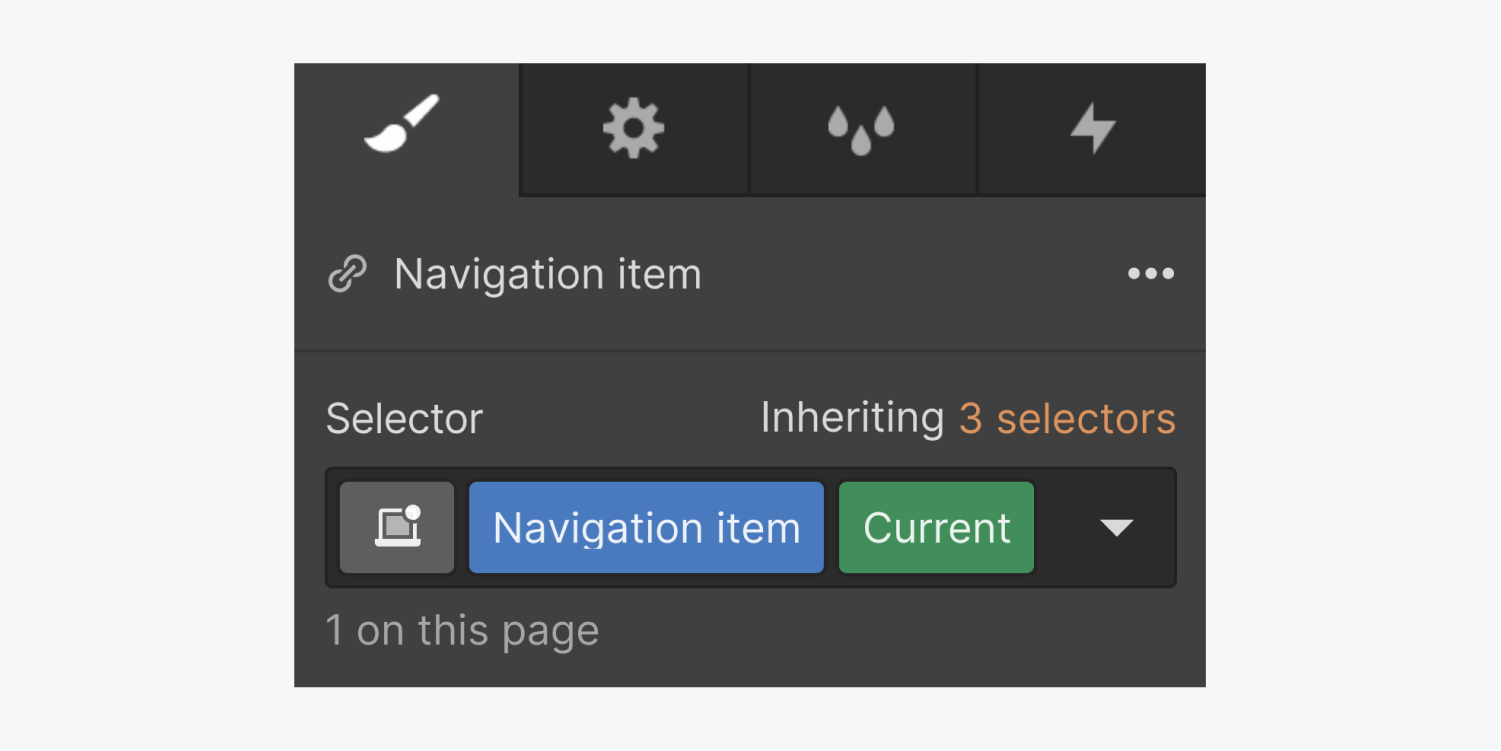
또 다른 옵션은 링크 설정에서 페이지 섹션을 선택하는 것입니다. 선택기 필드는 페이지의 특정 섹션에 도달하면 해당 요소의 현재 상태를 표시합니다. 이는 스크롤할 때 고정된 버튼이나 링크의 스타일을 지정하는 데 도움이 될 수 있습니다.
현재 상태의 스타일을 지정한 후에는 링크 설정을 수정하고 버튼과 링크 요소를 다른 페이지나 페이지 섹션에 연결할 수 있습니다.
탭의 현재 상태 선택
현재 탭을 일반 탭과 다르게 사용자 지정하여 활성 탭과 비활성 탭을 구별할 수 있습니다. 예를 들어, 글꼴 색상과 배경 색상을 변경하여 일반 탭과 구별할 수 있습니다.
현재 탭을 디자인하려면:
- 활성 탭 링크를 선택하세요
- 클래스를 제공하세요. 현재 상태가 자동으로 나타납니다.
- 스타일링 시작
선택기에서 현재 상태 표시기가 표시될 때 링크의 기본 상태 서식 지정
기본 상태를 설계할 때 현재 상태를 제거하는 방법은 여러 가지가 있습니다. 가장 쉬운 방법은 상속 메뉴에서 기본 기반 클래스를 선택하는 것입니다.
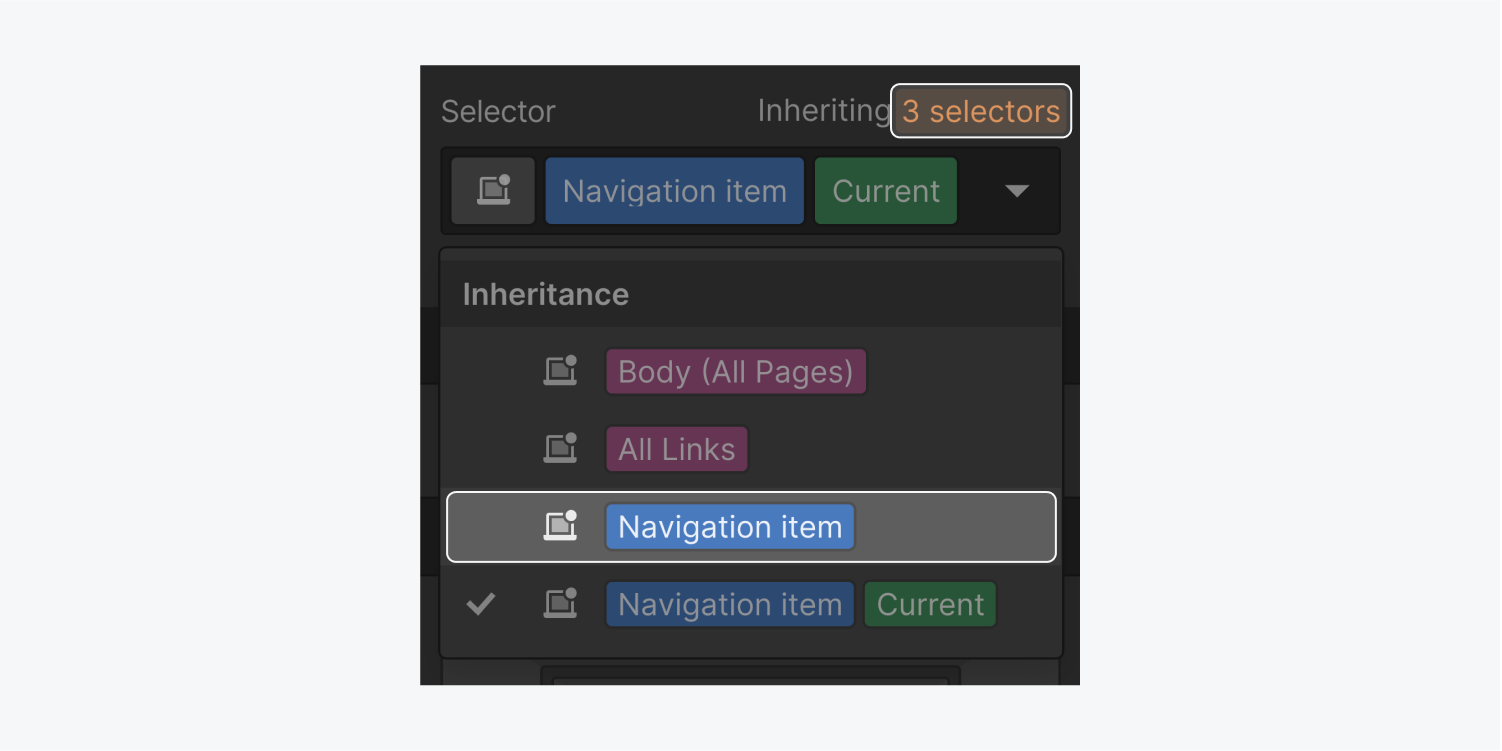
또는 Element 설정 패널에서 링크 설정을 일시적으로 해제하고, 링크 클래스를 디자인한 다음, 링크 설정을 다시 설정할 수 있습니다. 링크 설정을 해제하지 않으려면 링크 요소를 복제하고, 복제된 요소의 링크 설정을 제거하고, 클래스를 수정한 다음, 작업이 끝나면 복제된 요소를 삭제합니다.
상속된 스타일의 기원 이해
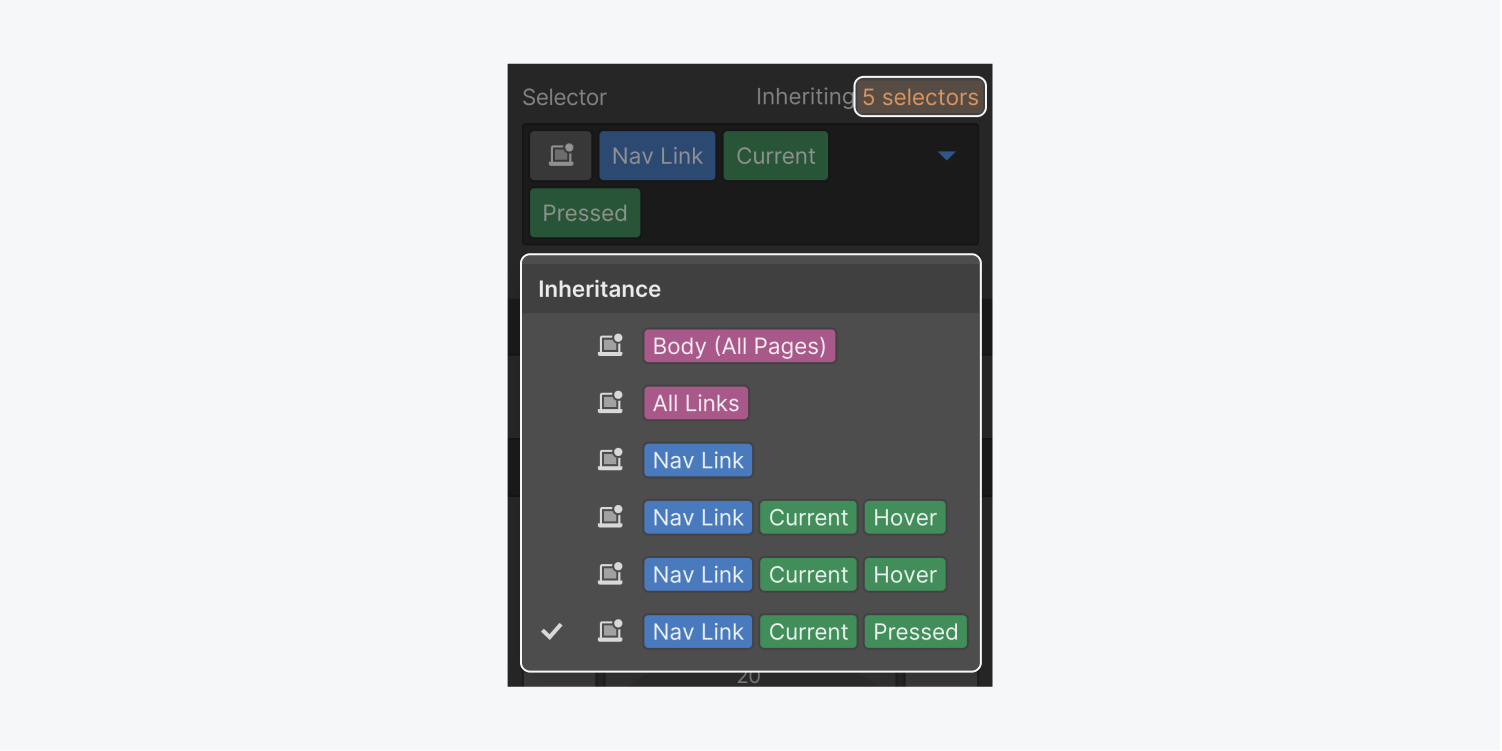
모든 상태는 "없음" 상태에서 스타일을 파생합니다. "눌렀음"은 또한 "호버" 상태에서 스타일을 상속합니다. 선택기 필드 바로 위에 있는 상속 표시기를 클릭하면 상속된 스타일의 소스를 식별할 수 있습니다.
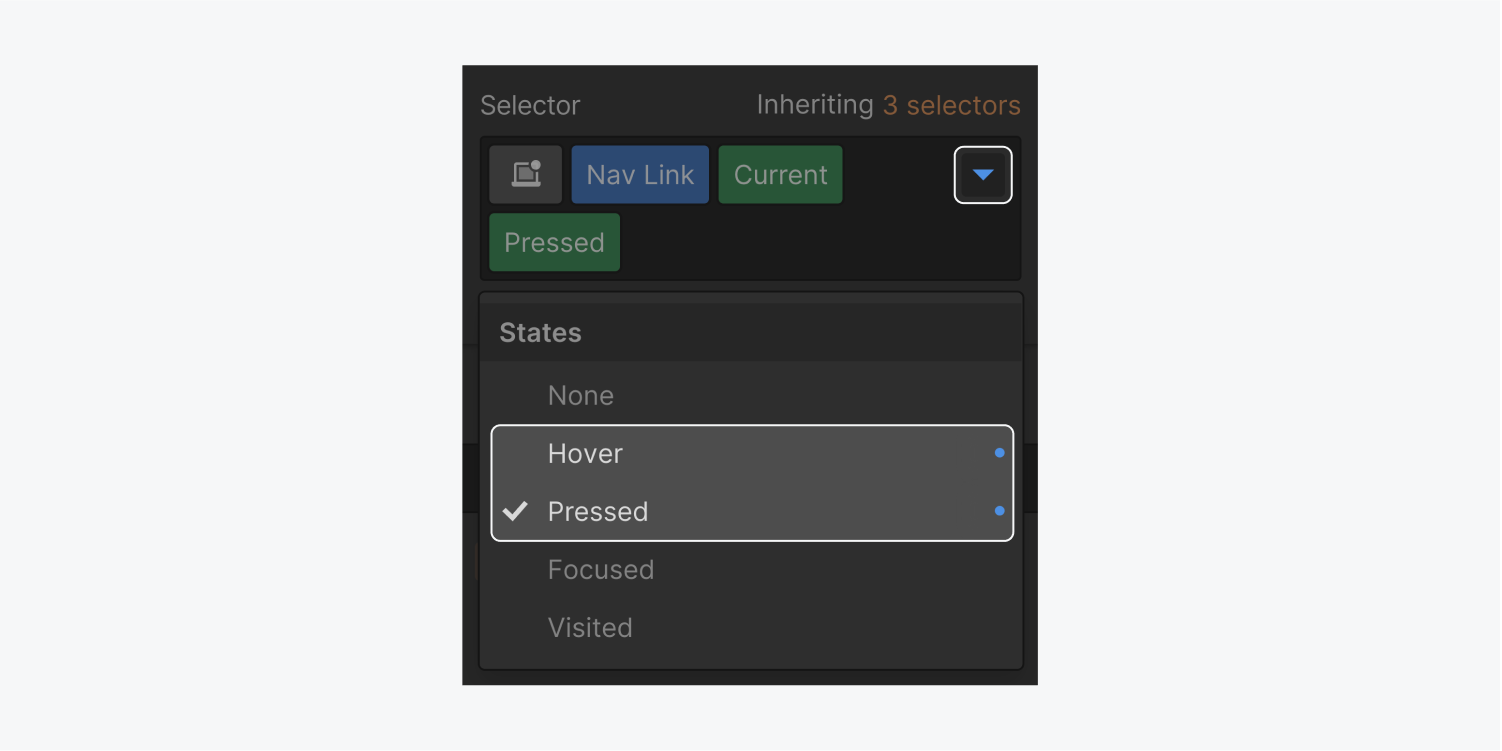
주에 스타일을 적용하면 주 메뉴 드롭다운 아이콘이 파란색으로 바뀝니다. 주 드롭다운 메뉴를 열면 해당 주에 로컬 스타일이 있음을 나타내는 파란색 원이 표시됩니다.
- Workspace 스팟 및 멤버 포함 또는 제거 - 2024년 4월 15일
- 센터링 상자 요약 - 2024년 4월 15일
- 나중에 참조할 수 있도록 사이트 저장 - 2024년 4월 15일
