Utilizing Webflow Logic enables you to build and execute automated sequences (referred to as “flows”) that gather and direct potential sales prospects, engage with your clientele, oversee your website content, and more — all through the Webflow Designer interface.
This tutorial covers the following:
- Accessing Logic
- Creating and organizing flows
- Implementing fallbacks
- Testing a flow
- Publishing flows
- Renaming, duplicating, and deleting flows
- FAQs and problem-solving suggestions
Accessing Logic
To kick off with Webflow Logic, simply click on the Logic icon located in the left sidebar to reveal the Logic panel. From there, navigate to the Flows tab to review general details about your flows (e.g., flow name, trigger, trigger source, status, etc.) and utilize the Flow editor for constructing, managing, and testing flows.
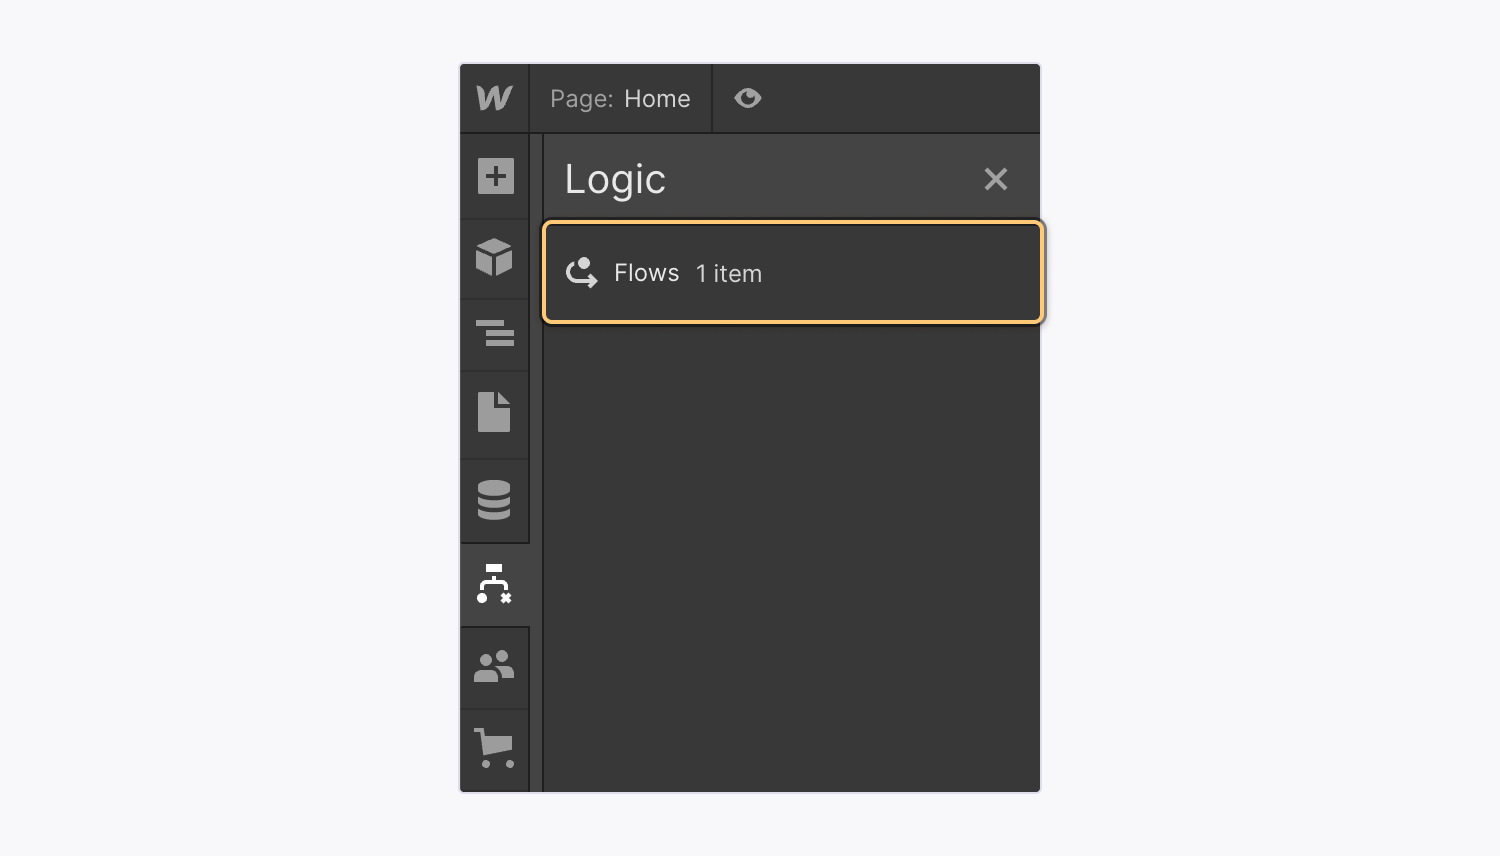
Creating and Organizing Flows
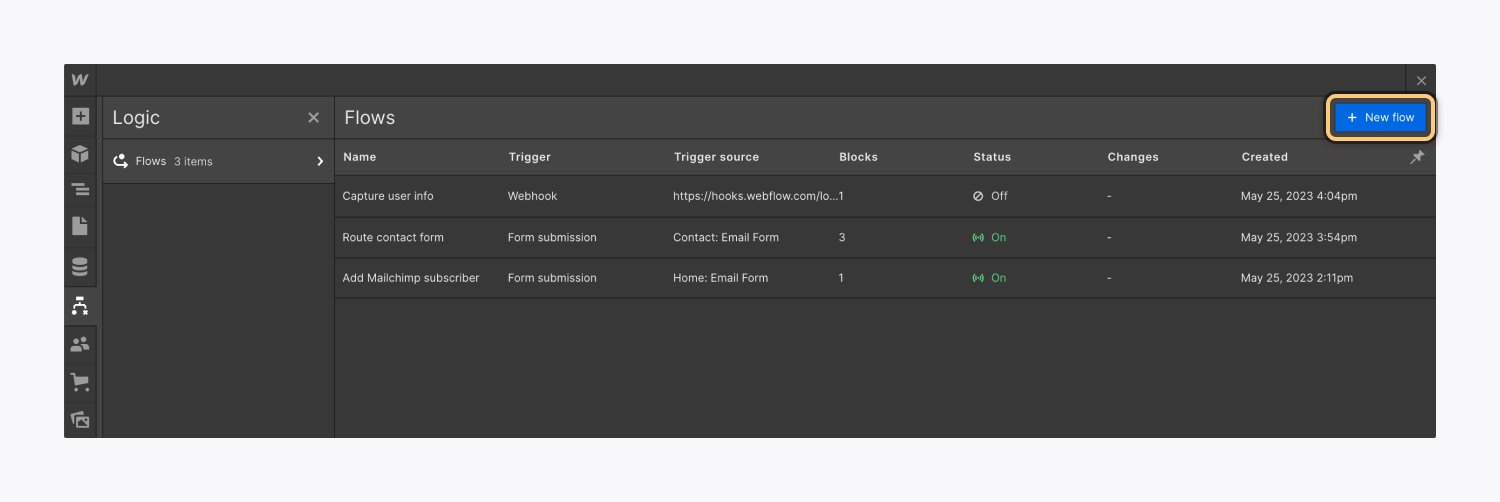
Flows consist of three key components: triggers, actions, and conditions. Begin crafting a new flow by accessing the Logic panel > Flows tab and hitting New flow to enter the Flow editor.
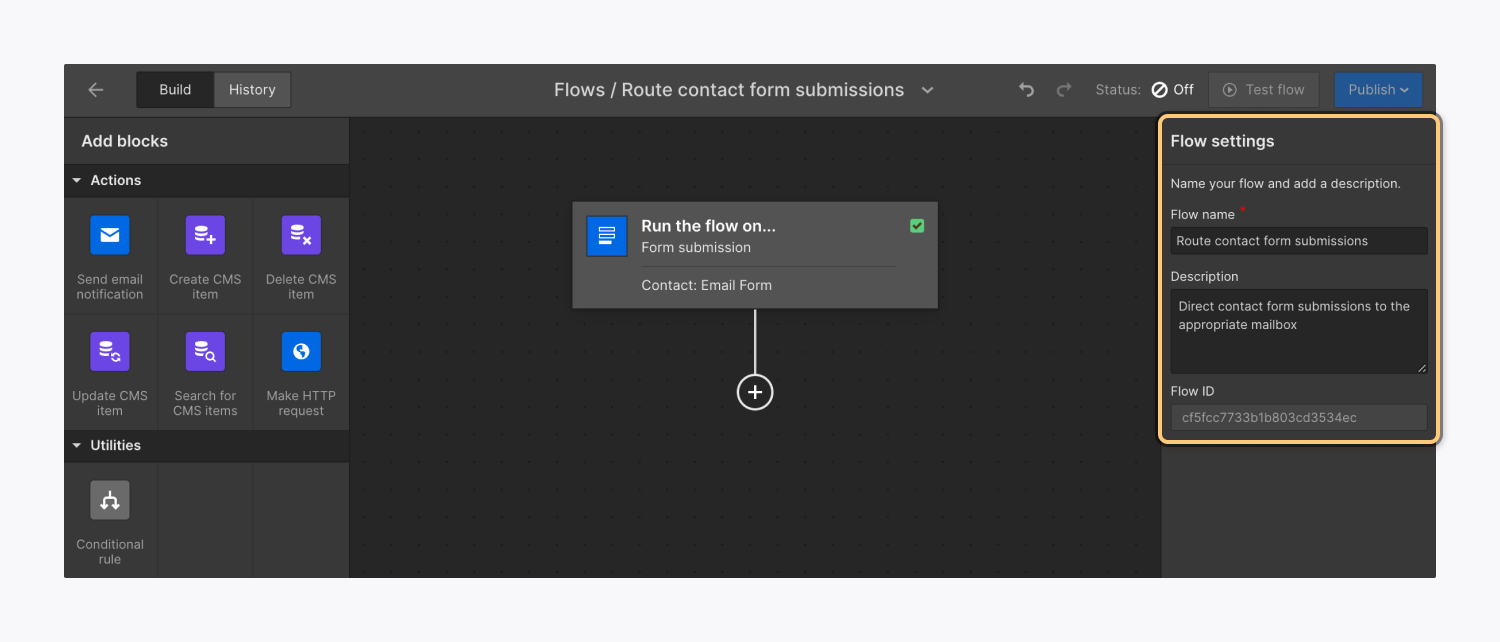
In the Flow settings section, allocate a title and description to your new flow for clarification and distinction. Here, you’ll also identify your Flow ID, which serves as the flow’s identifier for troubleshooting purposes.
Proceed with structuring your flow by selecting a trigger, then drag and drop actions and tools to the connection spots on the Flow editor canvas.
Essential: While building your flow, a yellow “wrench” icon will display on each block until its settings are configured. Once configured, the yellow “wrench” is swapped with a green “checkmark” icon.
Point to Note: Leaving the Flow editor without saving will keep the flow in draft mode with your modifications preserved.
You can rearrange blocks within your flow by dragging and dropping them to different connection points. Blocks can also be removed from the flow by right-clicking and choosing Remove block, or by selecting and hitting Delete on your keyboard.
Triggers
Each flow initiates with a trigger — an occurrence either within your site (e.g., form submission) or externally (e.g., webhook event) that commences the flow.
To integrate a trigger to your flow, click on Select a trigger starting this flow and opt for the desired trigger. There are two trigger choices:
- Form submission – activated upon form submission on your Webflow site
- Incoming webhook – triggered by an event in an external platform
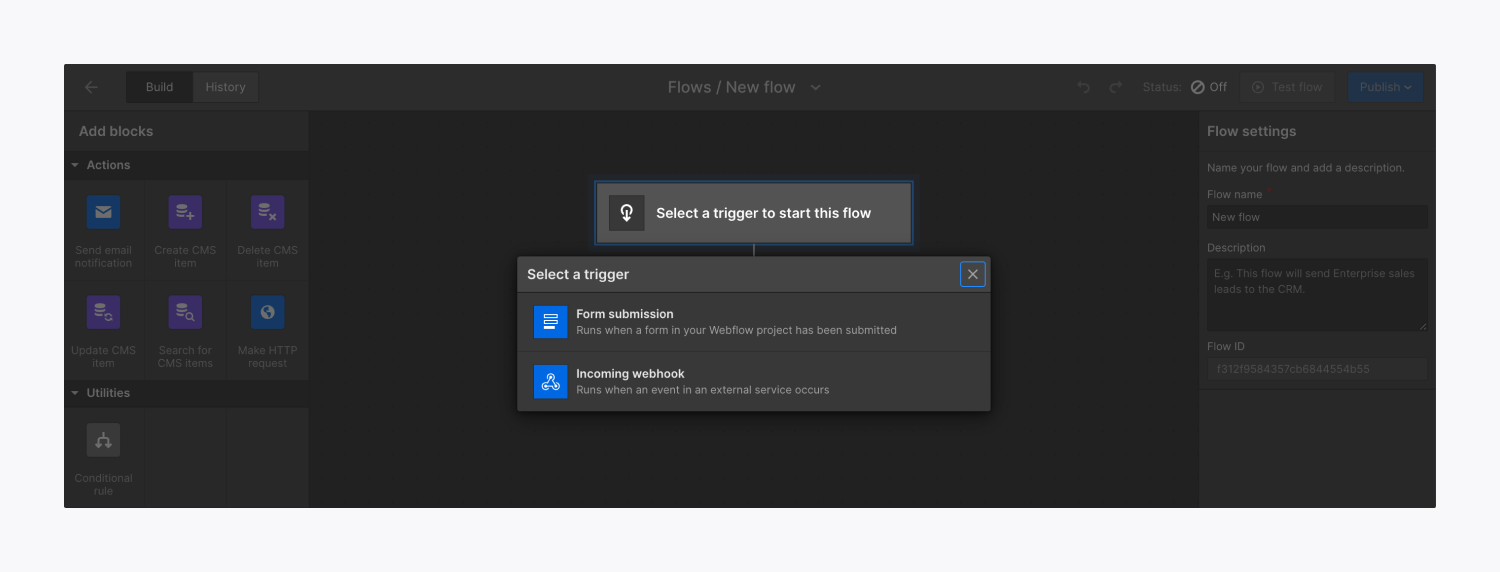
Reminder: Each flow can only have one trigger.
After adding a trigger, select the trigger block on the canvas, input a name under Trigger name, and configure the trigger settings based on its type (e.g., Form submission or Incoming webhook).
To replace or remove the trigger from your flow, right-click the trigger and choose Remove trigger, or select it and press Delete on your keyboard.
Examine the output of your trigger (i.e., data shared with subsequent blocks) in Trigger settings > Output tab.
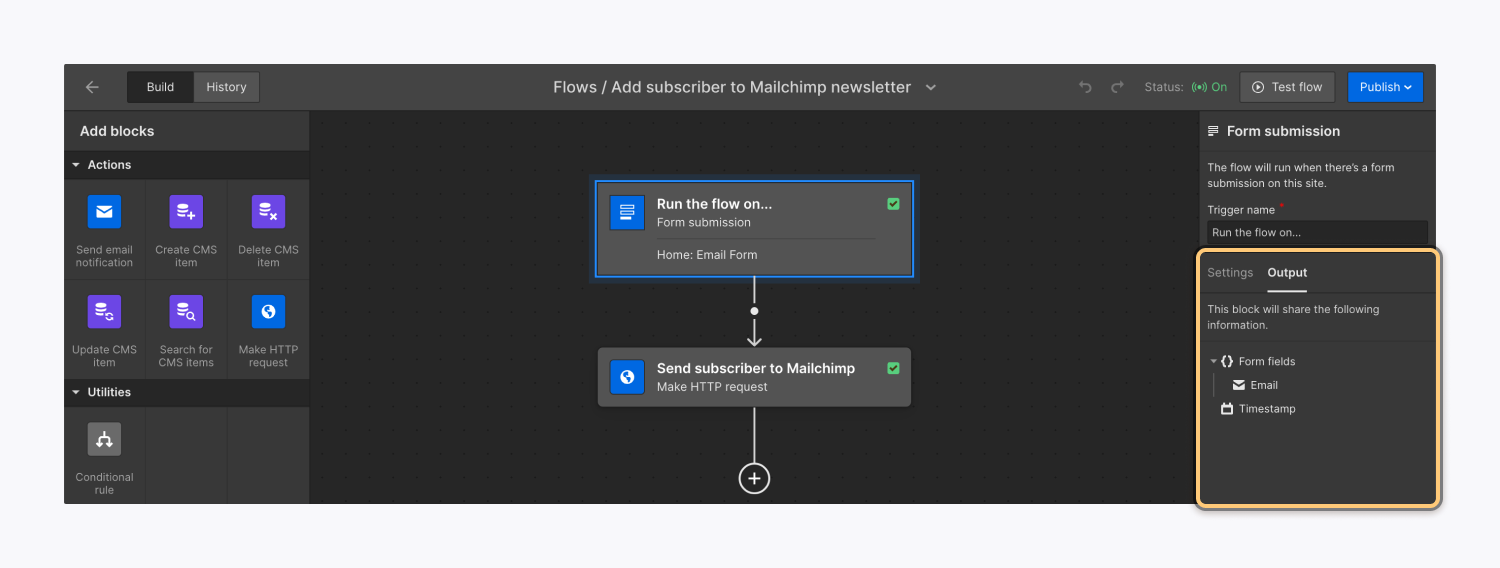
Subsequent to the trigger, you can execute actions (e.g., Send email notification, Create CMS item, Invite user, etc.) or establish conditions using tools.
Form submission
If employing a Form submission trigger, initiate by adding a form to your site. Connect your flow’s trigger to the designated form, prompting the flow to engage upon user form submission.
Important: Each form can serve as a trigger for one flow exclusively; it can’t be used for multiple Logic flows.
To link a form to your flow:
- Open the Flow editor
- Select the Form submission trigger block to reveal Trigger settings
- Choose the form from the dropdown menu
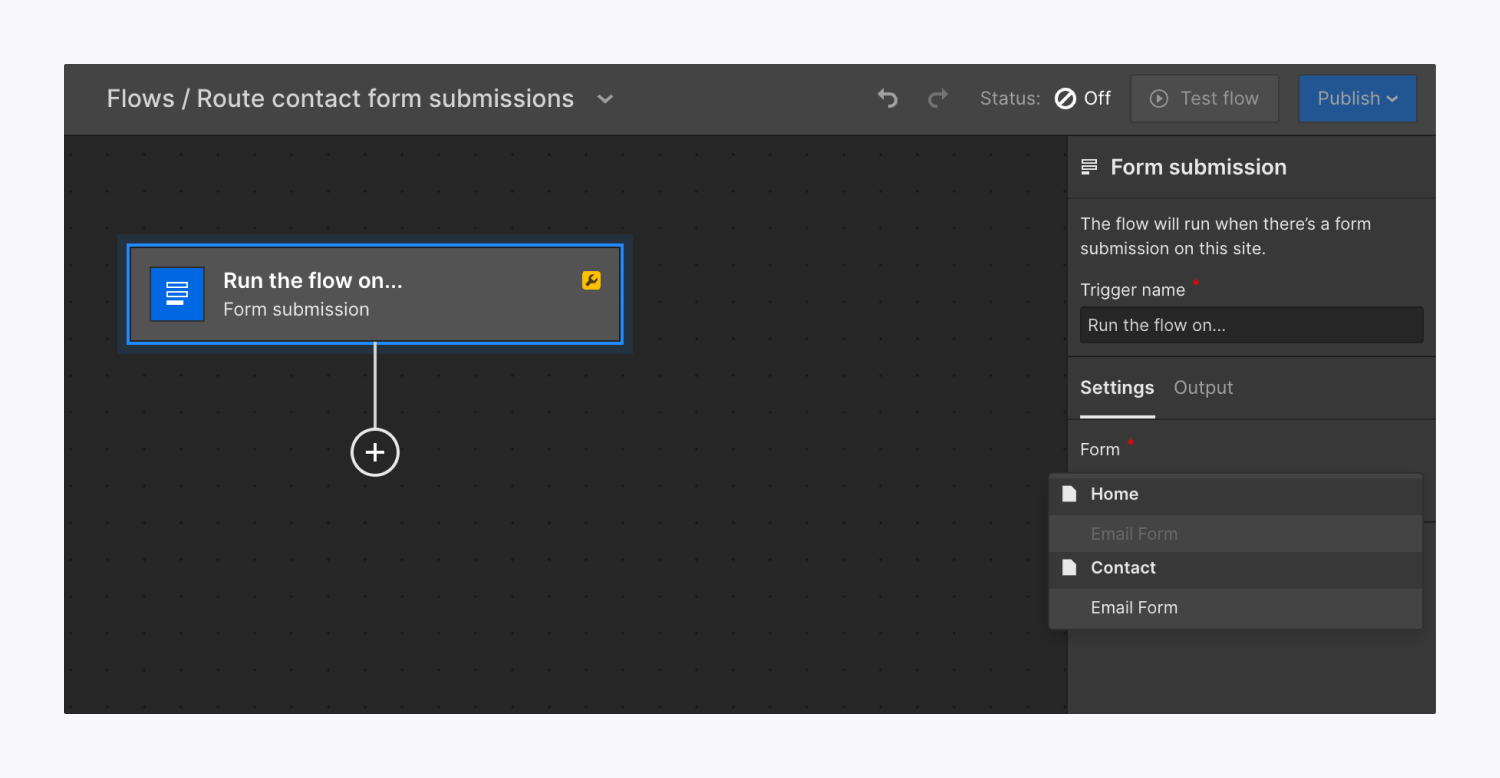
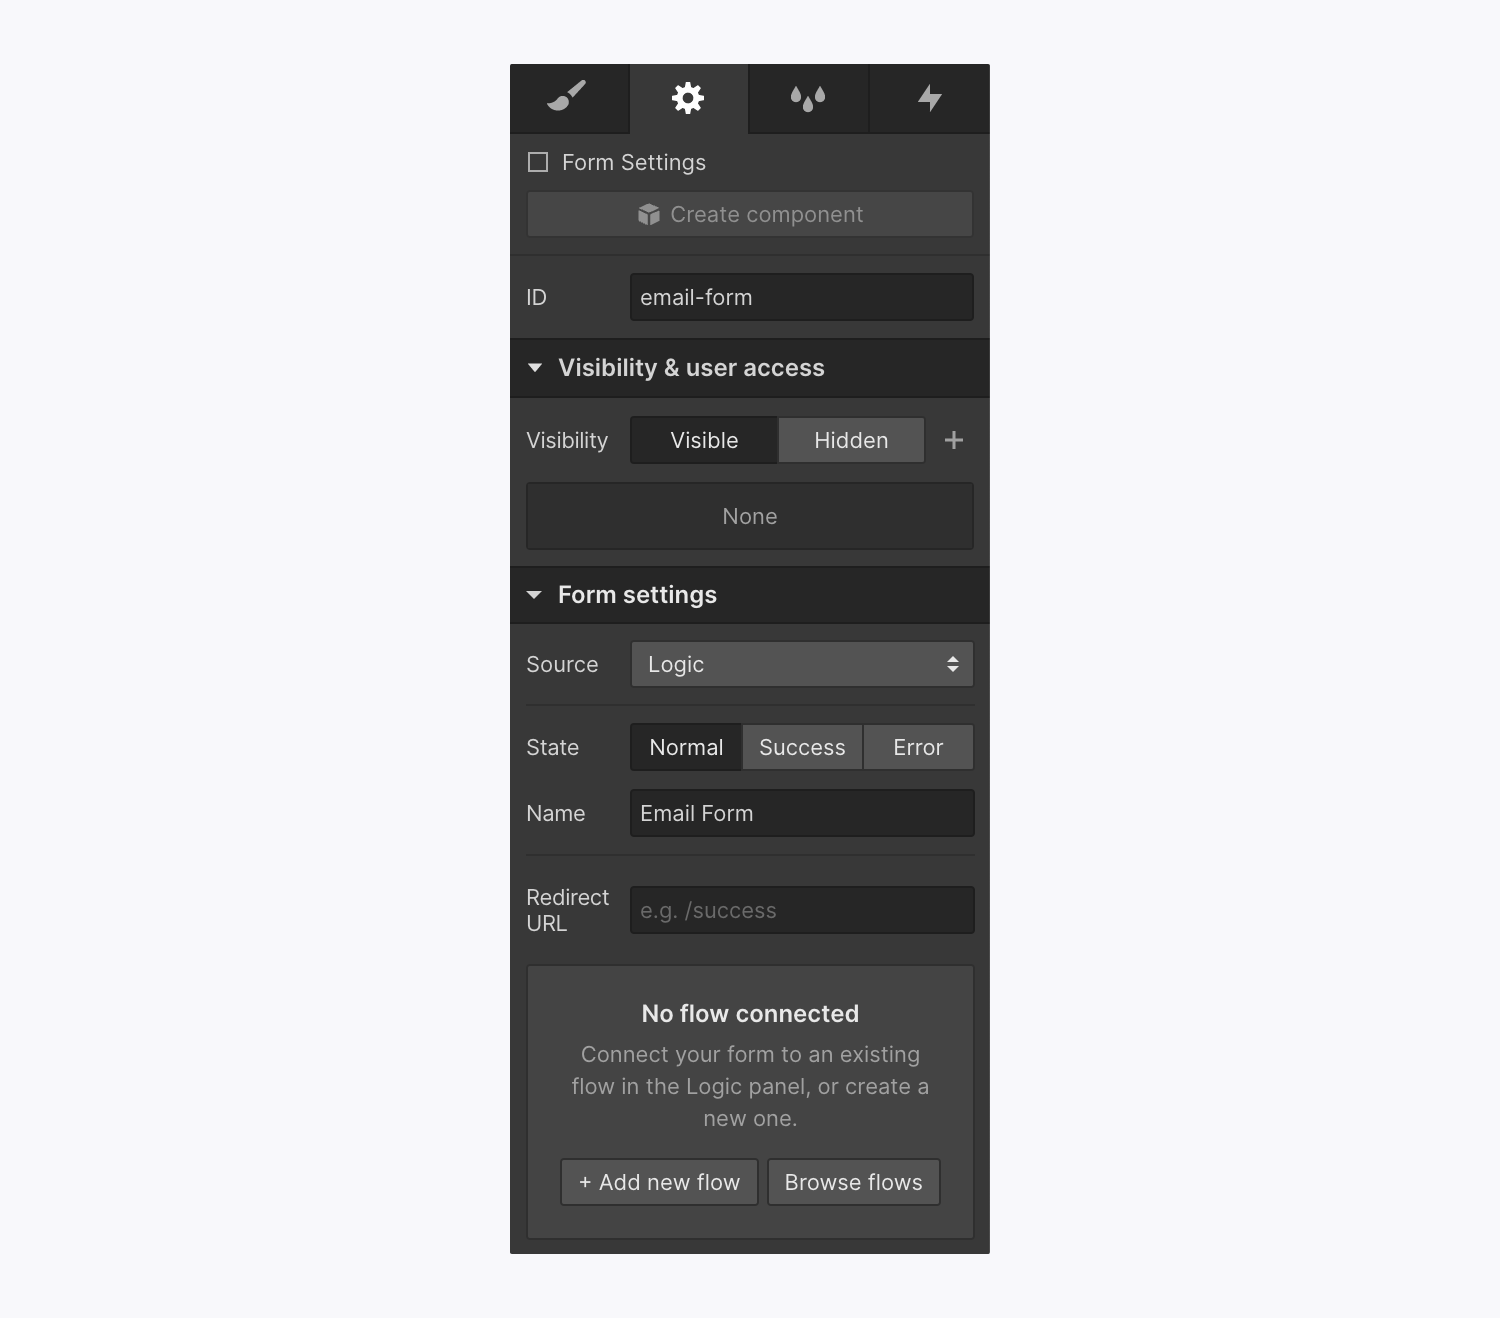
To incorporate a Form submission trigger from the Designer canvas, select the form, access Element settings panel > Form settings > Source, change Source to Logic, and choose either Add new flow or Browse flows to link the form to a new or existing flow.
To detach a form from your form submission trigger, access the Flow editor, …and proceed to Activate settings > Form drop-down and tap on Unlink form.
Important: If desired, you can activate spam filtering on your website to screen form entries for spam. Discover more about spam filtering.
Receiving webhook
The Receiving webhook switch permits you to transfer real-time data from external applications (e.g., Airtable, Make, Twilio, etc.) to your flow in JSON form. Essentially, the Receiving webhook switch empowers your external apps to communicate with your flow.
To employ a Receiving webhook switch, duplicate your Webhook URL from the switch settings, then insert it in the third-party application which will direct requests to this webhook. For instance, you could send a webhook from Mailchimp which would then start your Logic flow.
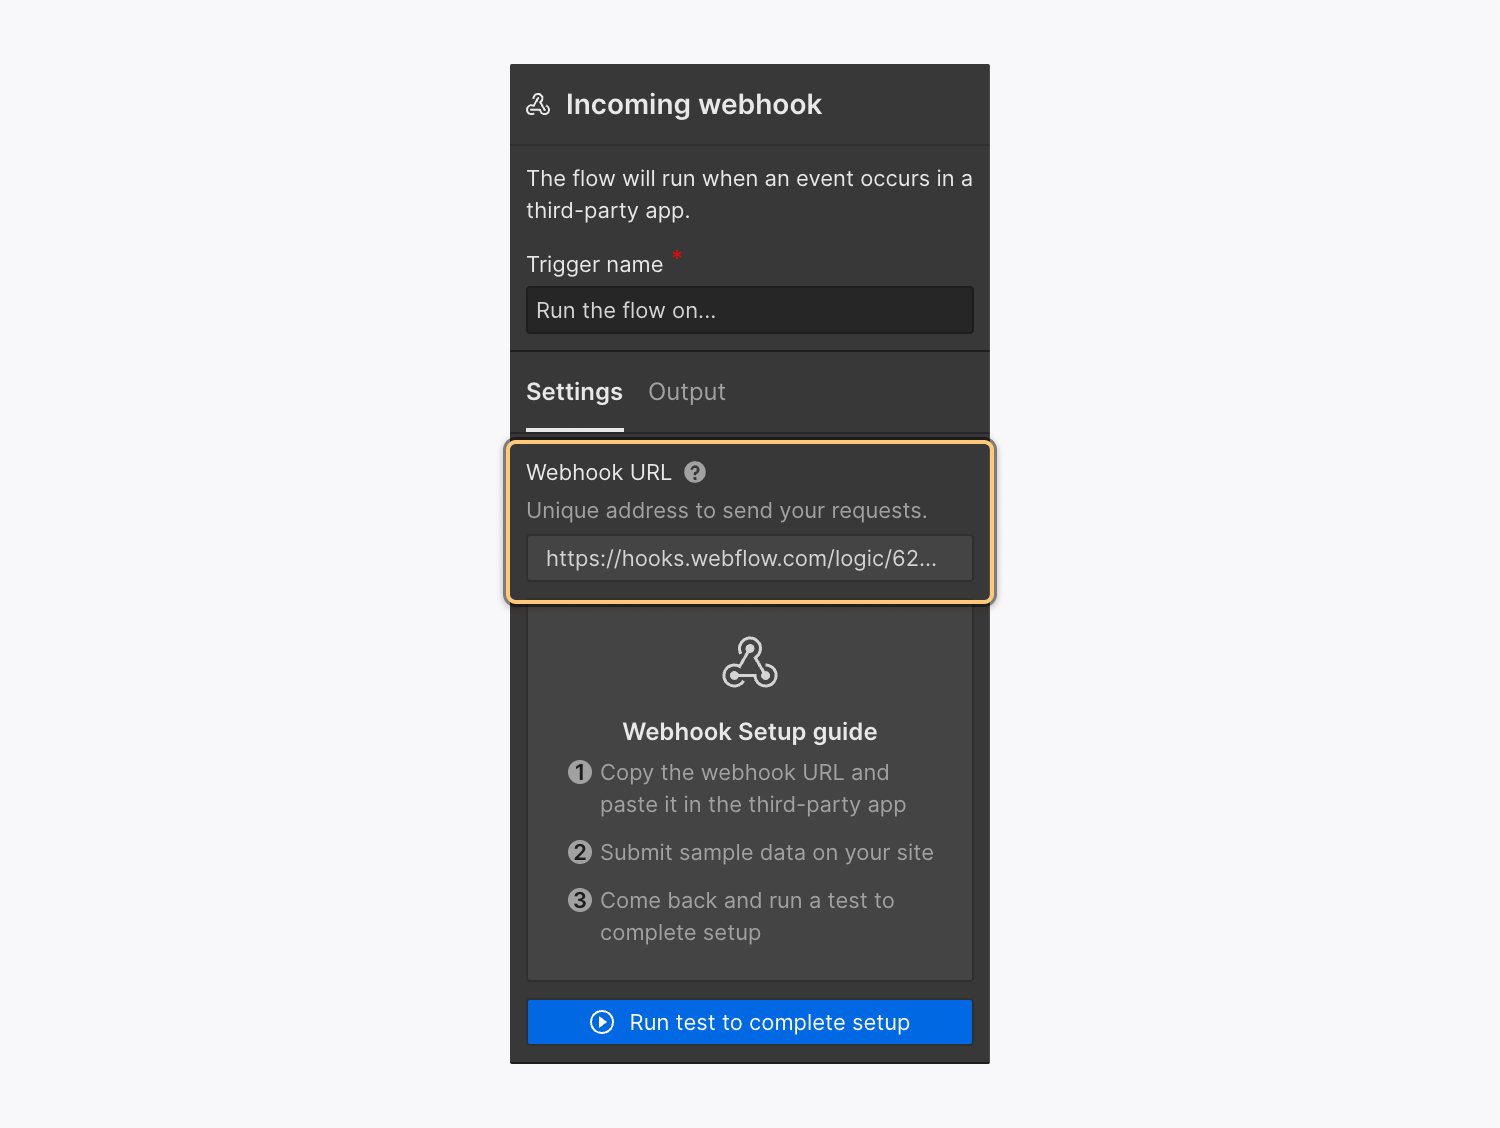
Important: Receiving webhook switches necessitate the utilization of external third-party utilities to communicate with the webhook. Kindly contact the third-party utility directly for assistance or functionality inquiries.
Activities
Activity blocks enable you to specify what you wish your flow to perform. They may optionally receive input data, execute a segment of reasoning, and always produce output data (i.e., information that will be shared with subsequent blocks).
You can scrutinize the output data (i.e., the information that the block shares with successive blocks in the flow) of Activity blocks in Block settings > Output tab.
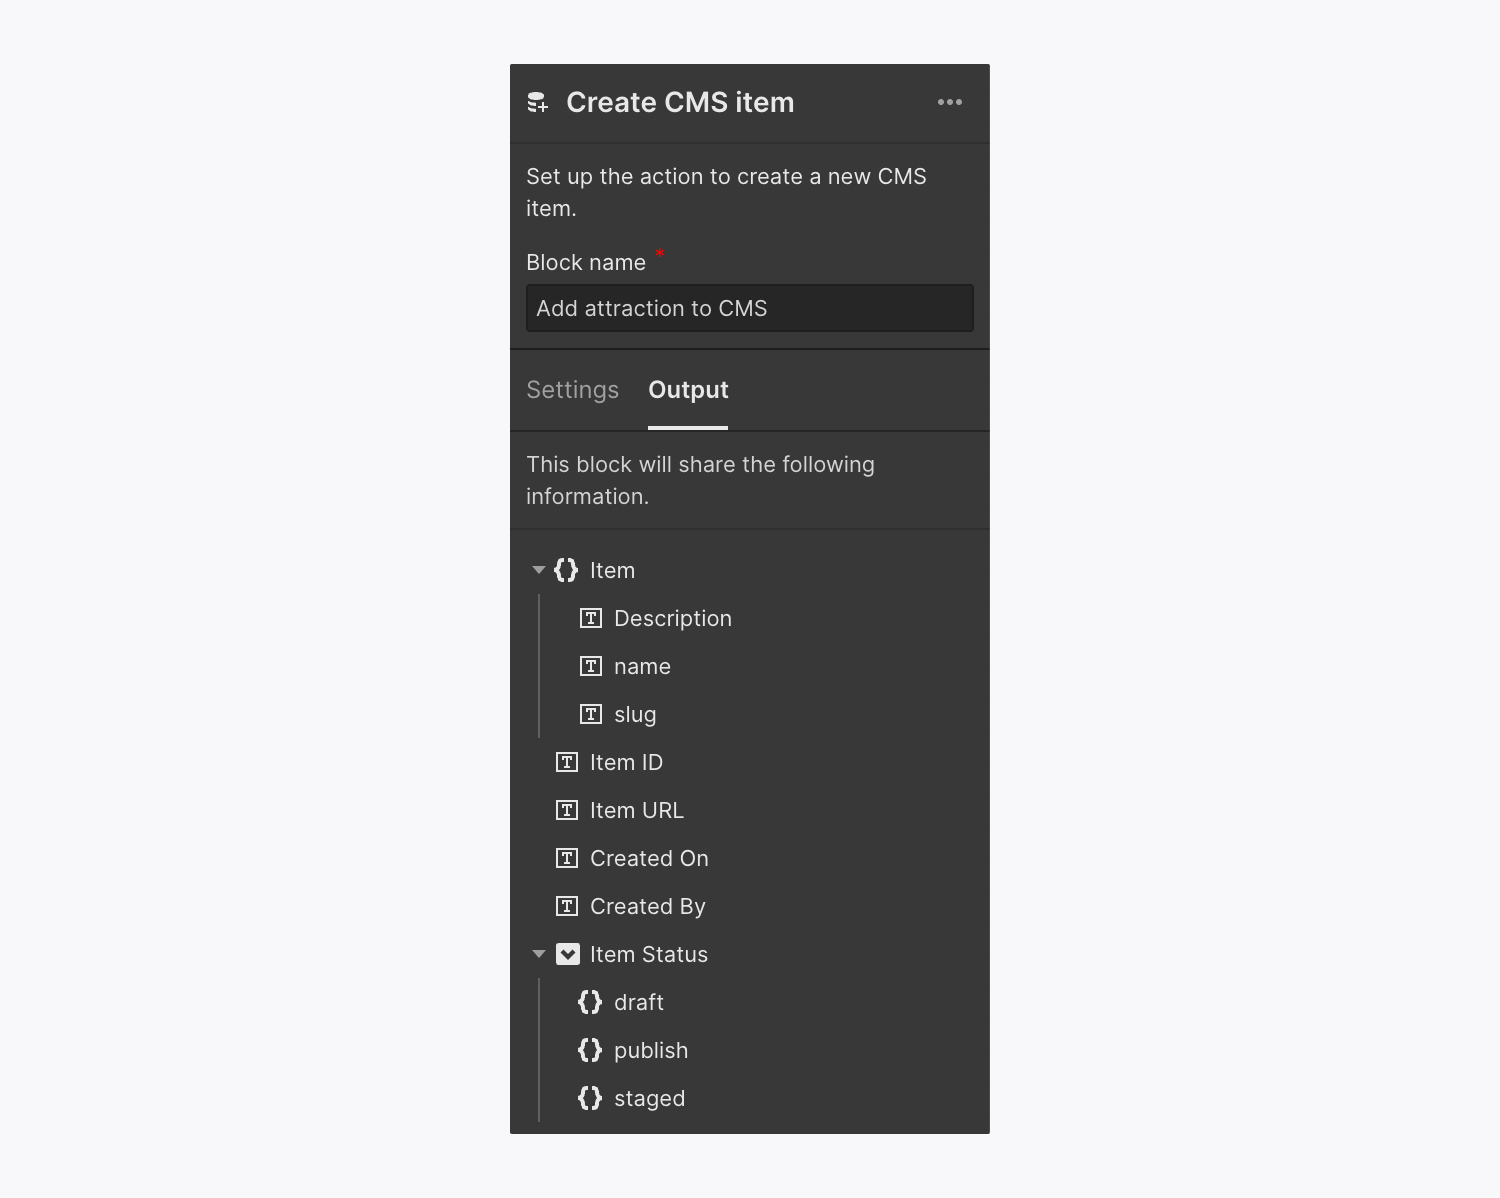
Let’s explore the obtainable Activity blocks:
- Distribute email alert
- Generate CMS element
- Eliminate CMS element
- Modify CMS element
- Look for CMS elements
- Initiate HTTP request
- Summon user
- Erase user record
- Revise user record
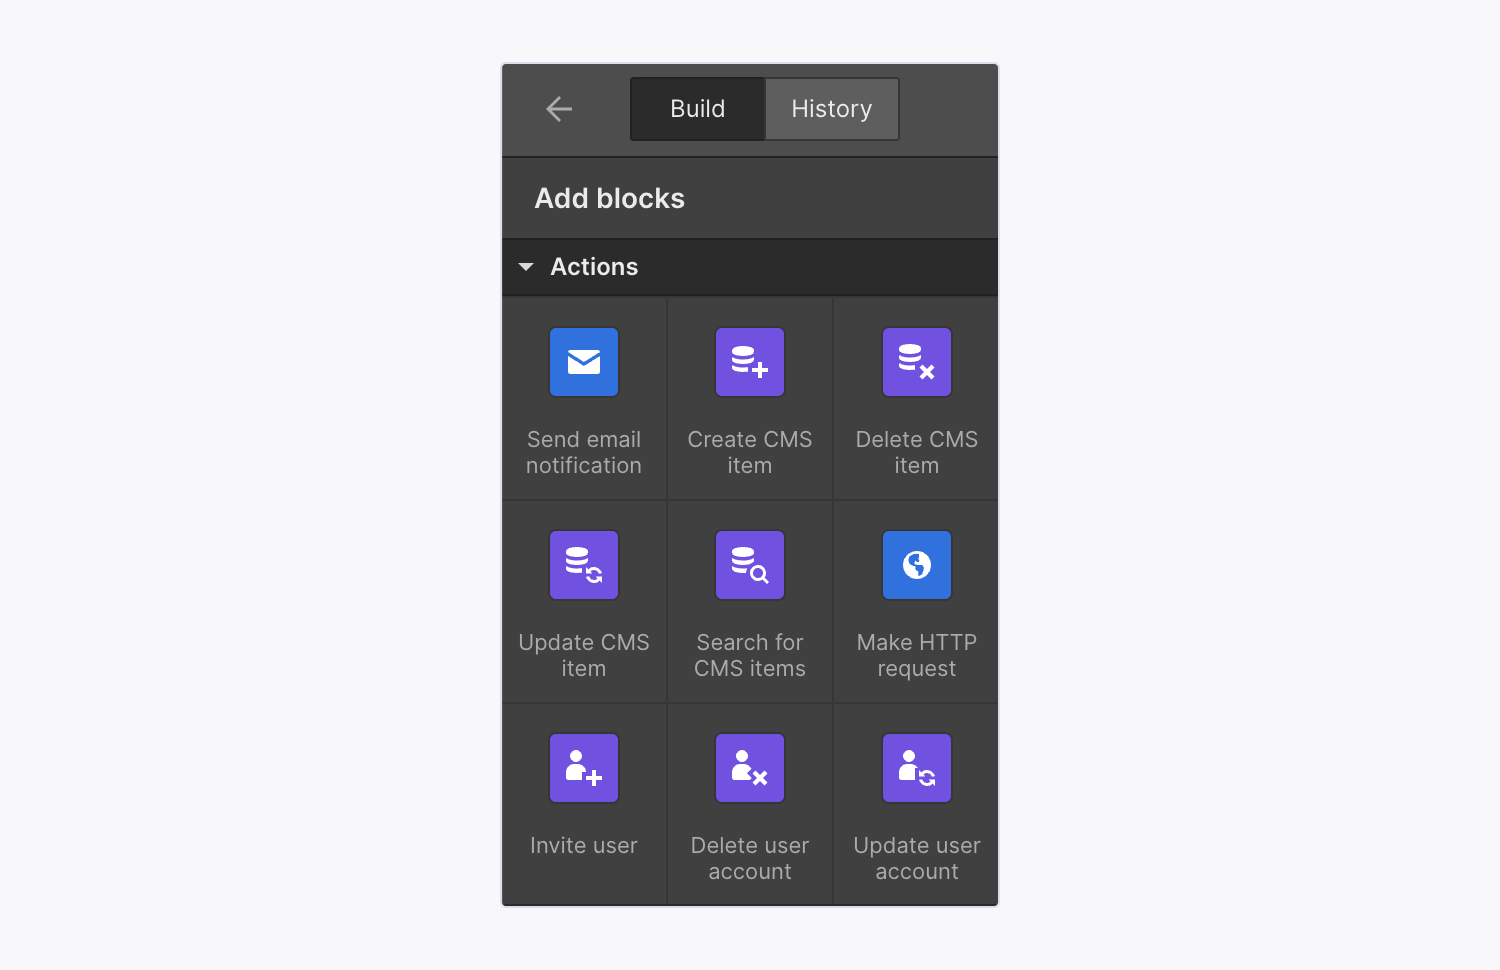
Distribute email alert
The Distribute email alert block authorizes you to send a custom email alert to any content editors on your site or individuals of your Workspace upon triggering the flow.
Select the block in the Flow editor and navigate to Distribute email alert block settings. Afterwards, tap into the Transfer to field to pick specific collaborators from the pool of accessible collaborators, or choose All collaborators to dispatch an email alert to all contributors on the list.
Important: If you wish to dispatch email alerts to individuals who are not members of your Workspace, you’ll need to either incorporate them into your site as content editors or forward your data to an external email service using the Initiate HTTP request block. Find out more about inviting content editors to your site.
You can personalize the subject line and message of the email using varied data from your trigger. The ensuing data types can be employed in the subject and message fields:
- Straightforward
- Electronic mail
- Cellphone
- Number
- Text Zone
- Checkmark
- Timestamp
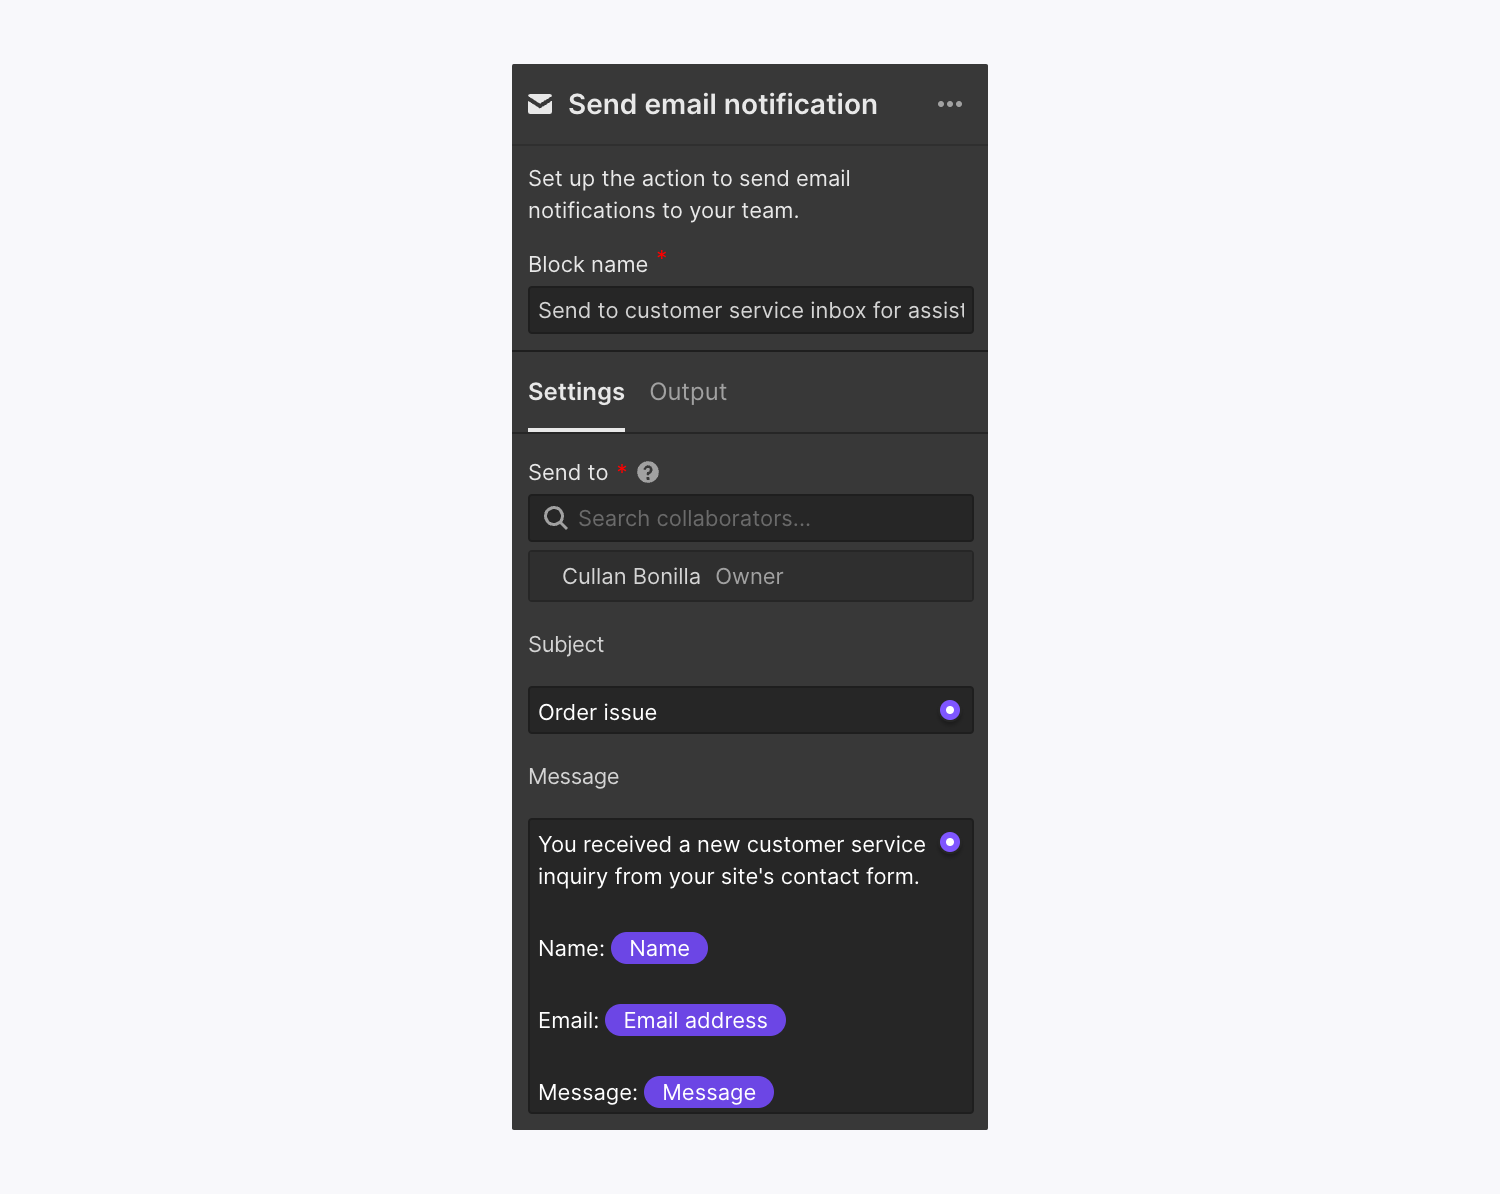
To cease receiving email notifications, click the “garbage” icon beside their name.
Generate CMS element
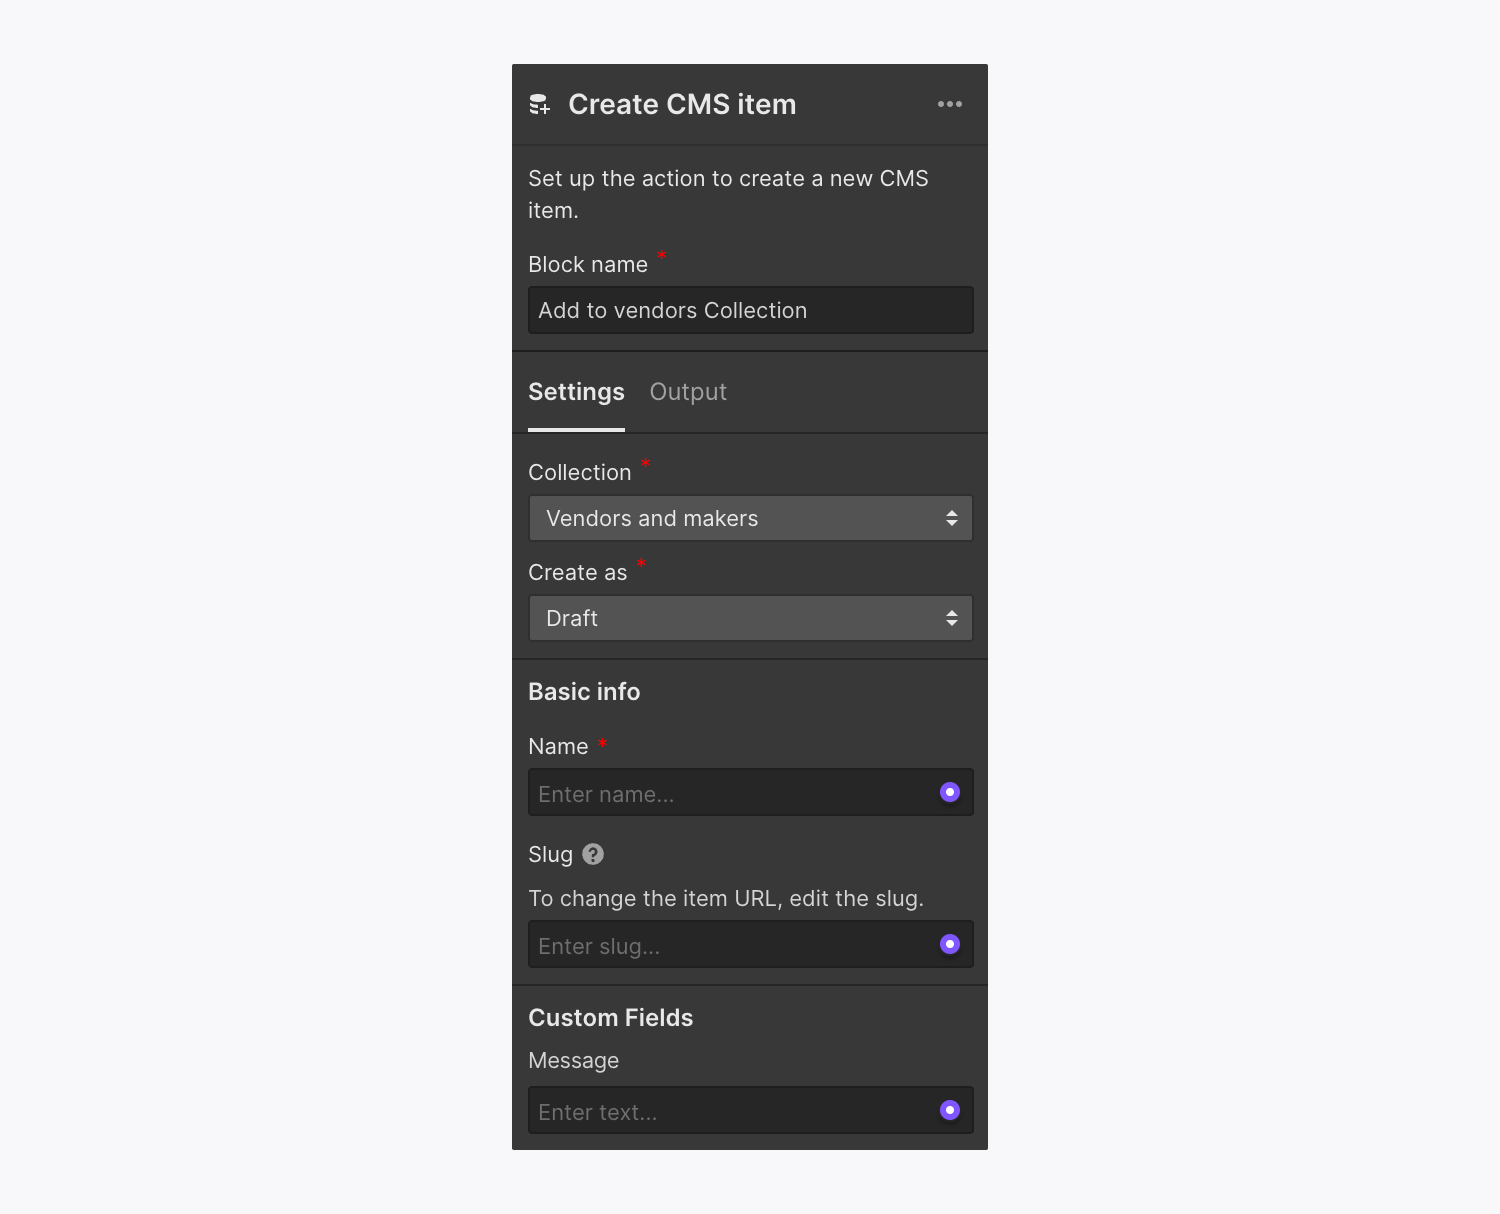
The Generate CMS element block empowers you to concoct a fresh CMS element within a Compilation when the block is triggered. The block settings will present the fields existing in the chosen Compilation.
Important: Ensure you’ve set up a CMS Compilation prior to configuring your flow to certify you can attach your Generate CMS element block to the Compilation.
Essential: Please be mindful of privacy implications when incorporating data into the CMS. For instance, if you collect leads and establish CMS elements based on those leads, those items are included in your sitemap and anyone with a read-only preview link for your site could view them. You should noindex any dynamic pages that shouldn’t be visible to site visitors or indexed by search engines. Discover more about disabling search engine indexing and optimum methods for privacy.
With this block, you can correlate fixed input or dynamic data from your flow (e.g., trigger data from form submissions or block output data) directly to your CMS Compilation’s basic info and personalized fields. You can only correlate like data kinds together (e.g., data from a plain text field in a form can only be correlated to a plain text field in the CMS). Assisted bindings cover:
Remark: Presently we do not endorse the mapping from a plain text field to a link-type field in the CMS. We also do not back fields created using custom components.
Crucial: You might observe a yellow “wrench” icon emerge beside your variables as you link them to your CMS Collection fields. This “wrench” icon adjacent to a variable suggests that you require to define a fallback for that variable. Learn more about utilizing fallbacks.
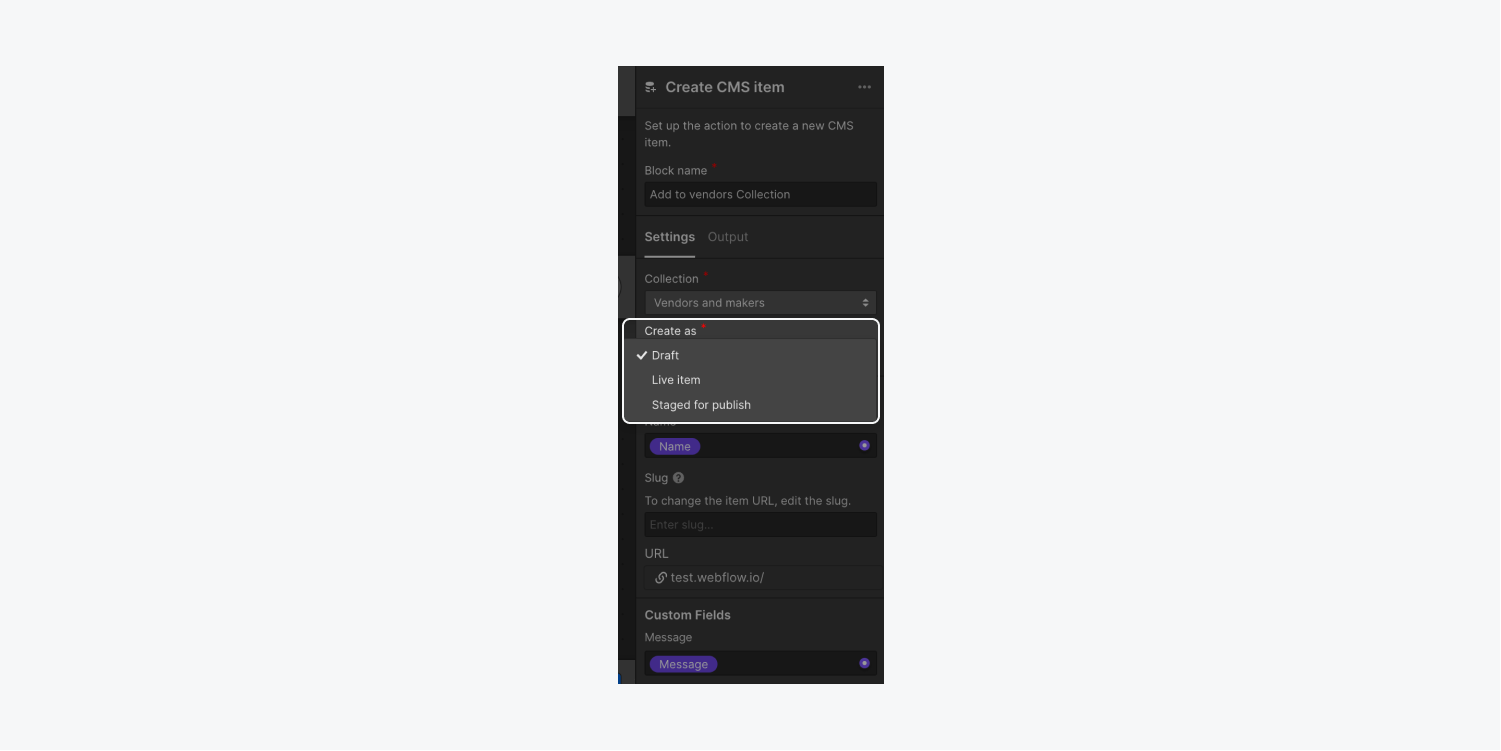
You can also designate the CMS item to draft status, stage it for publication, or publish the live item when the flow is initiated. Find out more about publication options.
Erase CMS item
The Delete CMS item block permits you to eradicate a CMS item within a Collection when the block is activated. You can delete by CMS item ID or opt for a CMS item by name.
Remark: Maintain that you’ve formed a CMS Collection and sample items before configuring your flow to ensure you can connect your Delete CMS item block to the Collection.
Revise CMS item
The Update CMS item block enables you to modify a CMS item’s fundamental information and custom fields by CMS item ID or by CMS item name using static input or dynamic data from your flow (e.g., trigger data from form submissions or block output data).
Remark: Ensure that you’ve generated a CMS Collection and Collection items prior to arranging your flow to ensure you can link your Update CMS item block to the Collection.
Similar to the Create CMS item block, you can associate your form data directly to your CMS Collection’s fundamental information and custom fields. You can solely associate like data types together (e.g., data from a plain text field in a form can solely be linked to a plain text field in the CMS). Supported linkages encompass:
Remark: At present, we do not support mapping from a plain text field to a link-type field in the CMS. We also do not endorse fields made using custom components.
Crucial: You might observe a yellow “wrench” icon emerge beside your variables as you link them to your CMS Collection fields. This “wrench” icon adjacent to a variable name suggests that you require to set a fallback for that variable. Learn more about utilizing fallbacks.
You can uphold the current status of the CMS item you’re altering or set it to draft status, stage it for publication, or publish the live item when the flow is initiated. Find out more about publication options.
Find CMS items
Remark: Collections containing obligatory fields that aren’t supported in Logic aren’t feasible for use in the Search for CMS items block.
The Search for CMS items block enables you to explore for CMS items by CMS item ID or by name using data from your flow. This permits you to execute actions using data from the retrieved CMS item later on in your flow, which can be advantageous for sites with user-generated content or marketing sites that collect leads.
For instance, if you constructed a cookbook site that permits site visitors to submit recipes, you could search for recipes in the CMS using the recipe name from your form submission and then, utilizing the Conditional rule utility block and Send email notification blocks, send the submission to site editors if an existing recipe with that name is found. Then, site editors can eliminate/combine the identical recipes.
Crucial: If no item is unearthed in a Search for CMS items block followed by a Conditional rule utility block, the flow halts at the Search for CMS items block and does not execute subsequent actions.
Make HTTP request
The Make HTTP request block connects Webflow Logic and your external tech stack (e.g., Mailchimp, Airtable, etc.) by permitting you to automate HTTP requests to any RESTful API endpoint. Then you can execute actions using the response data later on in your flow.
Learn more about the Make HTTP request block.
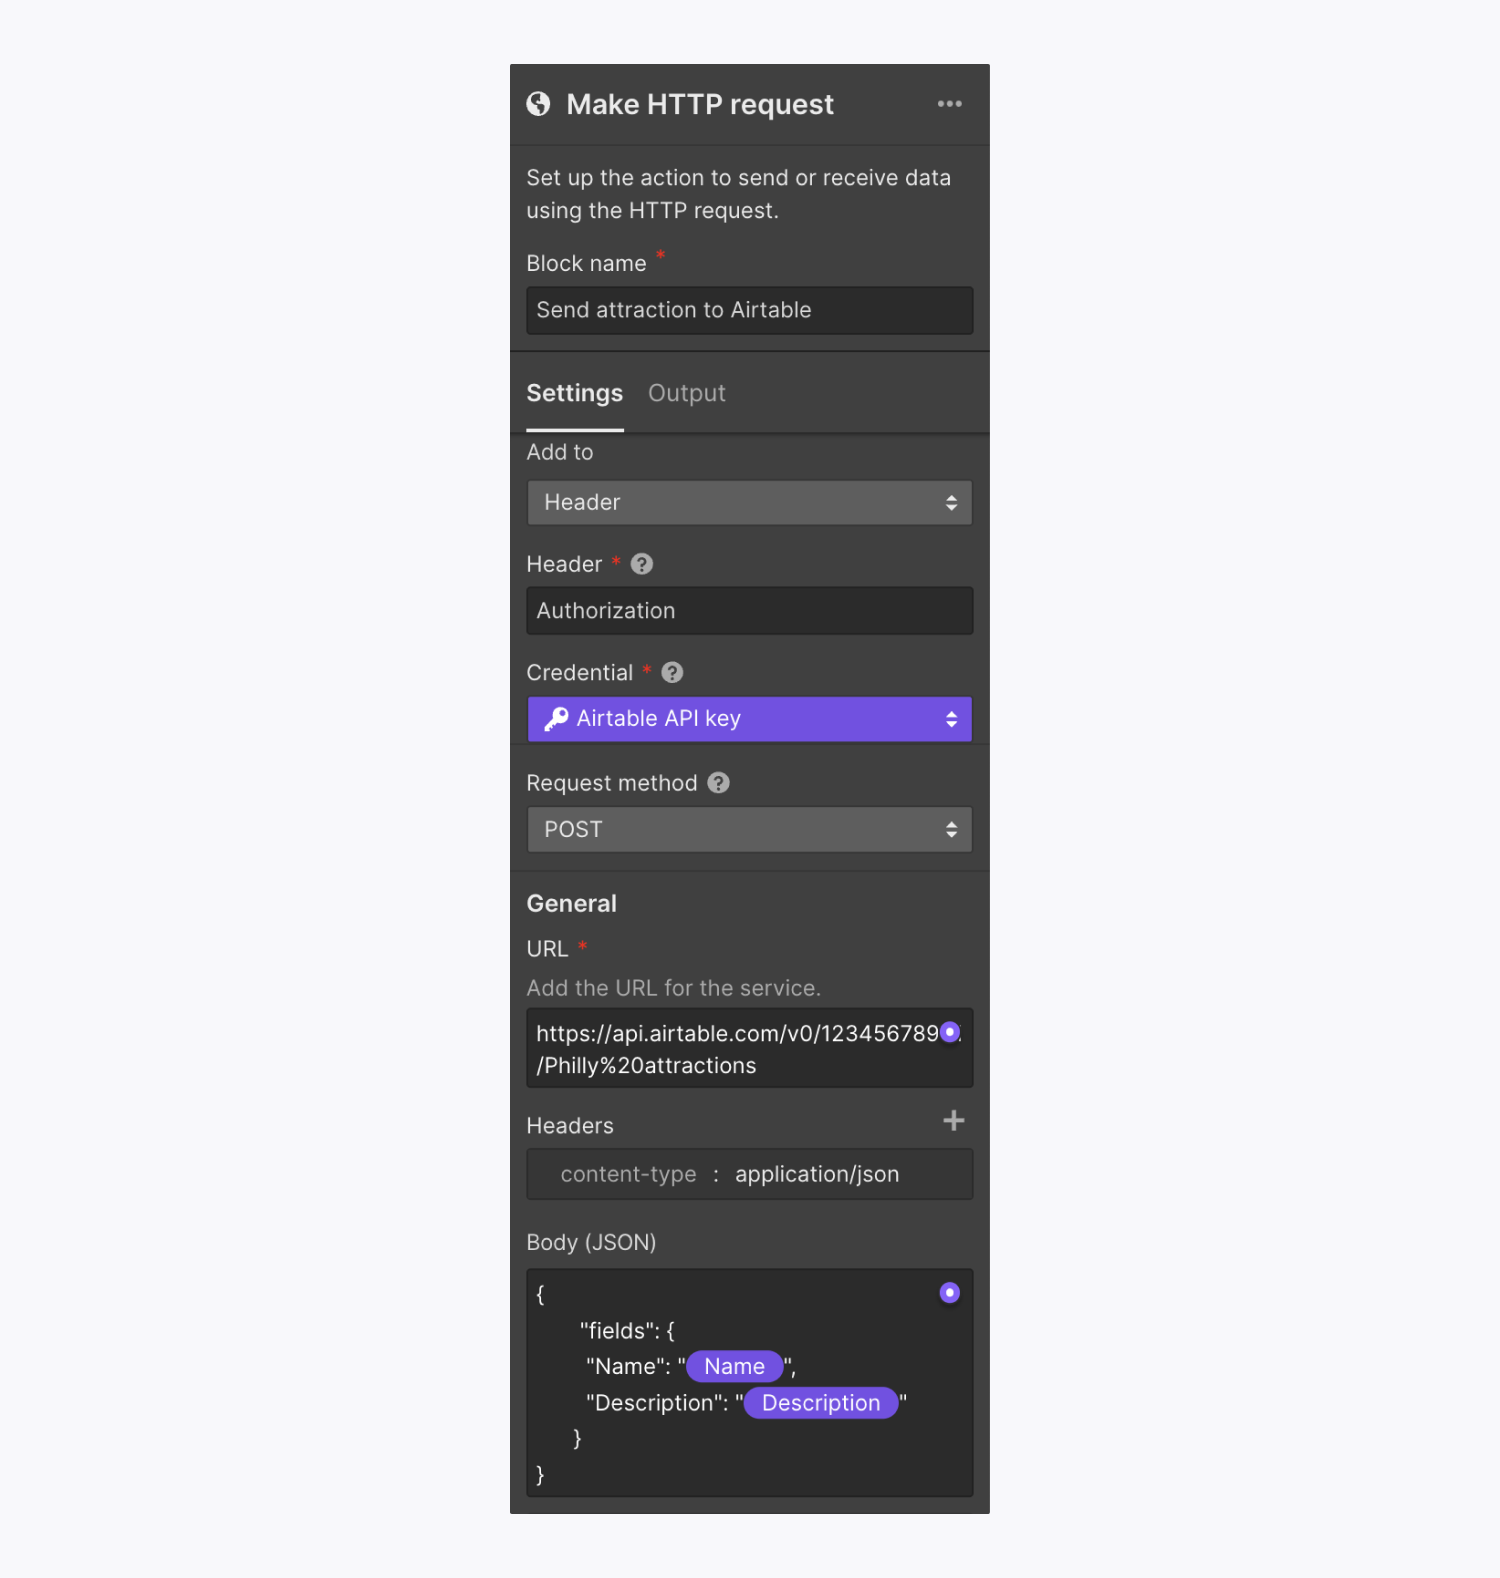
Invite user
The Invite user block permits you to automate inviting users to your User Accounts site and allocating them to access groups. This block functions well, for instance, with a Form submission trigger linked to a lead generation form that allows site visitors to indicate their desire for a user account.
Remark: The Invite user block is exclusively accessible on sites with User Accounts enabled. Learn more about User Accounts.
Delete user account
The Delete user account block permits you to automate removing users from your User Accounts site by user ID or user email. You can also pick an existing user on your site.
Remark: The Delete user account block is solely available on sites with User Accounts enabled. Learn more about User Accounts.
Modify user account
The Update user account block permits you to alter a user’s preferences (e.g., for marketing communications) and access groups by user ID or user email. You can also select an existing user on your site to adjust their preferences.
Remark: The Update user account block is solely accessible on sites with User Accounts enabled. Learn more about User Accounts.
Tools
The Conditional rule utility block allows you to establish conditions that determine the subsequent actions in your flow: If condition A, then execute action B – but if condition C, then carry out action D.
In essence, you can formulate a condition and designate actions to occur if the condition is fulfilled (i.e., actions willtake place on the “true” path) and if the condition is not satisfied (i.e., actions will happen on the “false” path). This enables you to automate email notifications, HTTP requests, manage CMS Collection items, and more, based on rules from the flow’s trigger setting or output data.
For instance, if you insert a Conditional rule utility block after a form submission trigger, you can establish conditional rules based on output data (e.g., name, email, etc.) from form submissions. To delve deeper into this illustration, you could set up a rule that triggers a section of your flow if someone named Mike Wazowski submits your form. In case Mike Wazowski submits your form, then a specific part of your flow would be executed, but if anyone else (not named Mike Wazowski) submits your form, another segment of your flow would be executed.
Note: Actions do not have to be defined on both the “true” and “false” paths. For instance, if you wish to generate a CMS item when a form is submitted with the “name” field specified, solely include the Create CMS item action on the “true” path. The “false” path (which will be executed when the form is submitted without a value in the “name” field) has no actions and will remain idle.
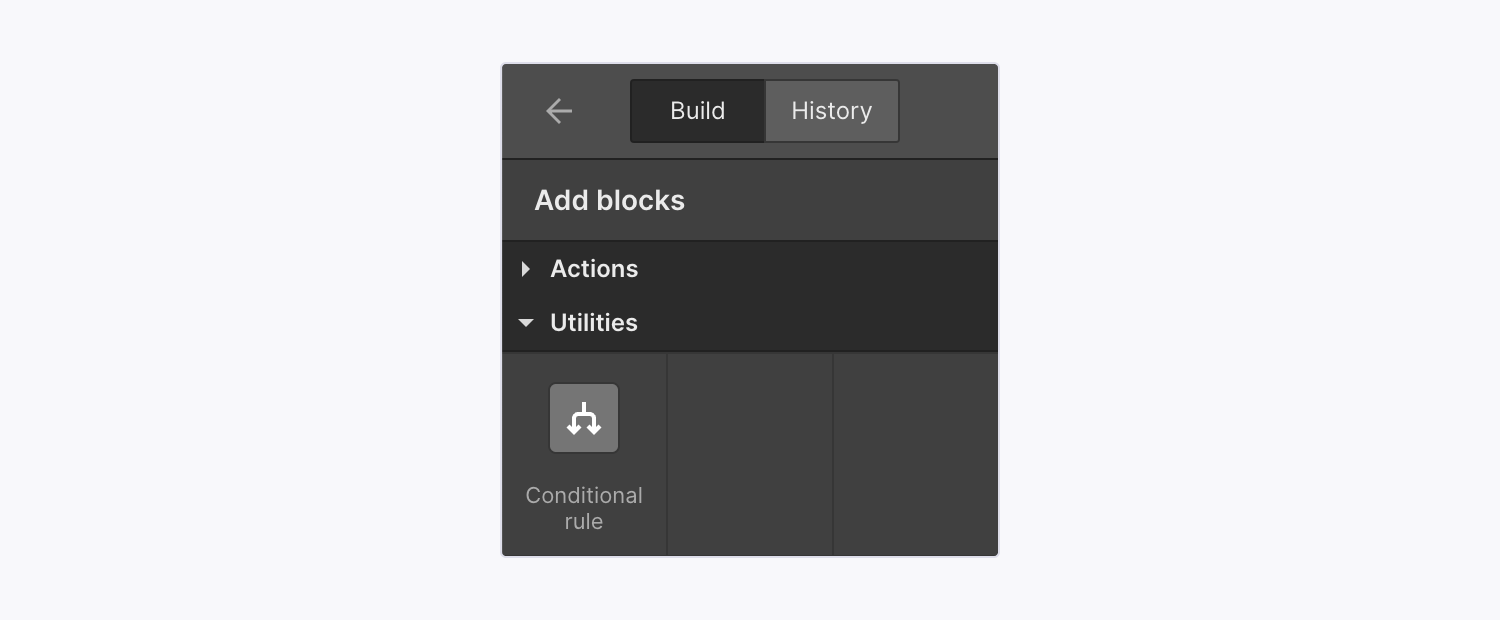
You have the ability to create conditional rules based on output data from all preceding blocks in your flow. For instance, if you design a flow where a form submission triggers a Search for CMS items action block, your Conditional rule utility block can incorporate data from form submissions and data from CMS items.
This can be advantageous for websites with user-generated content or marketing sites that gather leads. For example, on a cooking website that permits visitors to submit recipes, you could establish conditional rules to redirect recipe submissions to different Collections (e.g., “Breakfast,” “Appetizers,” “Desserts”) based on the dish type. Or, on a marketing website that captures sales leads, you could search for existing leads in the CMS using the company name from form submissions and then either create or update leads in the CMS based on the company name.
To configure a Conditional rule utility block, choose the block, then navigate to Conditional rule settings > Condition. Pick a field from the Select field dropdown, and then a type of logic from the Select logic dropdown (e.g., Is set, Is empty, Ends with, etc.).
The following field types are available for utilization in the Select field dropdown:
- Plain text
- Phone
- Number
- Text area
- Checkbox
- Select
- Radio button
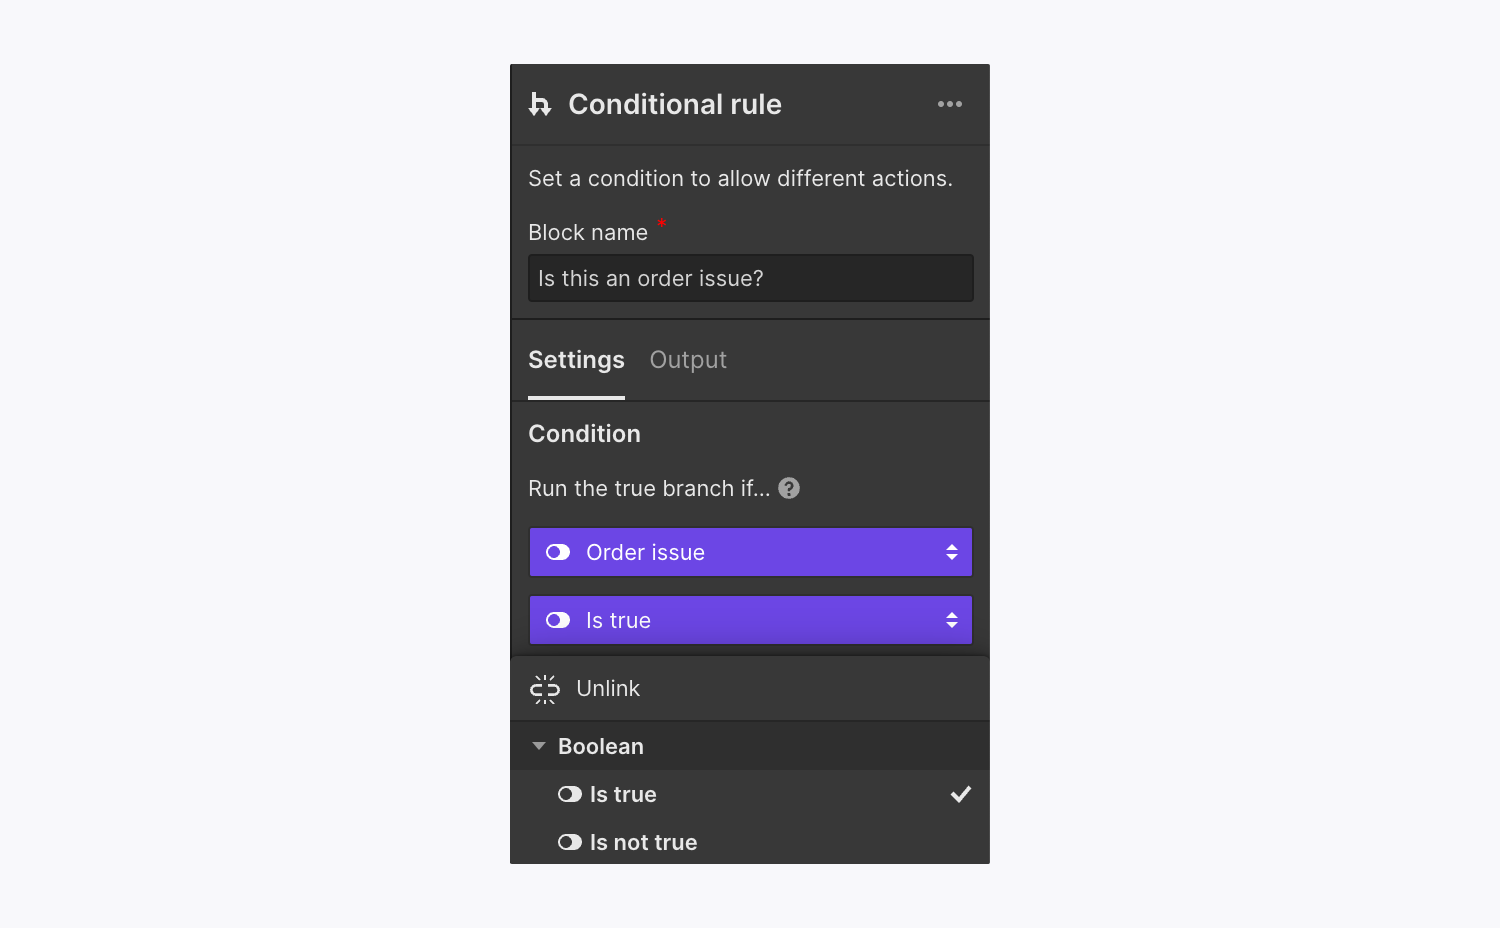
If you’ve opted for a type of logic (also referred to as an “operator”) that necessitates a comparison (e.g., Equals, Contains, Starts with, etc.), an Enter text field will materialize. Here, you’ll have to either input your desired text or incorporate a variable by clicking the purple “dot” icon in the field. Find out more about available operators in Logic.
The variables you’ll be able to access in this field will vary depending on the initial field (i.e., data type) and type of logic you’ve selected. In the aforementioned example of the marketing site, we would form a comparison to ascertain whether “company name” in the form matches or includes “name” in the CMS item. The variables in this context are “company name” and “name.”
Important: All comparisons are case sensitive. For example, if the condition is “Name Contains G,” “Grímur” returns true, but “grímur” returns false.
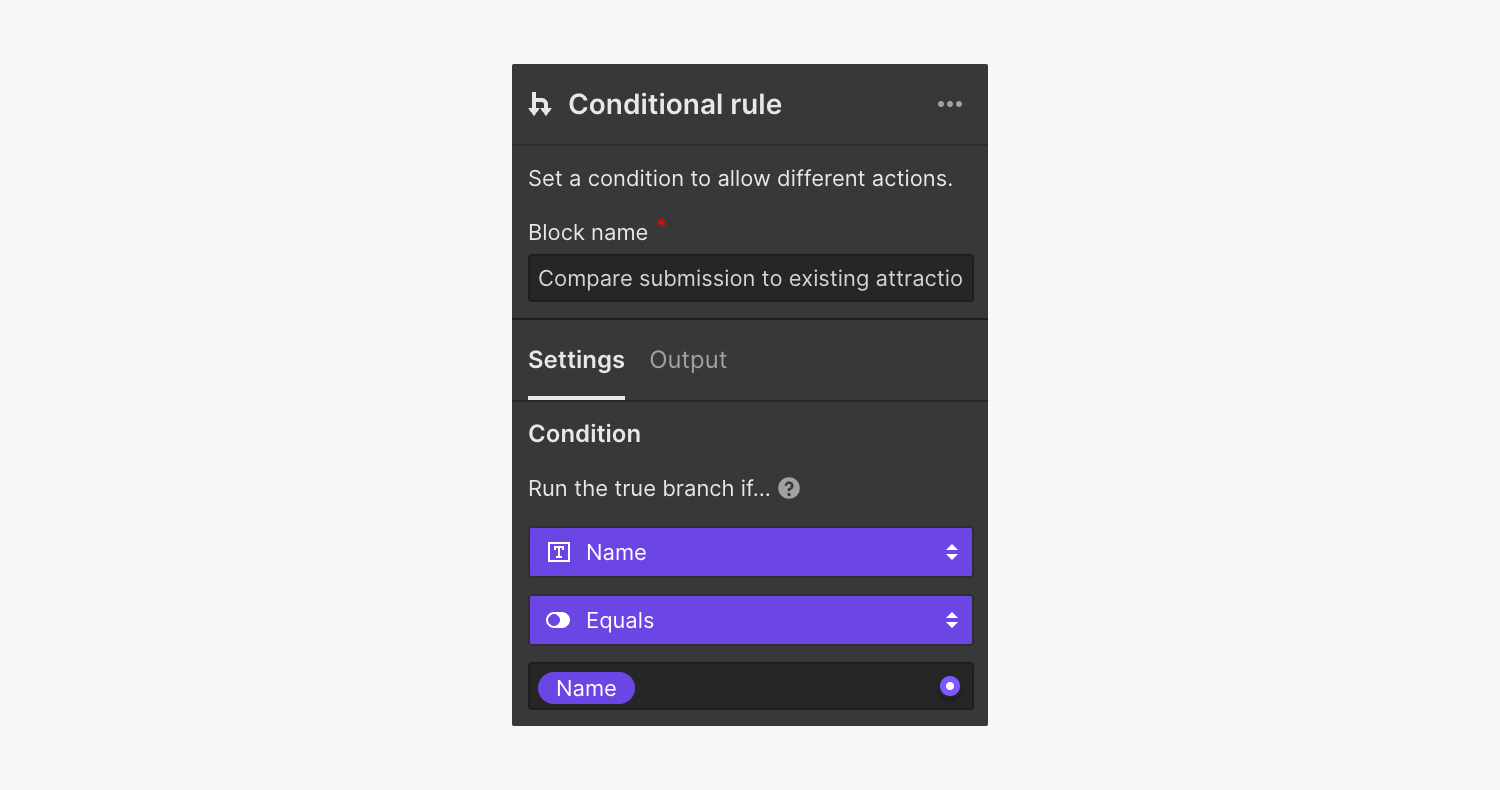
You can disconnect your fields or logic at any moment by selecting the Condition dropdown and then selecting Unlink.
Available operators
Let’s explore the available types of logic, or “operators,” for each data type:
Observation: The Is set operator checks if a variable (e.g., form input value) exists. It will return “false” if the text comprises solely blank spaces. The Is empty operator verifies if a variable (e.g., form input value) contains non-empty data. It will return “true” if the variable holds data or only whitespace characters. In case a visitor submits a form with only spaces in an input field (e.g., the “name” field), a condition using Is empty for the input field would return “true” and execute the “true” branch of the flow, while a condition with Is set would return “false” and activate the “false” branch of the flow.
Employing fallbacks
Fallbacks are default values used instead of a variable if the variable is inaccessible. Fallbacks are necessary when handling data from Incoming webhook triggers or from Form submission triggers where form field inputs are not mandatory. A yellow “wrench” symbol next to a variable indicates the need for a fallback.
Imagine you devised a plan that generates CMS items using data from a form submission that triggers the process. Your aim is to name the CMS items based on the data from the “name” field in the form, which isn’t obligatory. If the “name” field remains empty in the form submission, the designated fallback will be utilized to name the CMS item. As an example, setting a fallback as “No name provided” and a visitor submits the form without entering “name,” your CMS item would then be named “No name provided.”
To set a fallback for a variable:
- Tap the yellow “wrench” symbol next to the variable name
- Enter a fallback value, or click the violet “dot” symbol to opt for another variable as a fallback
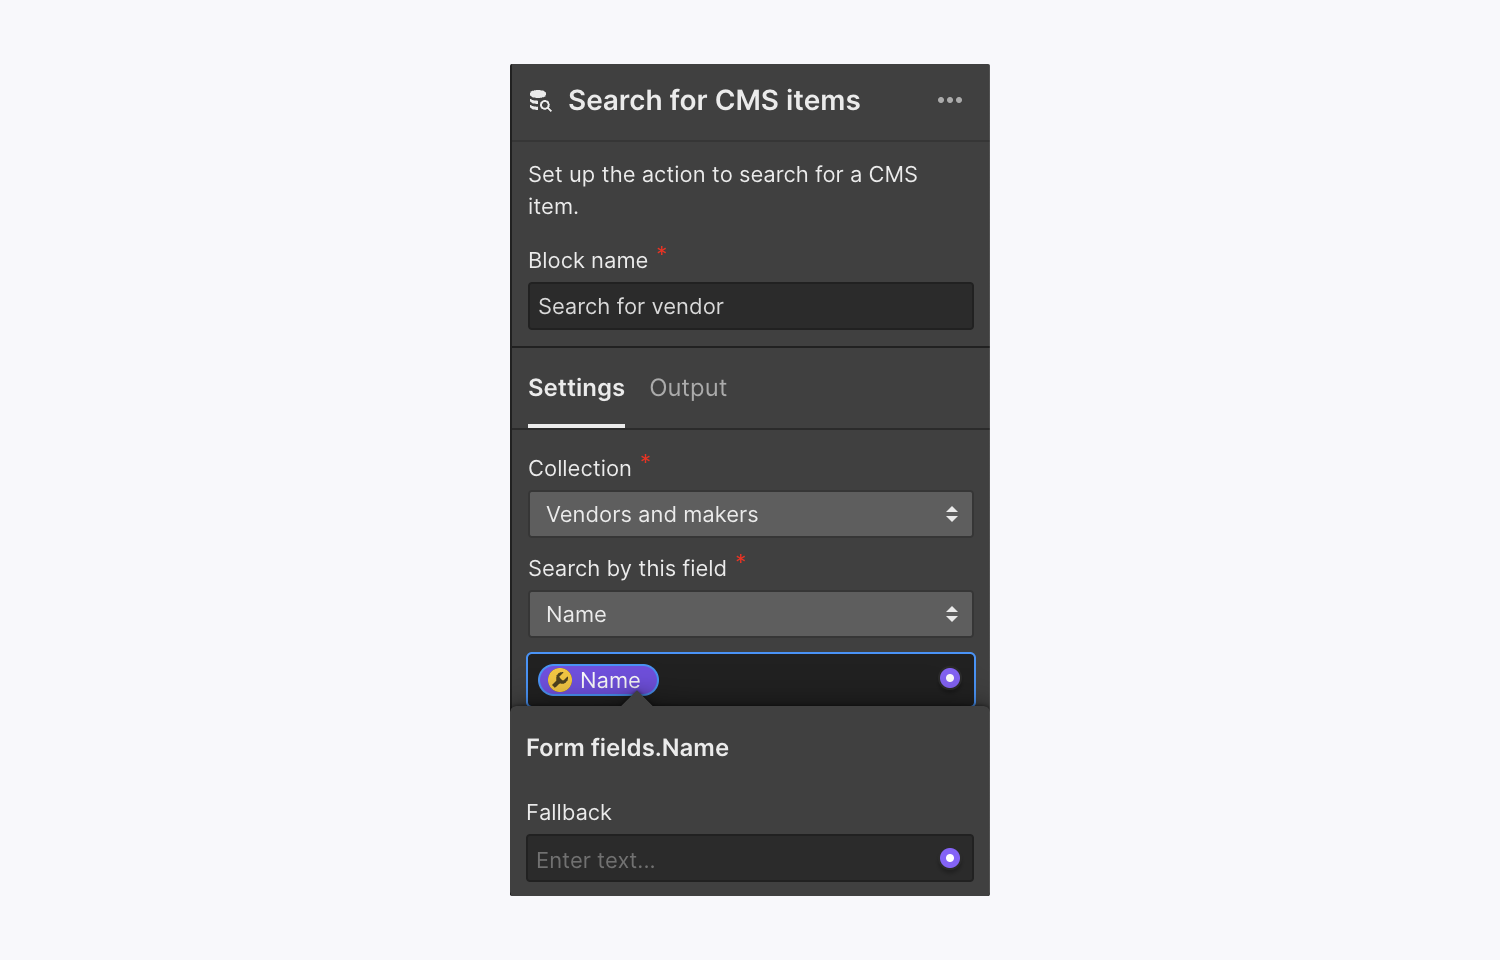
To eliminate a fallback for a variable:
- Choose the variable with the intended fallback to exclude
- Erase the fallback value from the Fallback field
Ways to evaluate a flow
It’s prudent to evaluate a flow before releasing it to confirm proper configuration of blocks and to ensure smooth flow execution. This practice also aids in troubleshooting flow-related issues.
To assess a flow, select Testflow at the upper right corner of the Flow editor. This opens a modal menu where you can input sample data for the connected trigger to execute the flow. After entering the data, click Run test to initiate the test flow. The test outcome will be displayed in the modal menu post-test completion.
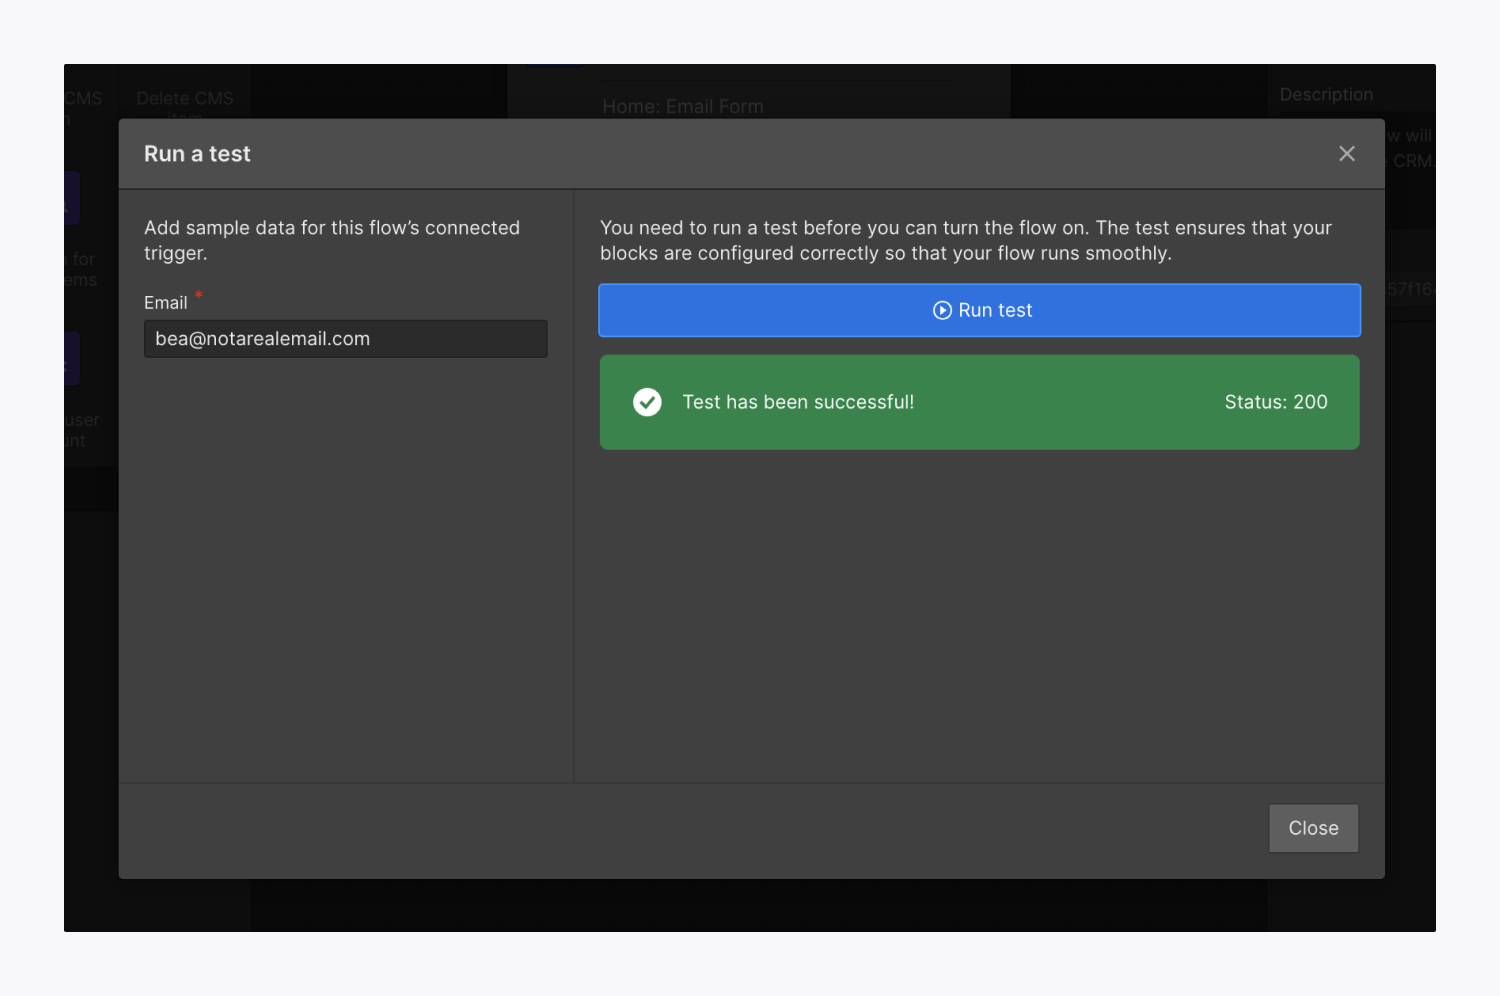
You can individually test Make HTTP request blocks outside the main flow. Right-click on the Make HTTP request block and choose Test this action, or select the block on the canvas and tap Run testto complete setup in Block settings — leading you to a modal menu to input sample data for the utilized values.
Following data entry, click Run test to execute the test for this block. The results are displayed in the modal menu post-test completion. Click Apply data to utilize the test response for evaluating the rest of the flow.
Operate history
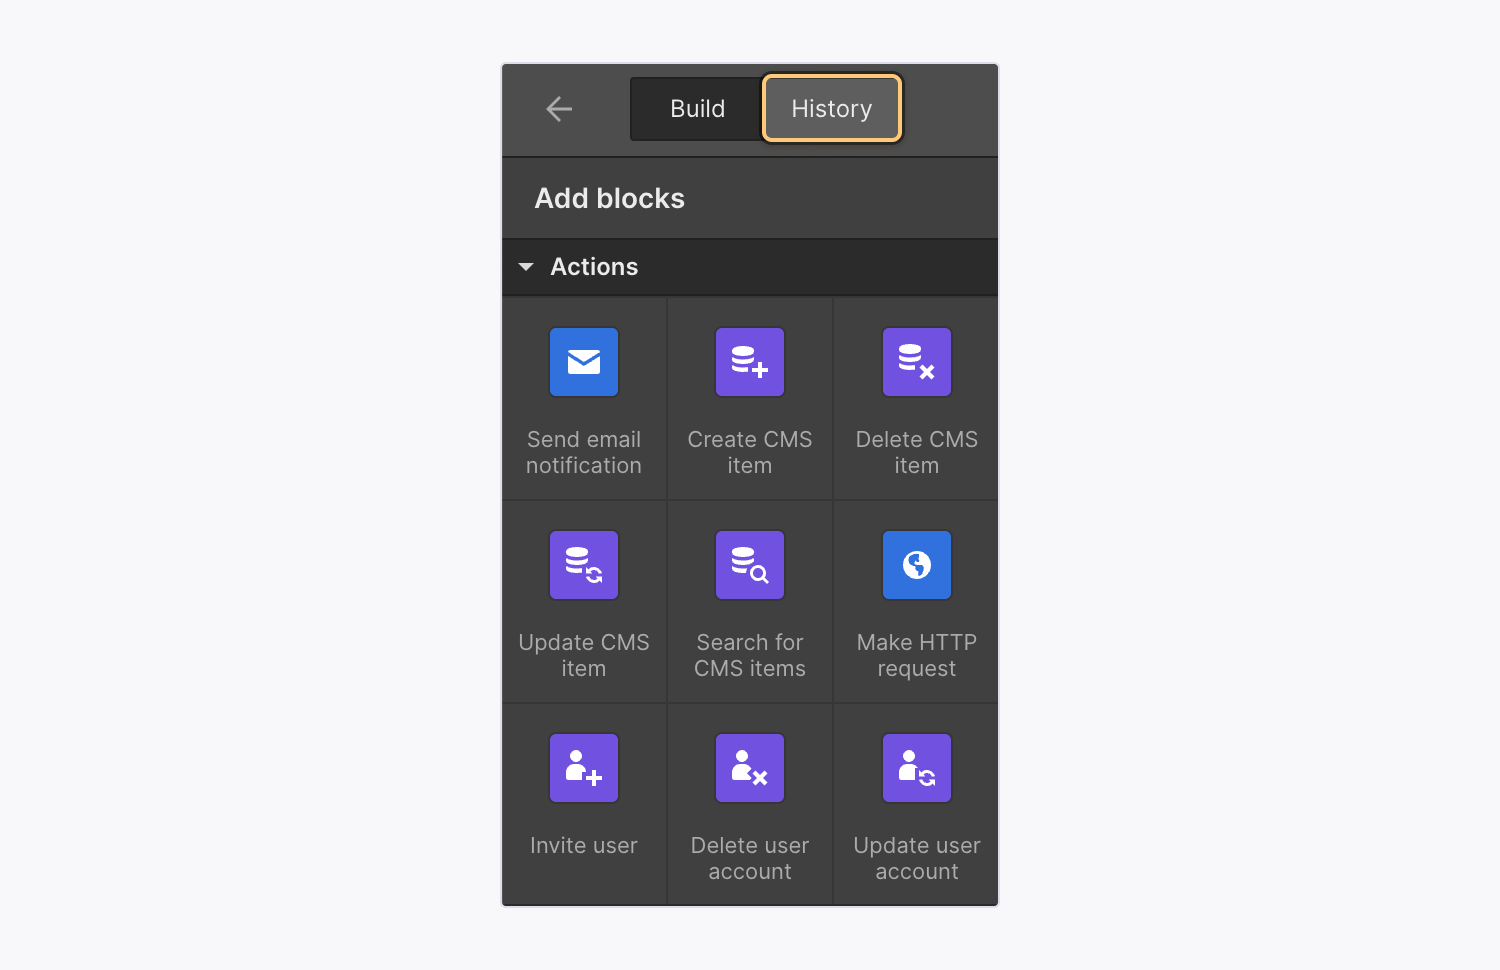
Operation history offers a log detailing the outcomes of both successful and unsuccessful previous runs of flows. To access Operation history, navigate to Flow editor > History tab. Clicking on any timestamp in Operation history reveals the input data that triggered that specific flow run.
Steps to finalize flows
The procedure for finalizing your flow varies based on the trigger used to initiate the flow (e.g., Form submission or Incoming webhook). If your flows don’t interact with site elements, you can independently manage flow finalization from site publishing (excluding flows triggered by Form submissions, as they rely on site forms).
Important: Publishing flows to a single domain is not feasible. Flows must be published across all domains connected to your site.
Essential: If your flow encompasses blocks affecting CMS items (e.g., Create CMS item, Delete CMS item, etc.) and you modify the CMS Collection schema (e.g., adding or removing a Collection field), reconfiguration of your flow and staging it for publishing becomes necessary.
Finalizing a Form submission flow
To finalize your flow utilizing a Form submission trigger, first choose the triggering form from the Form dropdown in the Flow editor. For publishing the flow during the next full site release, tap Publish, then Stage flow for publish.
Essential: If any changes are made to the form linked with the form submission trigger (e.g., adding or removing fields), reissuing the site publication is mandatory to guarantee that the revised form is available for use in the flow.
You can also immediately retract the flow from the live site by tapping Publish and then Unpublish flow.
If you attempt to publish your site while unresolved issues with any flows persist, an alert modal will appear listing flows encountering unresolved issues. If you decide to publish the site without addressing them, any flows with unresolved issues will be deactivated.
Publishea New incoming webhook mechanism
Unlike procedures that utilize Form submission triggers, procedures that utilize New incoming webhook triggers do not necessarily necessitate the publication of your site.
There are 2 alternatives for disseminating procedures that use New incoming webhook triggers:
- If you desire to make the procedure live on your active site immediately, tap Release and then Deploy procedure now
- If you aim to unveil the procedure on your forthcoming full site release, click Release and then Arrange procedure for release
You are able to engage Deploy procedure now in the Procedure editor anytime you wish to propagate fresh modifications to your procedure live — minus having to launch your full site on each occasion. Subsequent changes you implement to your procedure will not manifest on the active site until you tap Deploy procedure now.
You can also retract your procedure from your active site instantaneously by clicking Release and then Eliminate procedure.
If you endeavor to publish your site while there are pending matters with any of your procedures, an alert dialogue box will emerge with a register of procedures with unresolved concerns. If you proceed to launch your site without rectifying them, any procedures with pending matters will be rendered inactive.
Tips for modifying, duplicating, and removing procedures
You can pinpoint the alternatives to modify, duplicate, and erase procedures in the drop-down arrow menu adjacent to the procedure title.
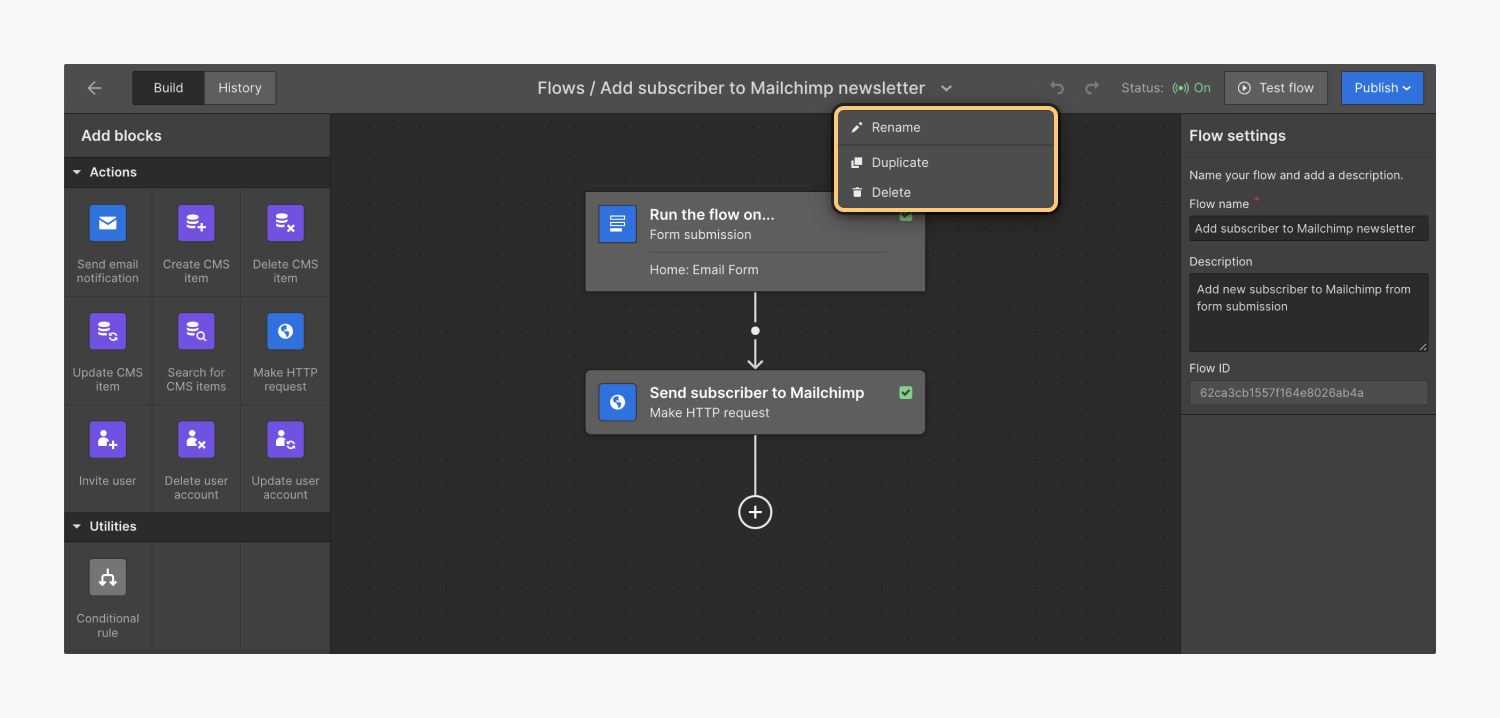
You can likewise modify your procedures by substituting the Procedure title in Procedure settings.
NB: To rename an individual block, you can input or replace the Block title in Block settings. To erase an individual block from your procedure, right-click on the block and select Delete block, or highlight the block and press Erase on your keyboard. Individual blocks are not able to be duplicated currently.
Frequently asked questions and problem resolution hints
What is the maximum number of procedures permitted on my site?
To avert performance setbacks, there is a cap of 20 procedures per site. If you make an attempt to establish more than 20 procedures on a site, you will be prompted to remove a procedure initially.
How many conditional directives/action blocks can be employed in a singular procedure?
You can insert up to 50 blocks in a singular procedure. This encompasses the conditional block. An “A maximum number of 50 blocks reached” error message will materialize upon reaching the threshold.
Is Reasoning covered in my site/Workspace arrangement?
You are not mandated to possess a site or Workspace plan to employ Reasoning, however, you might need a site or Workspace plan to boost your usage limits or the quantity of procedures you can devise. Refer to our plans and pricing page for insights on Reasoning usage constraints.
Which Workspace functions have the authorization to construct and oversee procedures?
All Workspace functions have the authority to construct and manage procedures. Bear in mind that Workspace members with site-level Can design or Can design (Limited) roles are unable to publish full sites, thus, these Workspace members may necessitate aid from other members to publish procedures that interact with elements on the site (e.g., procedures that use Form submission triggers). Learn more about Workspace functions and permissions.
Assistance needed! I am unable to enact alterations to my procedure!
If you are utilizing a form submission trigger, ensure you have released your site subsequent to linking your procedure to the form or executing any alterations to the form. Upon releasing your site, you can click Arrange for release to implement alterations to your procedure on your next full site release.
If you have completed this already and are still incapable of enacting alterations to your procedure, verify that all block settings have been properly configured and the green “checkmark” icon is visible on all the blocks in your procedure. If a yellow “wrench” icon emerges anywhere in your procedure, this denotes that block settings still necessitate configuration.
What transpires when a form field employed in a procedure undergoes a modification?
The live procedure will cease functioning. This predicament will occur if a form field is eradicated, appended, or renamed. You will need to reconfigure your procedure, prepare your procedure for release, and publish your site to rectify your live procedure.
My procedure was previously operational, but currently an exclamation point is displayed on my procedure trigger.
If you are utilizing a form trigger and you have altered your form (e.g., altering the form title, adding or removing form fields, etc.), you will need to reset the form trigger to reconfigure your procedure. To accomplish this, pick your trigger in the Procedure editor, navigate to Trigger settings, and tap Reset the form trigger.
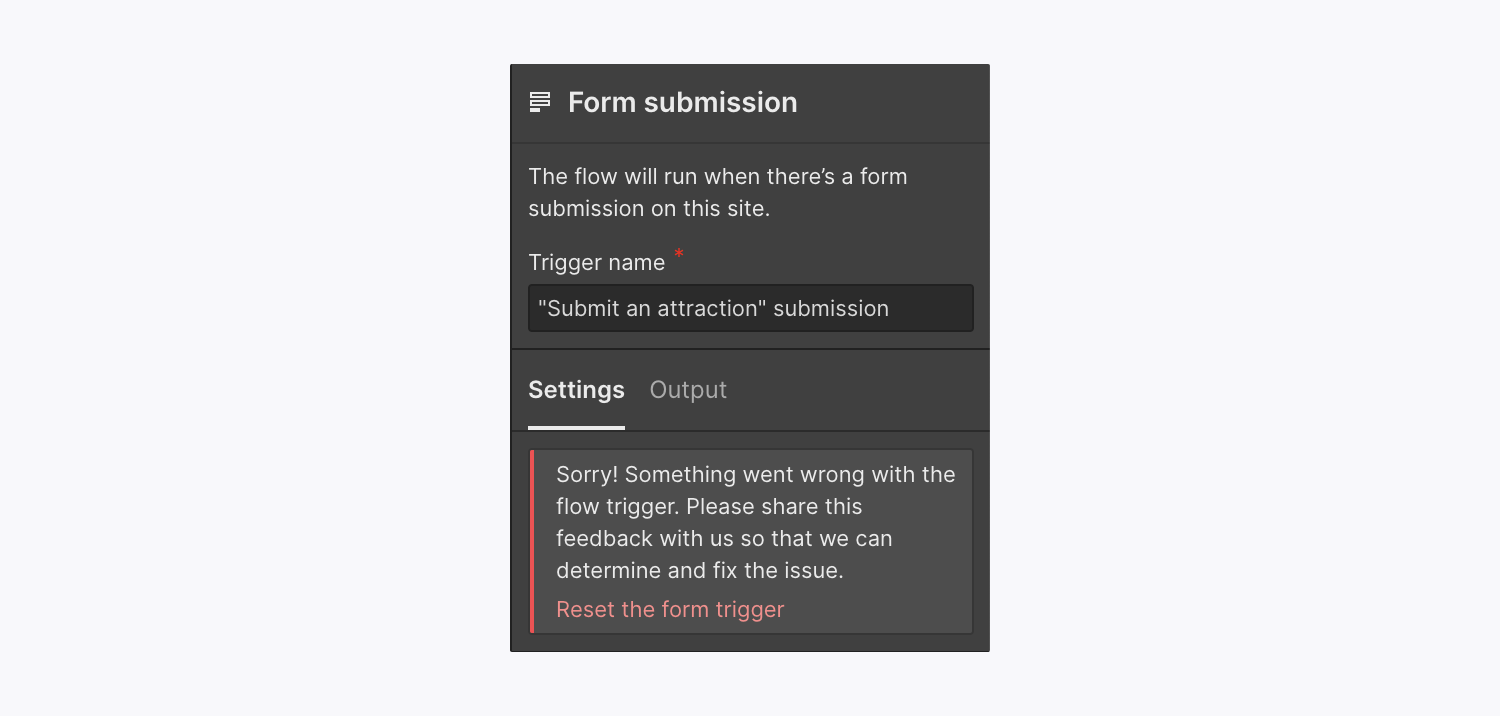
My action blocks are not functioning correctly.
Kindly double-check that your block settings have been properly configured. In the situation of Make HTTP request blocks, ensure that your HTTP request and block settings have been structured correctly. If all block settings have been appropriately configured, endeavor republishing your site and applying changes to your procedure.
If republishing your site does not resolve your issue, please record your screen and submit your issue to the Webflow Logic Bug and Feedback Form. Ensure to include your Procedure ID with your submission.

What transpires if a collaborator is eliminated from a site or Workspace subsequent to being appended to a Dispatch email notification block?
The former collaborator will no longer receive emails from the Dispatch email notification block. Nonetheless, they will not be eradicated from the collaborator list in the Dispatch email notification block settings — manual removal is necessary.
Can Logic be employed to alter content or a design on my site?
The Create CMS item and Update CMS item blocks can be utilized to modify content on the site when Create as is defined as Live. Note that the site necessitates a refresh to depict live modifications to CMS content.
However, except for those CMS-related blocks, you cannot utilize Logic to alter content or design on your site at this moment.
WillWill the logic still function after I export my website?
The flow of logic (alongside CMS and Ecommerce content) is not embedded in the exported code. Logic operation relies on hosting for proper functionality.
Is it possible for other members in the Workspace to view any private information (like third-party API keys, usernames, and passwords) I have entered?
Workspace members can access, manage, and utilize credentials. Nonetheless, once a credential is generated, no one, even the original creator, can see the actual details of the credential in the Webflow UI. Essentially, Workspace members can view the customized names assigned to the credentials, but do not have the ability to access the actual keys or tokens.
How does Webflow store and manage credentials?
Credentials are securely stored – always encrypted during transmission and at rest. After a credential is established, no one, not even the originator, can view the true contents of the credential within the Webflow UI. Users can only see the user-defined titles for the generated credentials.
Please be aware that despite the secure storage of credentials by Webflow, they do not have jurisdiction over any server or external service where you may transfer those credentials utilizing logic flows.
What happens to credentials during the cloning or transfer of a site?
Credentials are not preserved during the cloning or transfer of a site. Any credentials used in your processes will need to be set up anew once the site has been cloned or transferred.
If I duplicate a site from the gallery, will the flows be copied as well? Can I share flows through duplicable sites?
Absolutely. Duplicating a site equates to cloning it entirely. All elements tied to the site, including flows, will be replicated, except for credentials. Any credentials integrated into your processes will require reconfiguration post the cloning process.
Will the transferred site retain flows if I transfer a site with flows to another user?
Indeed. All components linked to the site, like flows, will be transferred, excluding credentials. Any credentials used in your processes will need to be set up once the site has been transferred.
What happens to flows when a site is recovered from a backup? Are they reinstated or left unaltered?
Restoring a backup will reinstate the flows to their state at the time of backup creation. However, due to possible divergences between your site’s forms and CMS schemas from the backup, recovered flows may potentially disrupt published processes.
- Include or eliminate Workspace spots and members - April 15, 2024
- Centering box summary - April 15, 2024
- Store a site for future reference - April 15, 2024

