Calendly has the capability to connect with 6 of your calendars to automatically verify availability, facilitating connections with your top contacts, leads, and customers.
In this tutorial:
- Replicate Calendly link
- Integrate Calendly in your layout
- Reproduce popup widget code
- Popup content
Replicate Calendly link
If you have not yet created one, go ahead and register for a Calendly account. This is important for two main reasons:
- Enables synchronization with your calendar account (e.g. Google Calendar)
- Facilitates coordination of appointments scheduled through Calendly
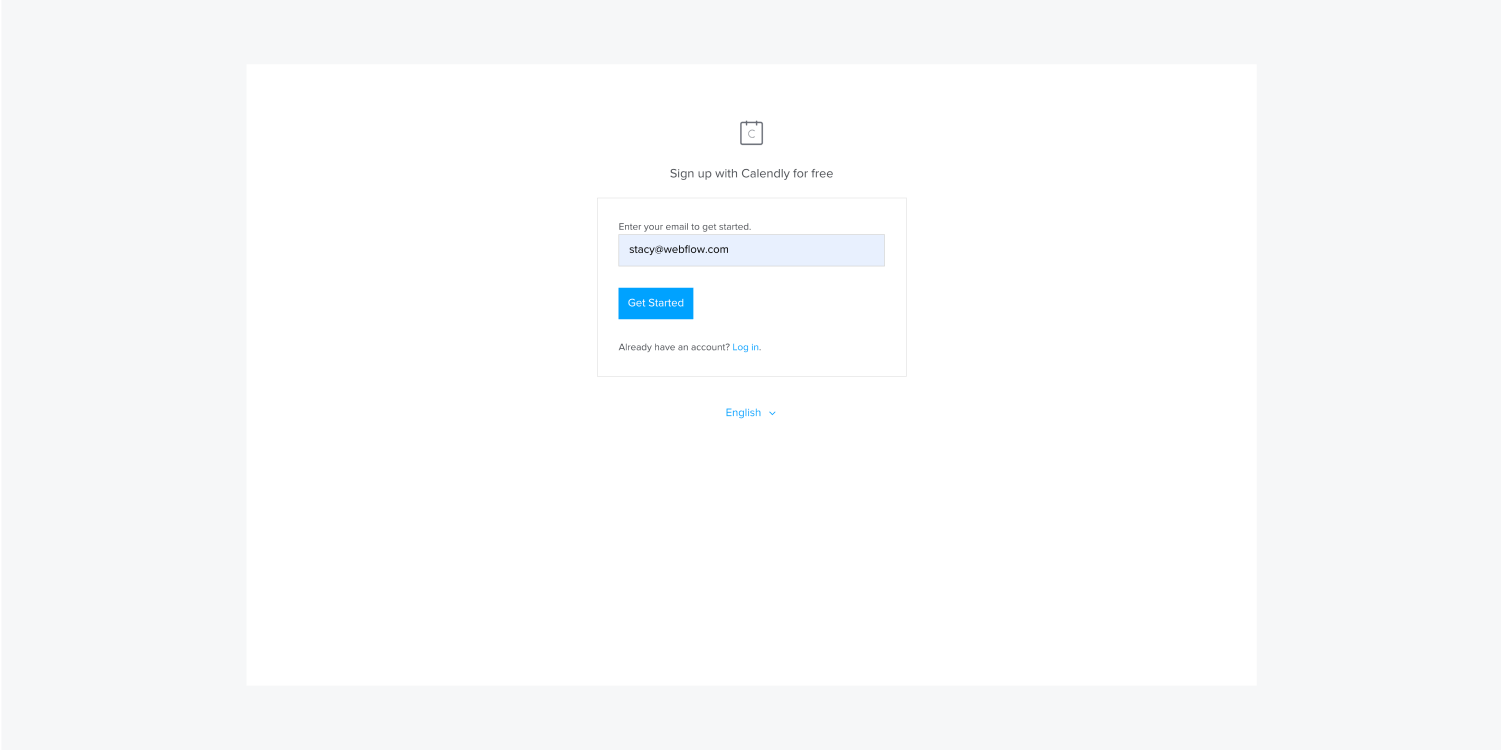
Once the account setup is complete, navigate to Home in the Calendly menu, and select Copy Link for the specific event you wish to schedule from the Event Types section. Initially, Calendly provides us with 3 choices (additional can be created if required):
- 15 Minute Meeting
- 30 Minute Meeting
- 60 Minute Meeting
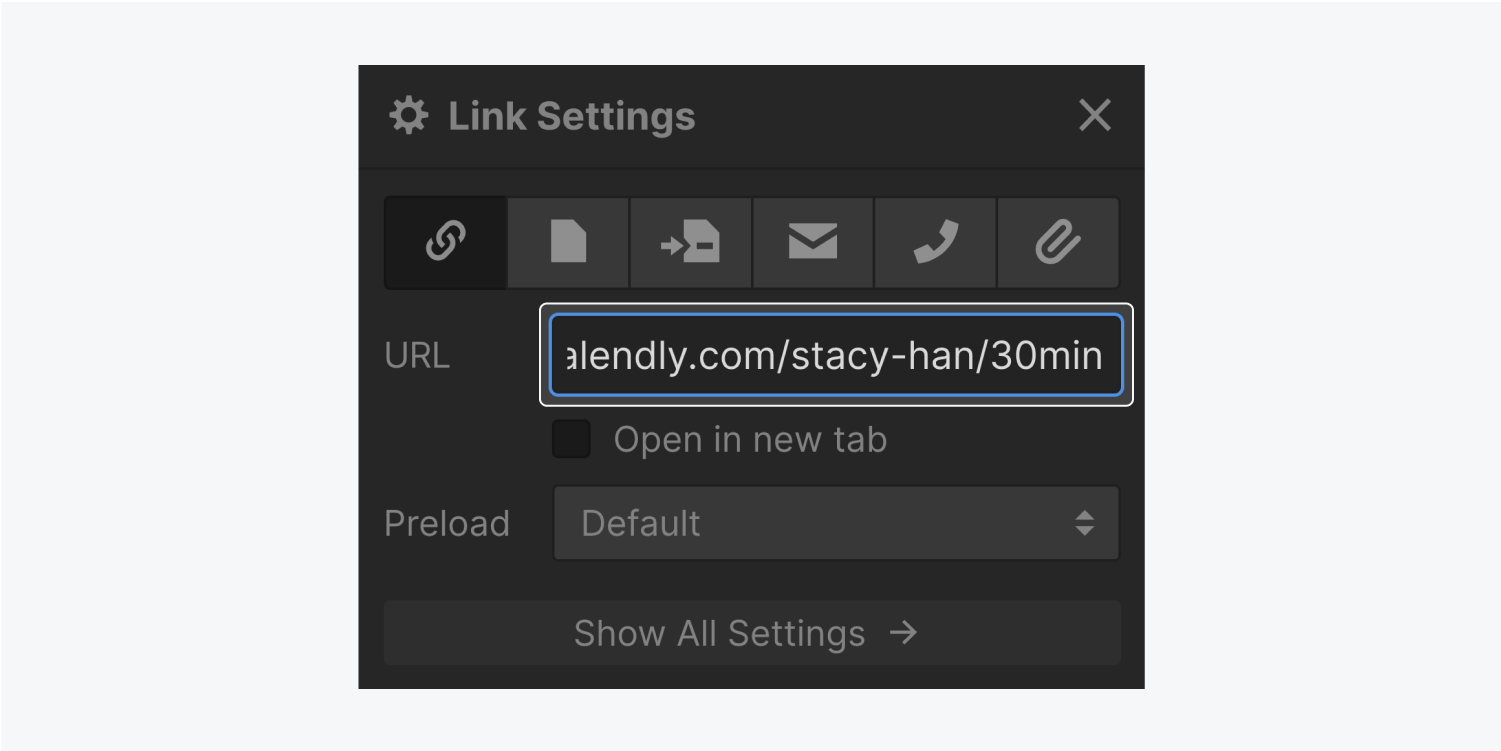
Proceed by pasting the copied link into your Webflow project. Various linking options are available, but for this instance, we will utilize a button. You can insert a button onto your page through the Add panel (A) located in the Elements tab under the Basic section. Subsequently, input the copied link into the button settings accessed once the button is added to the canvas. Further understanding link adjustments can be found.
Integrate Calendly in your layout
This stage involves acquiring the code snippet for Inline Embed. While in Calendly on the Home page, select the share button associated with the desired Event Type. Subsequently, choose Add to Website.
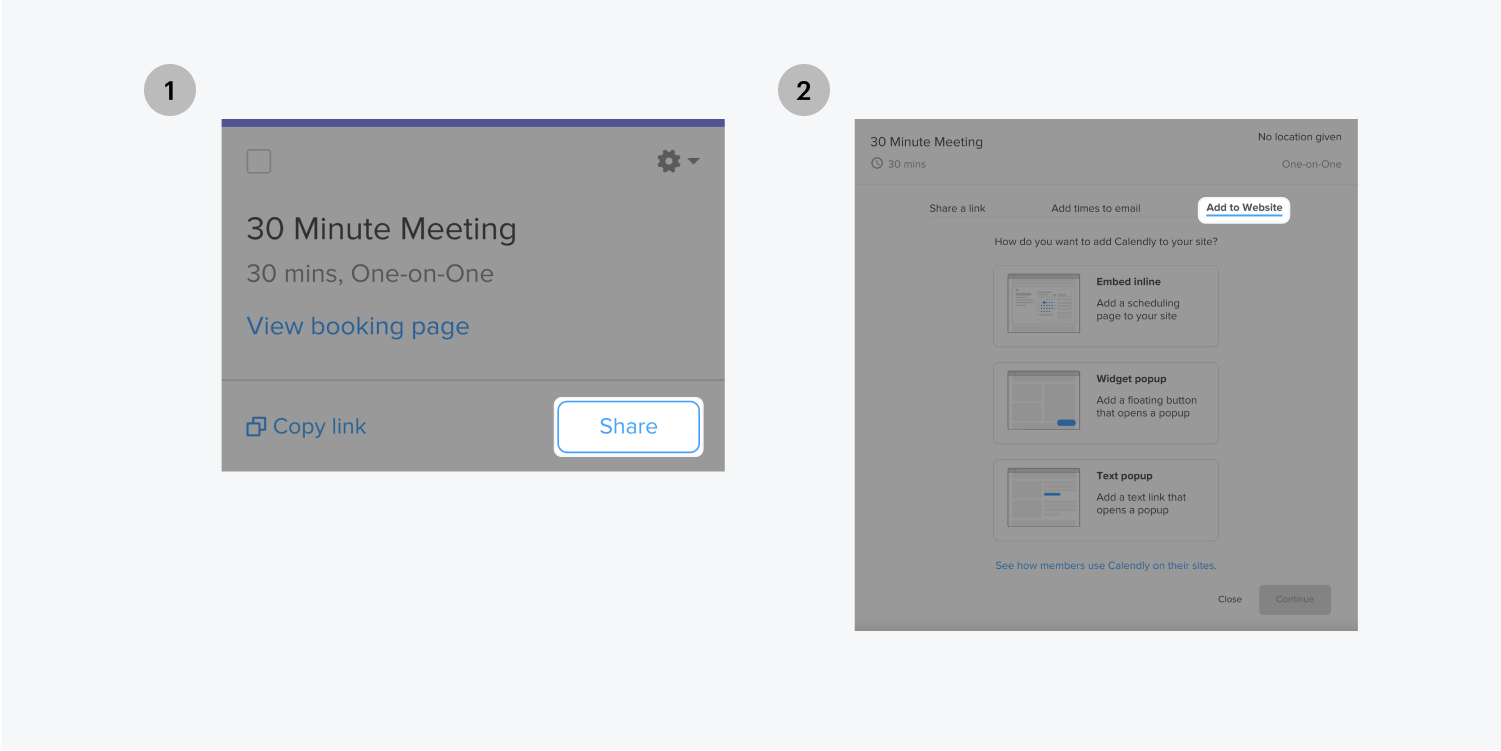
Opt for the Inline Embed choice, proceed by selecting Continue, then click Copy Code.
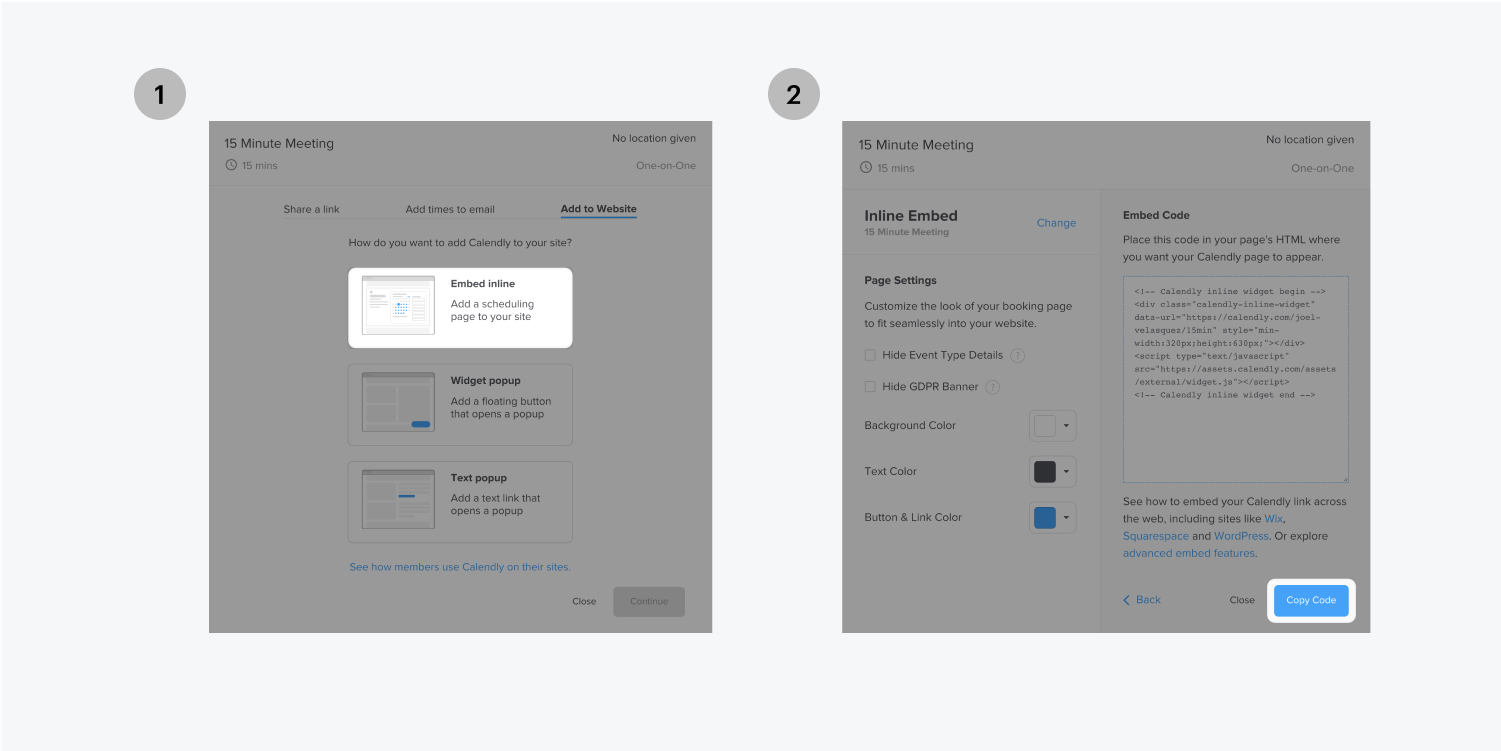
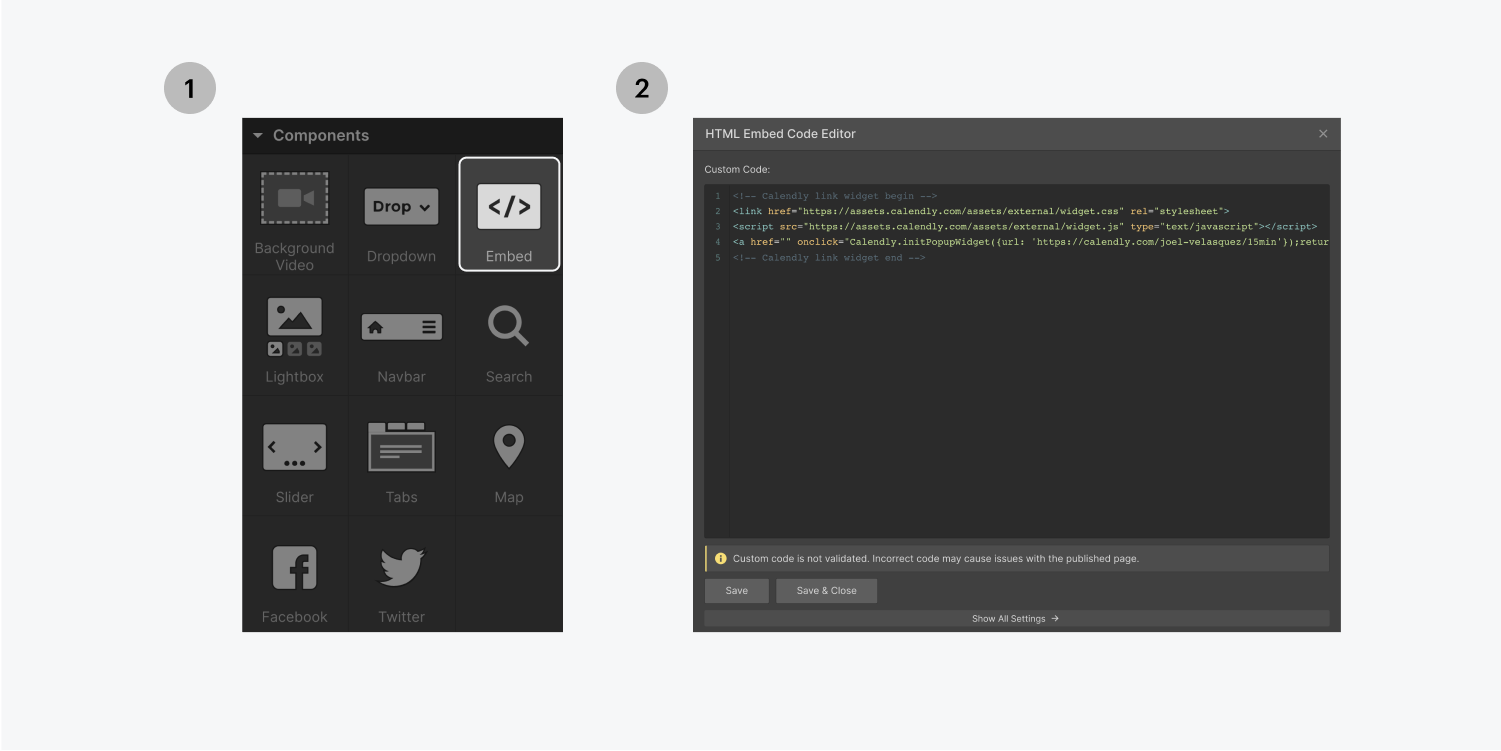
Subsequently, the copied code can be pasted in a custom code embed element within Webflow. To incorporate an Embed element, utilize quick find (CMD/CTRL+E) and search for “embed” or drag an Embed element from the Add panel. Paste the code and select the Save & Close option. More details regarding custom code embed are available.
Reproduce popup widget code
This phase involves obtaining the code snippet for the popup widget. On the Calendly homepage, click the gear icon linked to the desired Event Type. Proceed by selecting the Add to Website dropdown menu and opt for the Popup Widget. Select Continue and click the Copy Code button.
Place the copied code in the page settings where you want the popup widget to be displayed. Within the Designer, access the page settings, input the code in the Before tag section, save the settings, and publish your project.
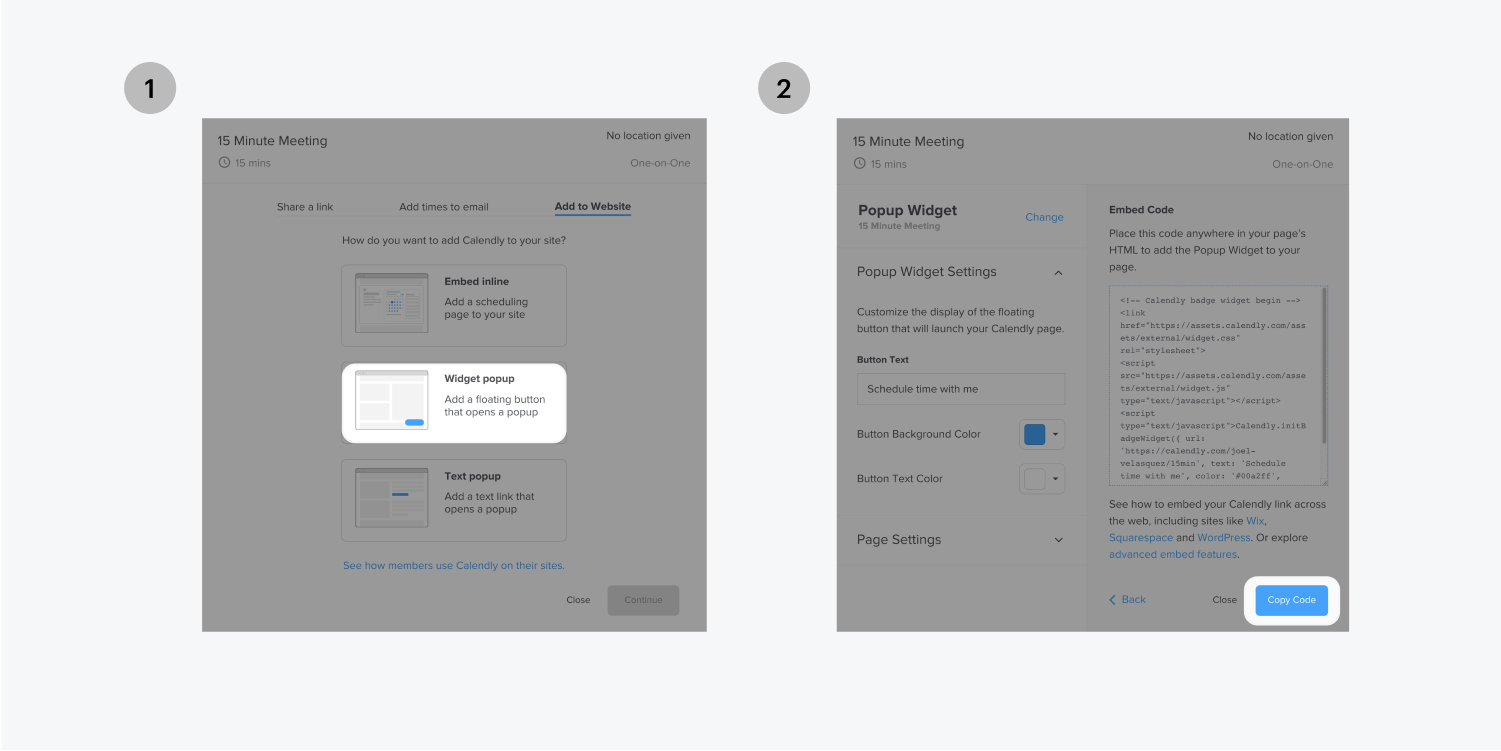
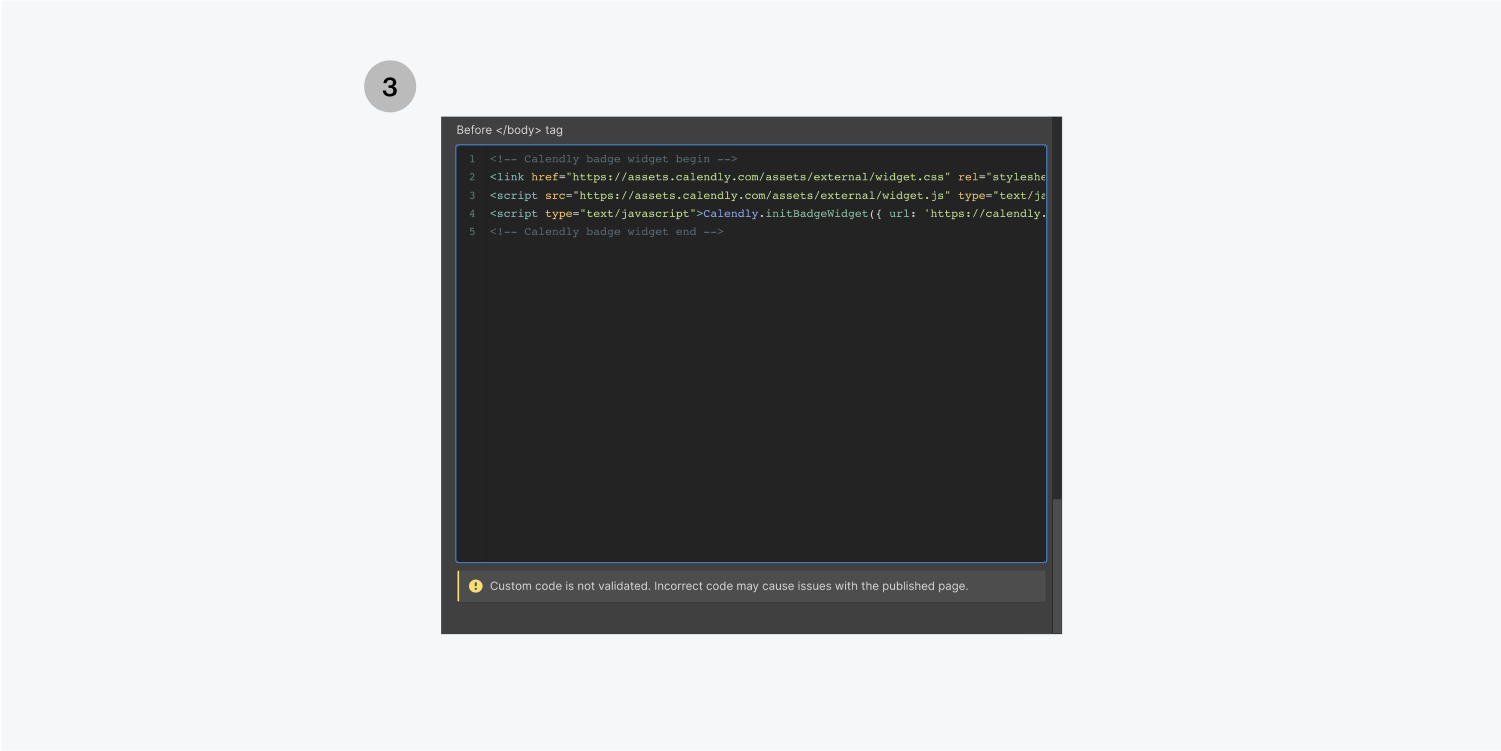
Popup content
This stage involves acquiring the code snippet for Popup Text. On the Calendly homepage, select the gear icon related to the desired Event Type. Choose the Add to Website dropdown menu and select the Popup Text option. Click Continue followed by the Copy Code button.
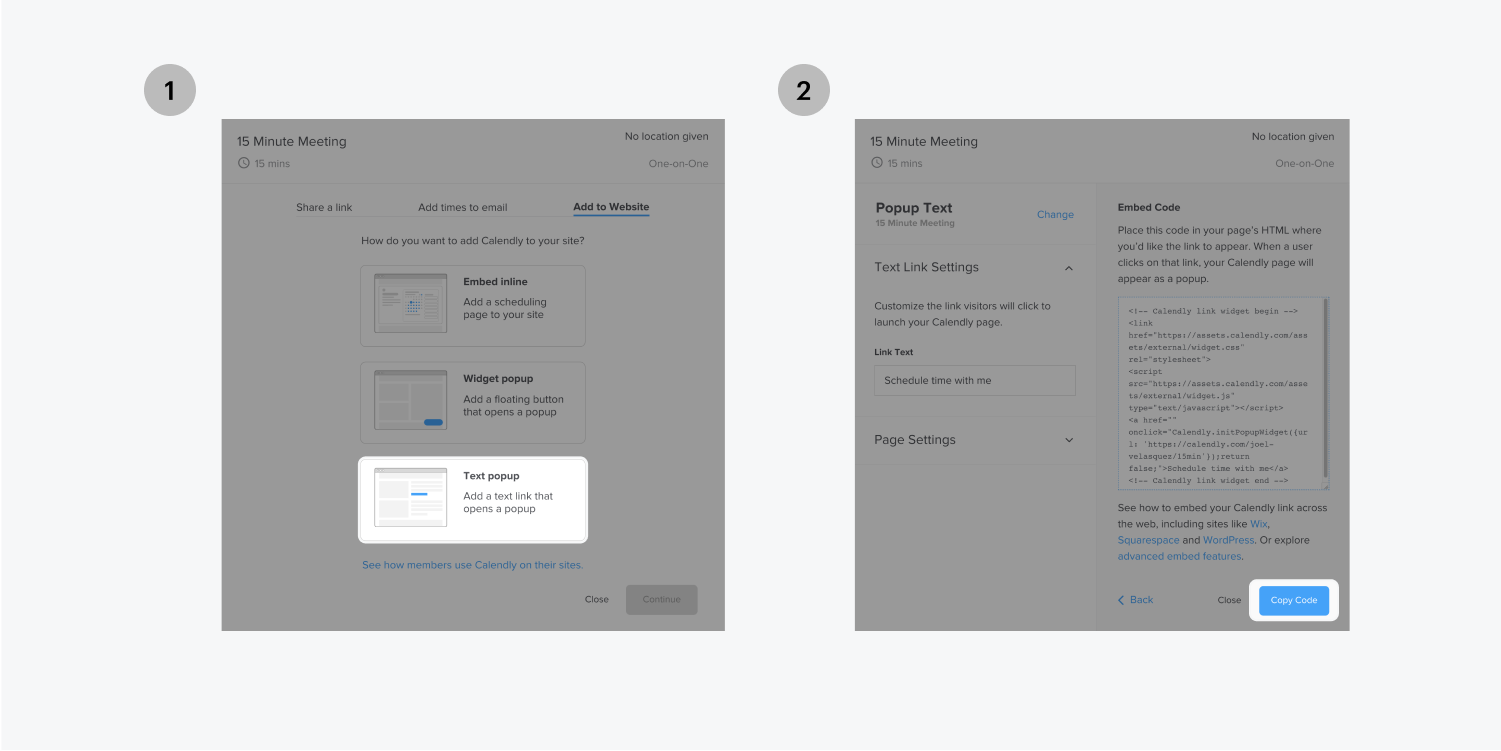
Return to your Webflow project. Utilizing the left side toolbar, click the addition symbol. Within Components, drag an Embed element into your design for the Calendly link placement. Proceed by pasting the code, then finalize by selecting Save & Close.
Note: Text styling modifications applied to the parent element of our HTML embed (can be any div block, section, or container as a parent element) will reflect on the text style of the HTML embed.
- Include or eliminate Workspace spots and members - April 15, 2024
- Centering box summary - April 15, 2024
- Store a site for future reference - April 15, 2024
