The time/date selection field is a Collection field that enables you and your Co-workers to define a specific time and date for a Collection Item. The specified time and date values can be showcased in Collection lists or on Collection pages. This field can also be used for arranging and organizing a Collection list or for establishing conditional visibility on elements in Collection lists and pages.
Webflow automatically monitors creation dates, publication dates, and modification dates, eliminating the need to create separate fields for these.
Usual Applications
- A future date or time (such as an upcoming event or release date)
- A past date or time (like a birthday or historical event)
- Manually defining custom publication dates
This guide covers:
- Establishing a time/date selection field
- Defining dates and times
- Showcasing dynamic dates and times
- Filtering a Collection list with the time/date field
- Ordering a Collection list with the time/date field
- Implementing conditional visibility using the time/date field
Establishing a time/date selection field
You can integrate a time/date selection field into a new or existing Collection. Within Collection settings, click on New Field and then select the Time/Date field.

You have the option to include a time selector. Additionally, as with any field, you can specify whether the field is mandatory or not.
Defining dates and times
You can establish your date and time using the provided pickers or manually input a date (MM/DD/YYYY) or a date and time value (MM/DD/YYYY HH:MM AM).
Showcasing dynamic dates and times
Designers have multiple techniques for displaying dynamic date and time values in designs. To incorporate these values into Collection lists and pages:
- Link the date and time field to a text element
- Format the date and time values
Linking date and time values to text elements
You can attach date and time values to any text element within a Collection list or page. To create and link a date and time element:
- Add a text element in your Collection list or page
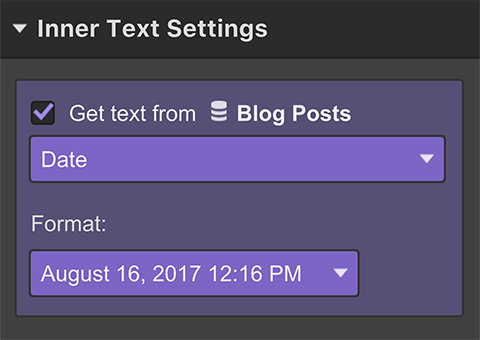
- Check the Retrieve text from option within the Inner Text Settings
- Select the Date/time field from the field dropdown
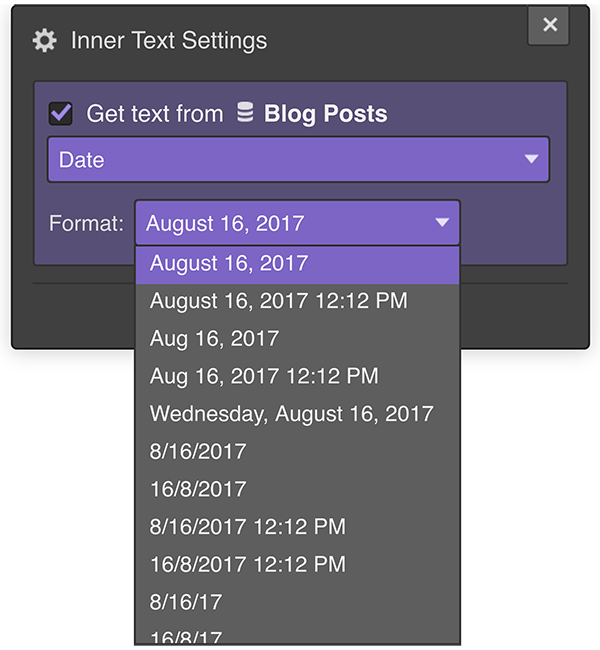
- Choose a date (and time) format
You can access the Inner Text Settings by clicking on the settings icon beside the element label on the canvas or by navigating to the Settings panel (D).

To disconnect the link, deselect the “Retrieve text from” option under Inner Text Settings.
Formatting the date and time values
After linking your date and time field to an element, various date, time, and date/time formatting choices are available in the Format dropdown.

You can use the Date/Time field multiple times in your designs. This allows for crafting unique layouts and designs to exhibit segmented portions of a date (days, months, and years) and time (hours). You can achieve this by linking multiple text elements to different date/time segments. For instance, link one to the day, another to the month, and a third one to the year.
Filtering a Collection list with the time/date field
If you aim to create a Collection list of forthcoming events, for example, you can apply a filter utilizing the time/date field to display future events while concealing past ones. To achieve this:
- Select the Collection list requiring the filter
- Access the Settings panel (D)
- Add a Filter within Collection list settings
- Select your time & date field in the initial dropdown
- Opt for Is after or equal to
- Specify the number of days as 0 (to signify filtering for today)
- Save
The filter conditions that can be utilized with the time/date field values include:
- Is Set: Seeks Collection items with a defined date for this date field
- Is Not Set: Locates Collection items lacking a specified date for this field
- Is after or equal to: Filters items set on or after the chosen date
- Is before or equal to: Filters items set on or before the chosen date.
For “Is after/before or equal to,” you can:
- Select the time frame (days, weeks, months, or years)
- Choose whether the date is set “in the past” or “in the future”
To create a date range for filtering, designate a start and end date for your range. For instance, to filter from 2 weeks before to 2 weeks after:
- Select the Collection list for filtering
- Access the Settings panel(D)
- Include a Screen within Assembly list configurations
- Pick your information & time field in the primary dropdown menu
- Select Is after or equal to
- Establish the quantity to 2, the duration to weeks, and formerly
- Preserve
- Integrate a second Display
- Pick your meeting & time field again
- Select Is before or equal to
- Determine the quantity to 2, the duration to weeks, and in the future
- Preserve
This duo of date screens will establish a series where only the items with dates within the two screens will be exhibited in your assembly list.
Get further details on filtering Assembly Lists.
Arranging a Group list utilizing the date and time field
You can also organize a Group list by date and time:
- Select the Group list you wish to sift
- Head to the Configurations panel (D)
- Add a Sequence under Assembly List Configurations
- Pick your date & time field in the primary dropdown menu
- Opt for the sequence in the secondary dropdown menu: oldest to newest, or newest to oldest
- Press Preserve
Establishing provisional perception utilizing the date and time field
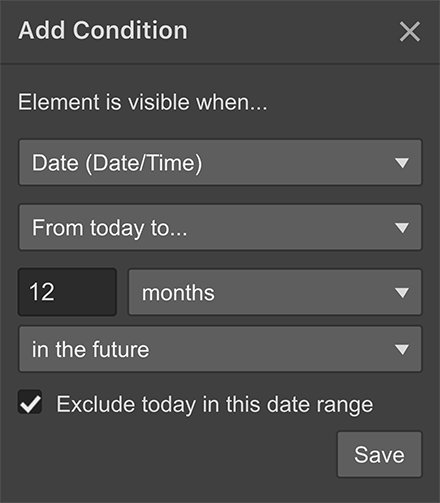
By applying the date screen, you are obscuring Group components that fail to adhere to a particular date range. With provisional perception, you can select to disclose or conceal particular elements, e.g., an impending event label, within your design by choosing a perceptibility regulation.
- Select the impending event label
- Head to the Configurations panel (D)
- Add a State (when this element is exposed) under Provisional perceptibility
- Pick your date & time field in the primary dropdown menu
- Select Is after or equal to
- Determine the quantity of days, months, or years (select 0 days to include today)
- Select in the Future
- Press Preserve
Get further details on provisional perception.

- Include or eliminate Workspace spots and members - April 15, 2024
- Centering box summary - April 15, 2024
- Store a site for future reference - April 15, 2024
