The email address field is a Collection field that allows you to specify an email address for a Collection item. The email addresses provided in this field can be shown in Collection List or a Collection Page as text. Similar to a link field, an email address field can serve as a link for visitors to easily send an email. You can also utilize the email field for filtering a collection list or setting conditional visibility on elements within collection lists and pages.
Usual applications
- Email address of a team member, customer service, departments, and more.
- Incorporating links to these email addresses on the website.
Covered in this module
- Establishing an email address field
- Inserting content into an email field
- Linking email fields with text
- Associating email fields with email links
- Filtering a Collection list via the email field
- Defining conditional visibility using the email field
Establishing an email address field
You can introduce an Email field to a brand new or pre-existing Collection. When setting up the Collection, click on New Field and then select the Email field.

Inserting content in an email address field
You can input any valid email address into this field.
Handy Hint
You can also include inline email links with the rich text field.
Linking email fields with text
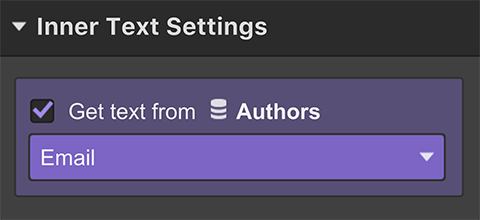
You can associate an email address with any text element in a Collection list or a Collection page:
- Add a text element in your collection list or page
- Tick the Get text from box in the Inner Text Settings
- Choose the email field from the field dropdown
You can also access the Inner Text Settings by selecting the text element and either clicking on the settings icon next to the element label on the canvas or going to the Settings panel (D).

Linking email fields to email links
You can also correlate an email address with a link element, including a button. This link will prompt an Email using the Email address for the corresponding collection item. To form a dynamic email link:
- Include a link element in your collection list or page
- Opt for Email in the Link Settings
- Select Get email from
- Pick the email field from the field dropdown
You can also access the Link Settings by choosing the link element and either clicking on the settings icon next to the element label on the canvas or accessing the Settings panel (D).
You can revoke any of these relationships by unchecking the respective option.
Necessary to grasp
When a link is associated with the dynamic email field, any email address in the email field in the link settings will be overridden by the dynamic email address designated for collection items.
Filtering a Collection list with the email address field
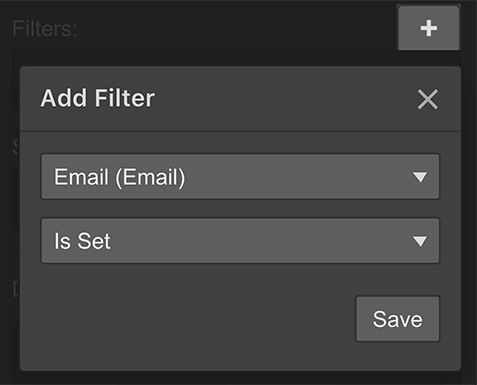
You can filter a Collection list using the email field by specifying any of the subsequent guidelines: Equals, Does not equal, Is set, Is not set.
- Choose the Collection list you wish to filter
- Navigate to the Settings panel (D)
- Add a Filter under Collection List Settings
- Pick your email field in the initial dropdown
- Select a rule in the second field
- Assign a value if applicable
- Tap on Save

The filter criteria available for the email field and values are:
- Equals – locates Collection items with an email address that matches the value stipulated for this rule
- Does Not Equal – identifies Collection items with an email address different from the value specified for this rule
- Is Set – looks for Collection items with an email address assigned to this email field
- Is Not Set – searches for Collection items lacking an email address for this email field
Defining conditional visibility with the email address field
You can establish a conditional visibility rule on an email button within your Collection list or page. This guarantees that the button is only visible when an email address is allocated in the email field for that Collection item.
- Choose the email button connected to the email field
- Access the Settings panel (D)
- Include a Condition (when this element is visible) under Conditional visibility
- Choose your email field in the first dropdown
- Select Is set in the second dropdown
- Press Save
- Include or eliminate Workspace spots and members - April 15, 2024
- Centering box summary - April 15, 2024
- Store a site for future reference - April 15, 2024
