As a part of our series discussing After Effects and Lottie in Webflow, we developed a small cardboard box that was animated using After Effects. In this guide, we are going to configure the box to animate on the web by opening it upon scrolling into view and closing it upon scrolling out of view.
We will accomplish this in three simple steps:
- Include the animation
- Establish the trigger
- Configure the animation
Include the animation
You will have to export your Lottie animation from After Effects and import it into your Webflow project. We exported the box using Bodymovin. Follow steps 3 and 4 of our comprehensive tutorial for a full walkthrough on how to do this.
For this particular project, you will need to create two sections — refer to our Section tutorial or duplicate the project.
To locate and insert the animation, utilize the image icon in the Assets panel located in the left toolbar and drag the box onto the Canvas between the two sections.
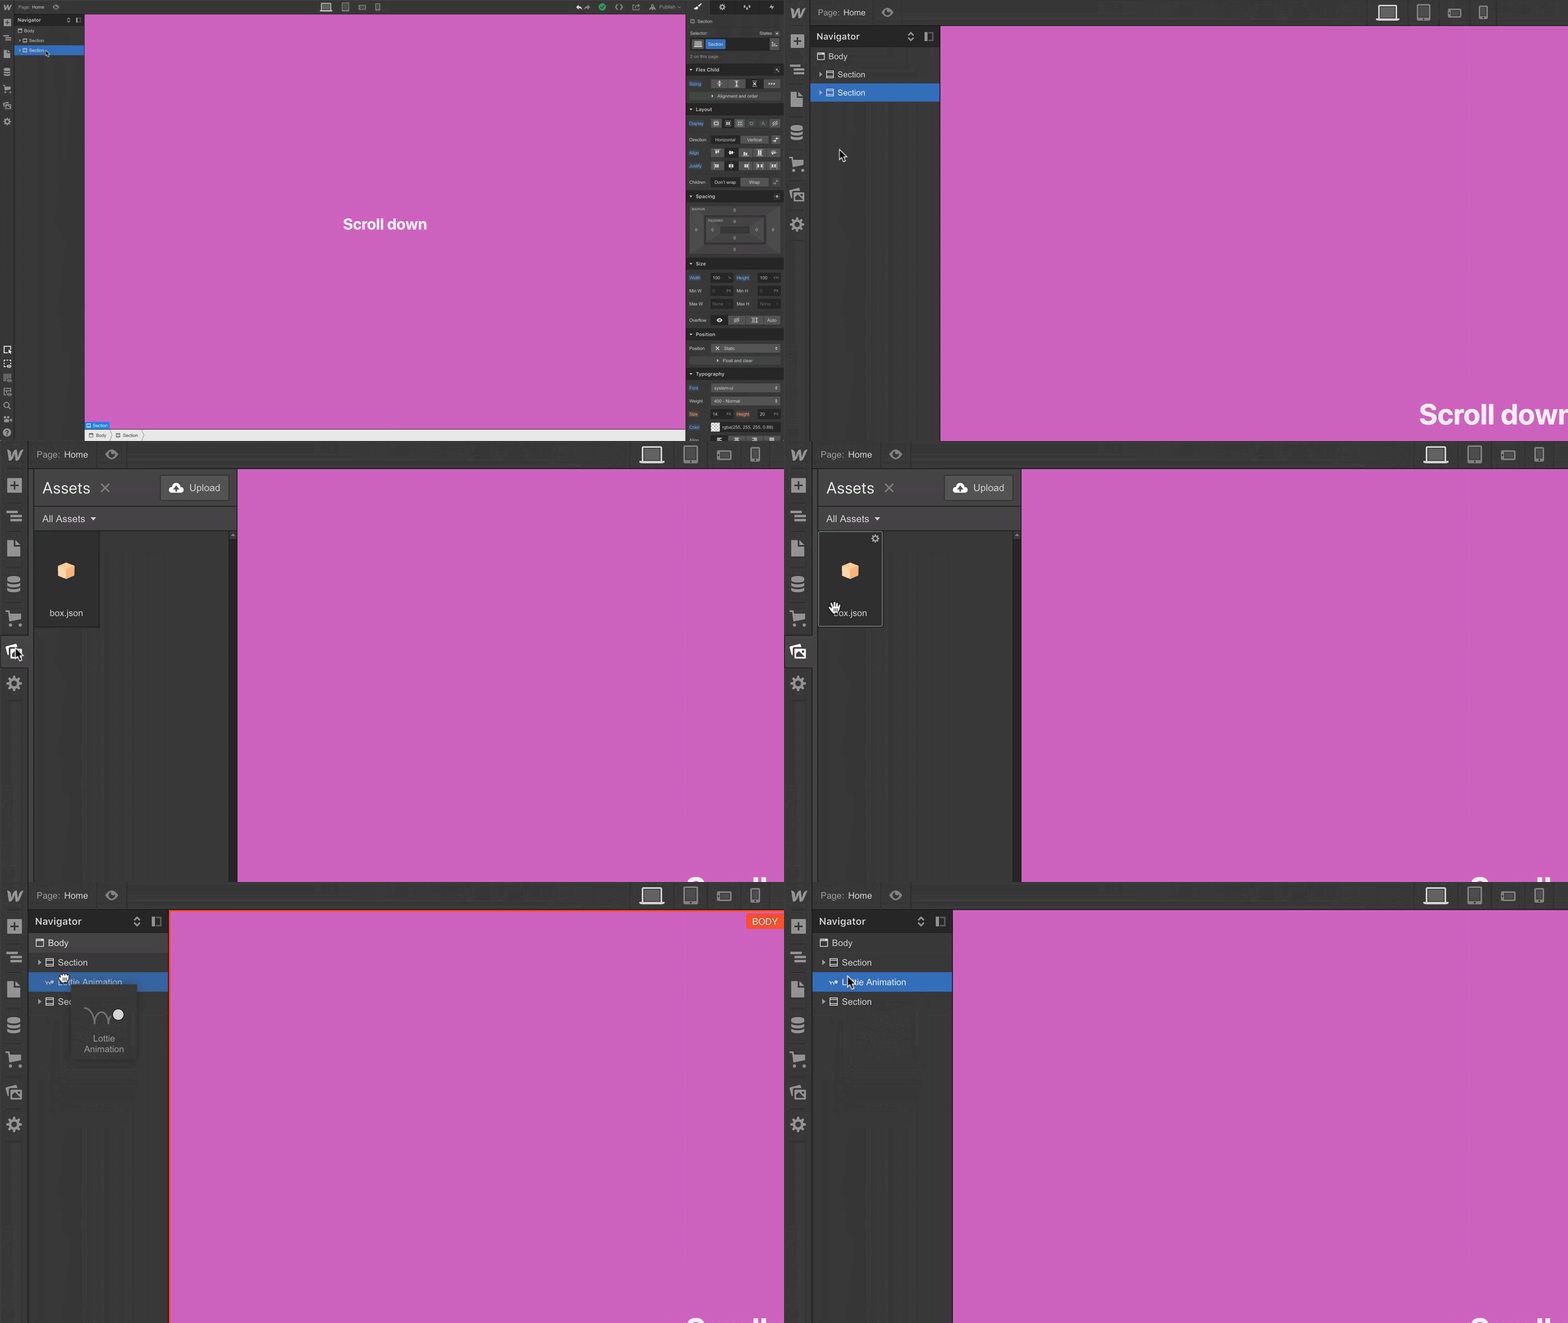
Due to each section’s height matching our viewport, let’s adjust the size of our cardboard box to be quite small (about 100 pixels).

First step completed! Let’s move on to setting up the trigger.
Establish the trigger
Prior to adding our trigger, we need to ensure that the animation (and not another element) is selected.

We desire the animation to be activated when the selected element (our Lottie animation, the box) enters the viewport. Within the Interactions panel in the right toolbar, open the Element trigger menu and select Scroll into view.
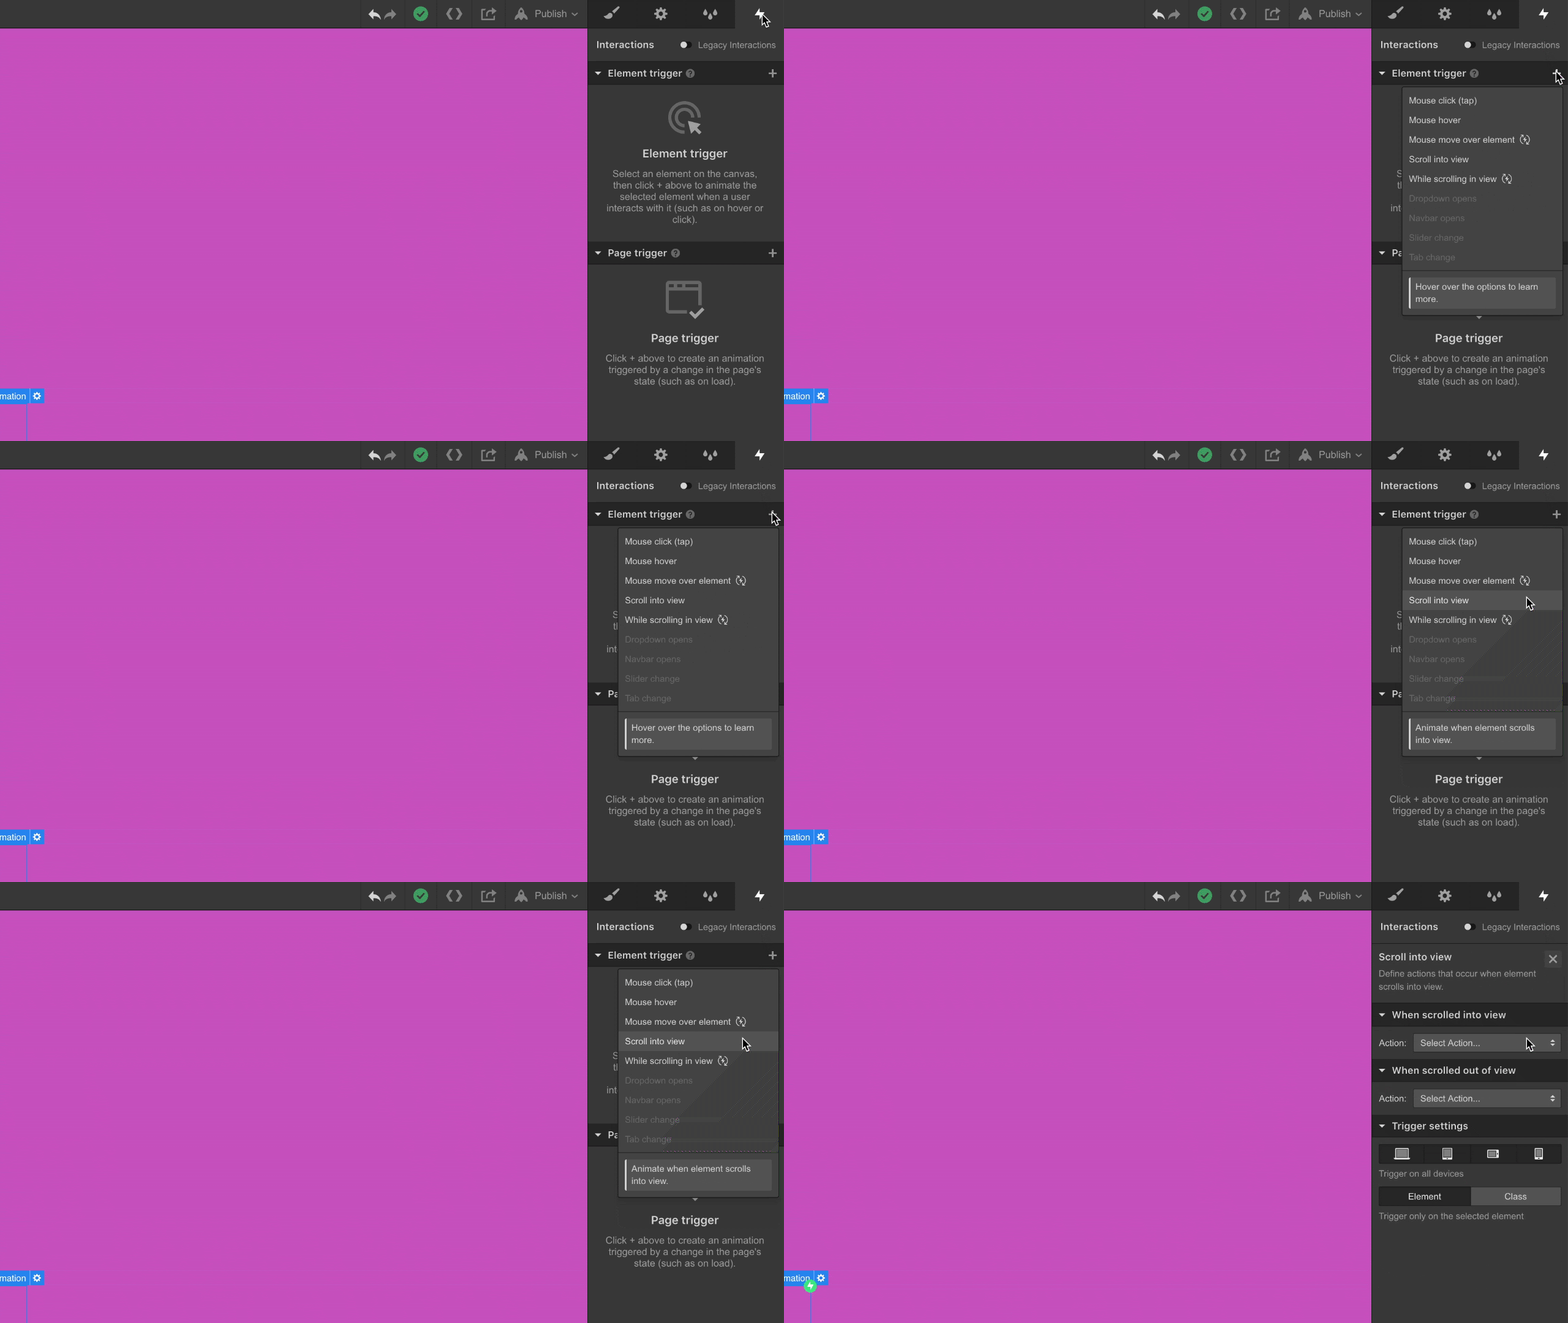
Remain in the Interactions panel to configure the animation in our final step.
Configure the animation
Once our selected element is in view, we want the Lottie animation to start playing.
In the Interactions panel under When scrolled into view, select Lottie Playback from the Action menu.

Upon scrolling back to the beginning of the page and clicking preview (the eye icon at the top left corner), you will observe the cardboard box opening as it enters the view — as expected. However, scrolling back up and then down will still keep the box in an open state.
Thus, our next step involves configuring our Lottie animation to play forward and then reverse (so the box reverts to a closed state) when the box scrolls back out of view. To accomplish this, in the Interactions panel under When scrolled out of view, select Lottie Playback from the Action menu. To animate the box back into a closed state, choose Reverse.
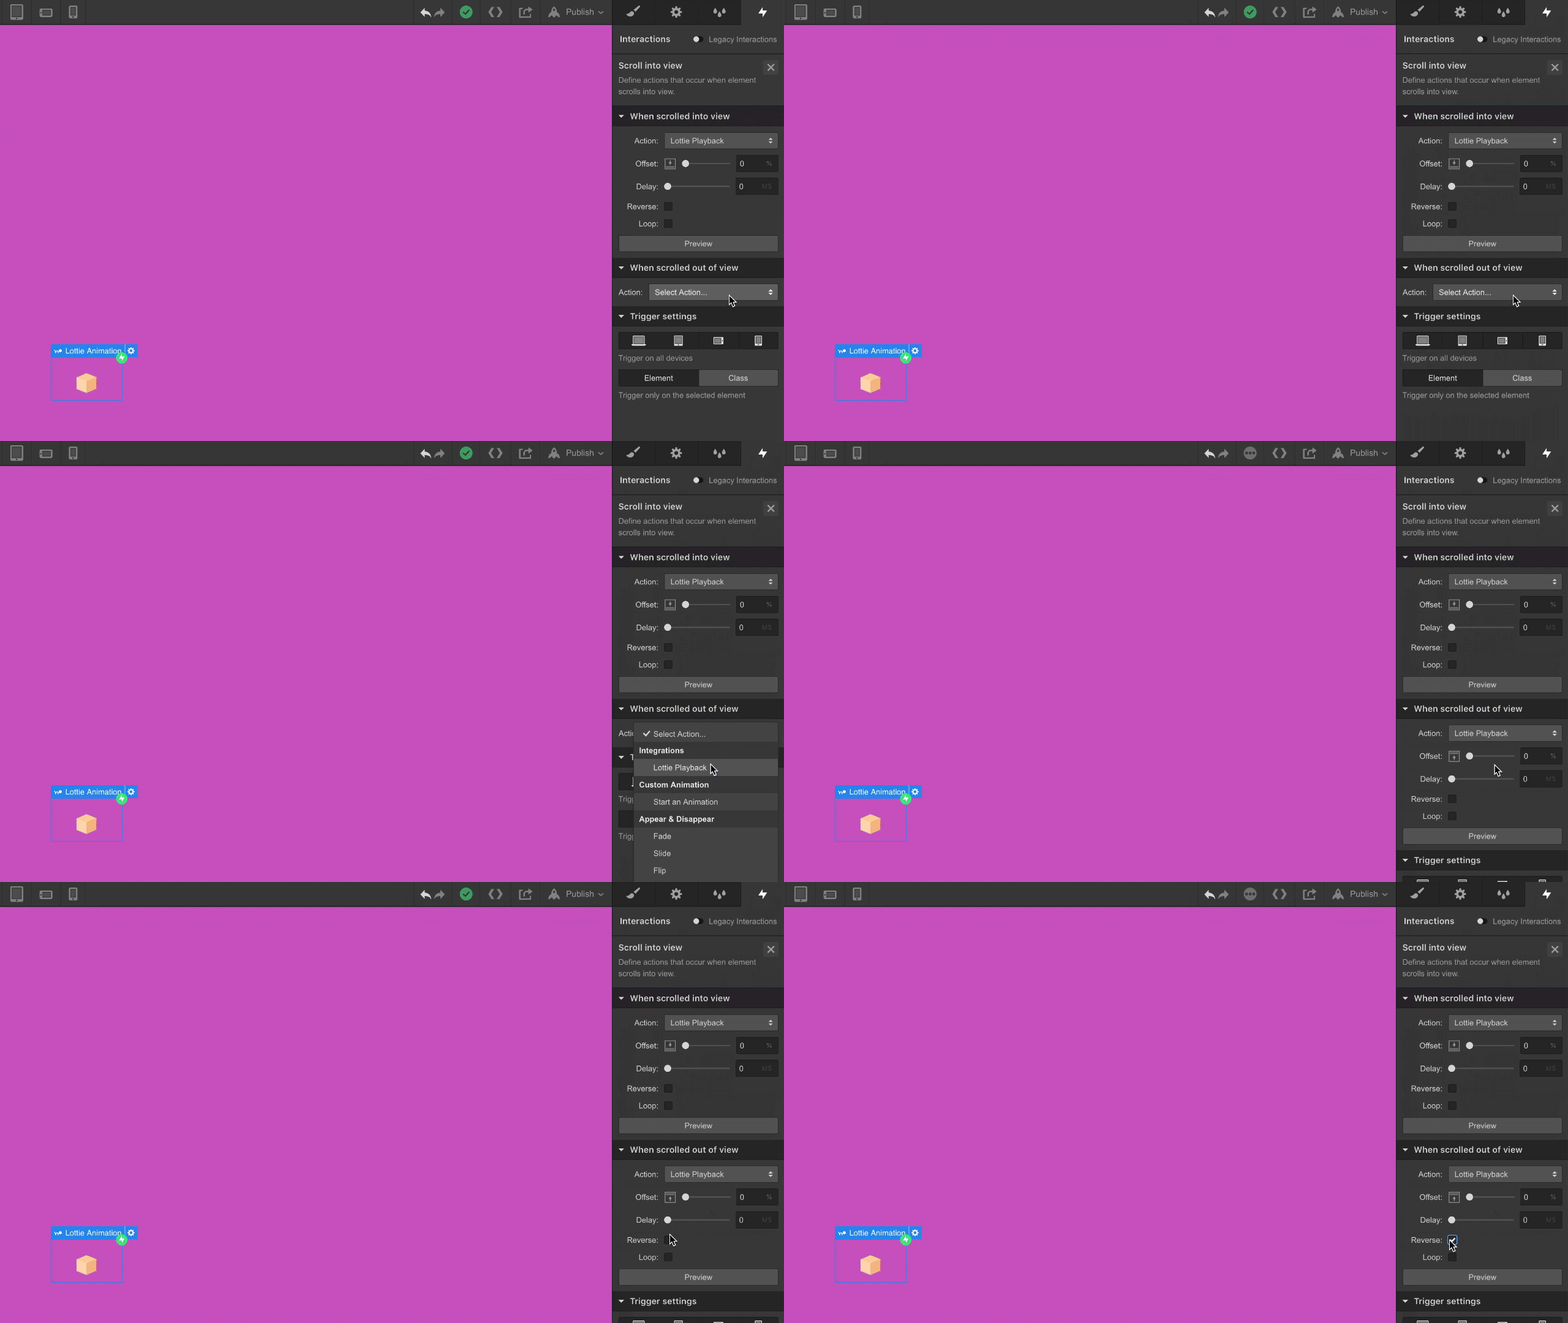
After all this effort, we must ensure that this animation doesn’t go unnoticed — let’s introduce an offset so the animation triggers only when it reaches a specific point on the page. While still within the Interactions panel, include a 10% Offset for both When scrolled into view and When scrolled out of view.
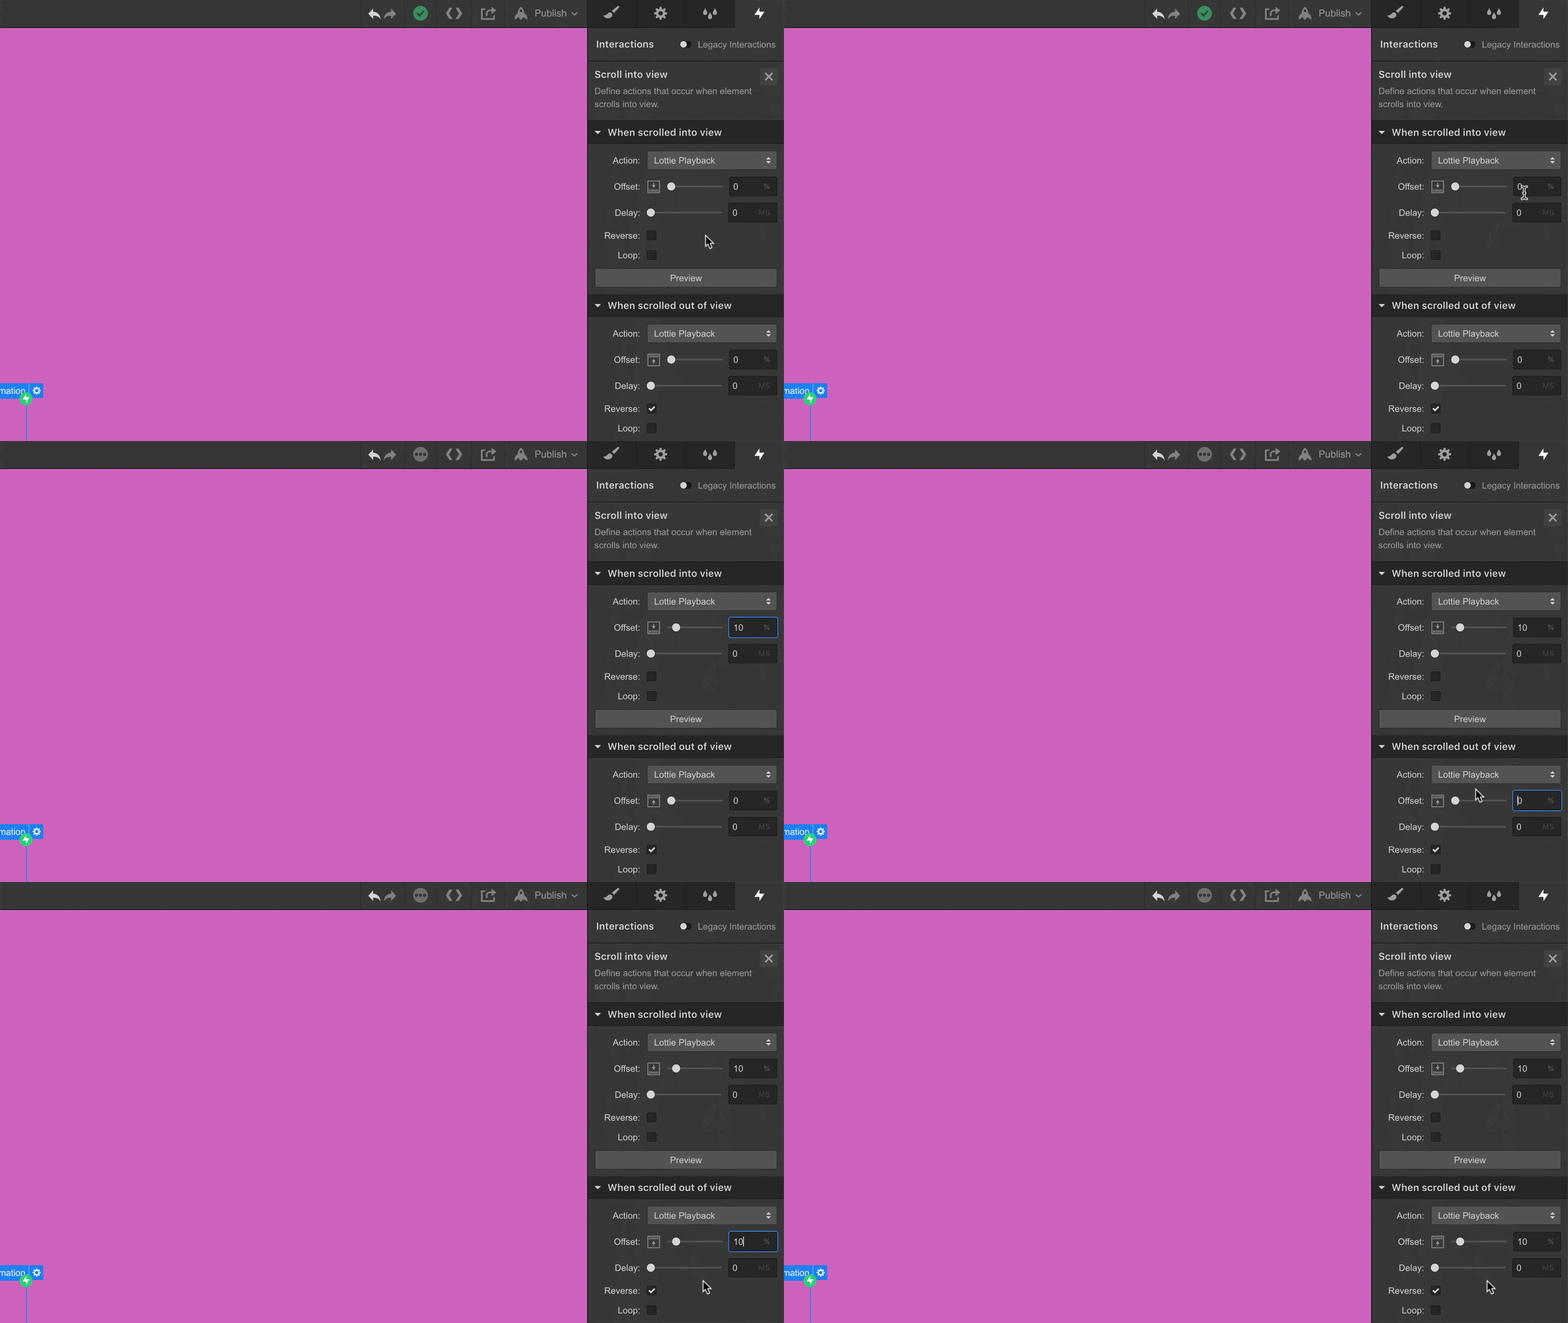
Now, when you hit preview, start from the top and scroll a bit, and you’ll notice the box remains closed… until it hits that 10% threshold, triggering it to open. Furthermore, if you scroll back to the point where it goes out of view, the animation will play in reverse once it reaches the 10% mark, exactly as we instructed it to. Well done!
We have added a Lottie animation, chosen our scroll-based trigger, and configured two animations: one for scrolling into view and the other for scrolling out of view. This means you have successfully set up an element to animate as it comes into and goes out of view.
Celebration time!
- Include or eliminate Workspace spots and members - April 15, 2024
- Centering box summary - April 15, 2024
- Store a site for future reference - April 15, 2024
