Through Airtable, you have the ability to generate and oversee databases of vital information for your enterprise. Logic enables you to transmit data, like contact details of a potential customer, from form submissions to Airtable, linking your Webflow website to your business database.
Prior to commencing: In case you haven’t done so already, create an Airtable account and an Airtable base. You’ll also need to integrate a form into your Webflow site with fields that match your Airtable table.
Within this tutorial, we will delve into:
- Steps to configure your Airtable API key
- Methods to establish authentication for your Logic flow
- Locating your Airtable documentation
- Setting up your HTTP request
- Testing and deploying your flow
- Troubleshooting any issues with your flow
Insider tip: Logic also facilitates the synchronization of data from Airtable to the Webflow CMS using either the Make HTTP request block or an Incoming webhook trigger. Delve deeper into the process of making HTTP requests with Logic.
Creating Your Airtable API Key
Similar to a password, an API key (referred to as an “access token” at times) identifies the site or application issuing an HTTP request to an API. An Airtable API key is essential for sending data to Airtable.
To generate your Airtable API key:
- Navigate to your Airtable dashboard
- Click on your profile icon and select Account
- Scroll to the API section and click on Create token
- Tap on Create new token
- Assign a name to your token
- Choose an action for this API key from the dropdown menu (at least data.records:write is required for sending data to Airtable)
- Select a base and designate the Airtable base where you wish to send data
- Click Create token, copy your API key, and ensure you keep this tab open!
Configuring Authentication for Your Logic Flow
- Launch your site in the Webflow Designer within a new tab
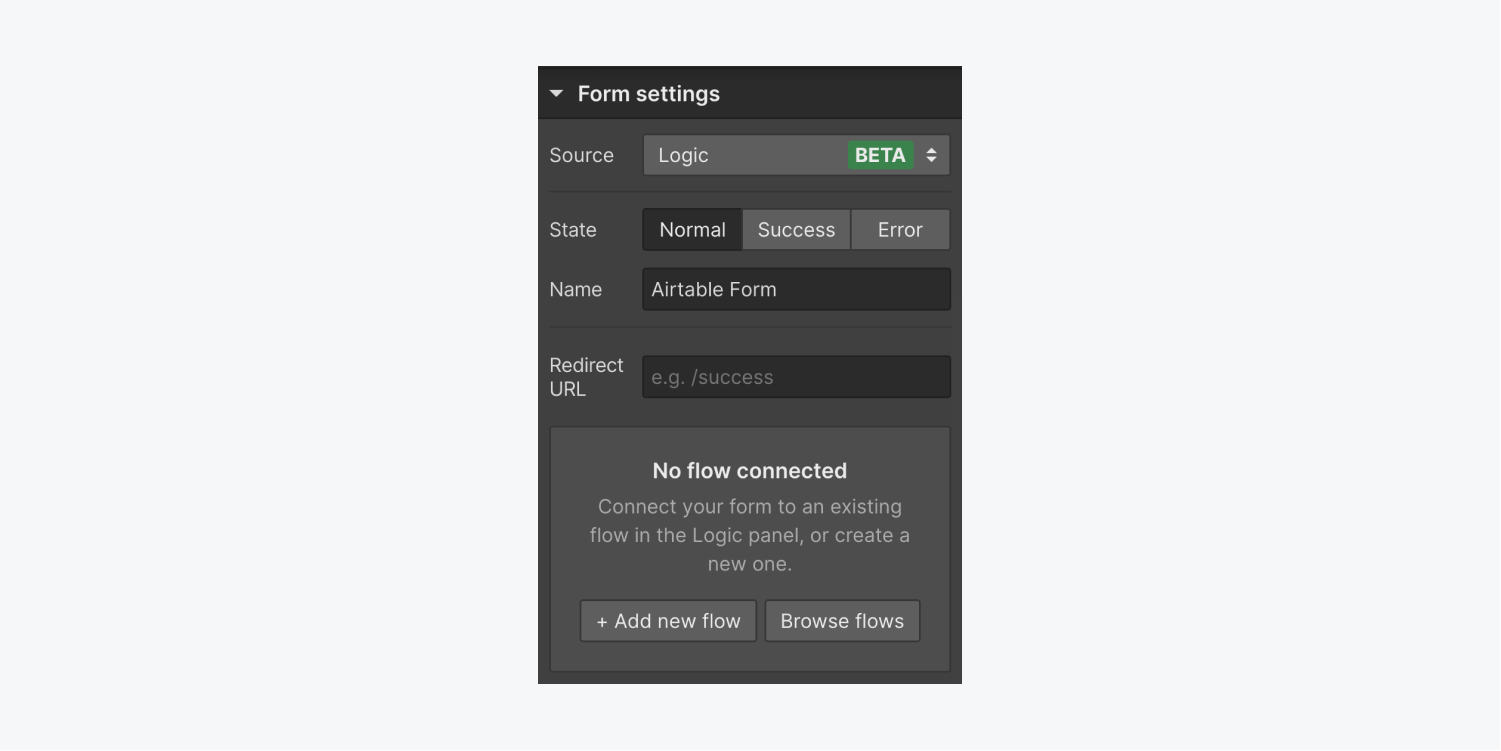
- Select your form on the Designer canvas and access Form settings
- Choose Logic from the Source dropdown
- Click Add new flow
- Name your new flow (e.g., “Forward leads to Airtable”) in the Name field and optionally add a description in the Description field
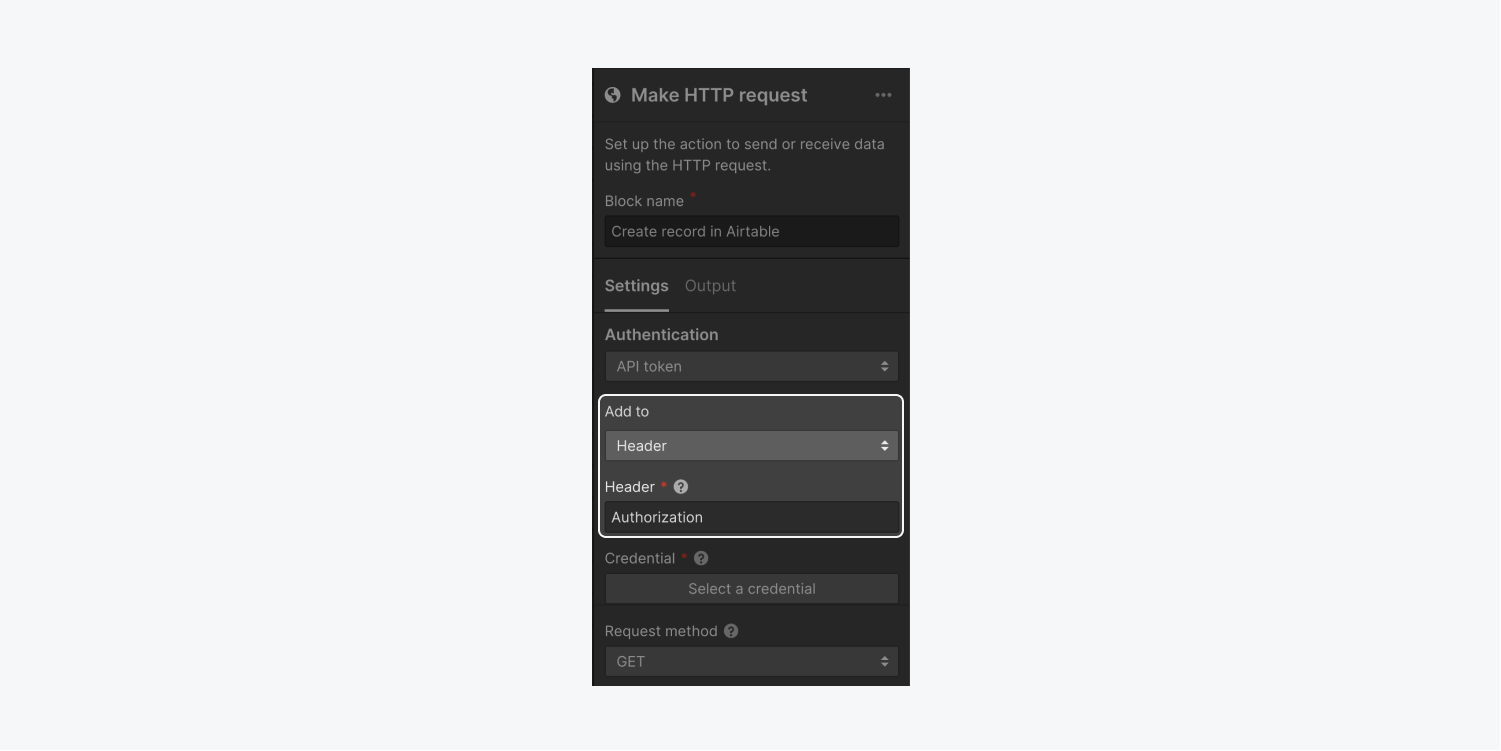
- Drag a Make HTTP request block to the flow editor canvas and provide a name (e.g., “Create new lead record in Airtable”)
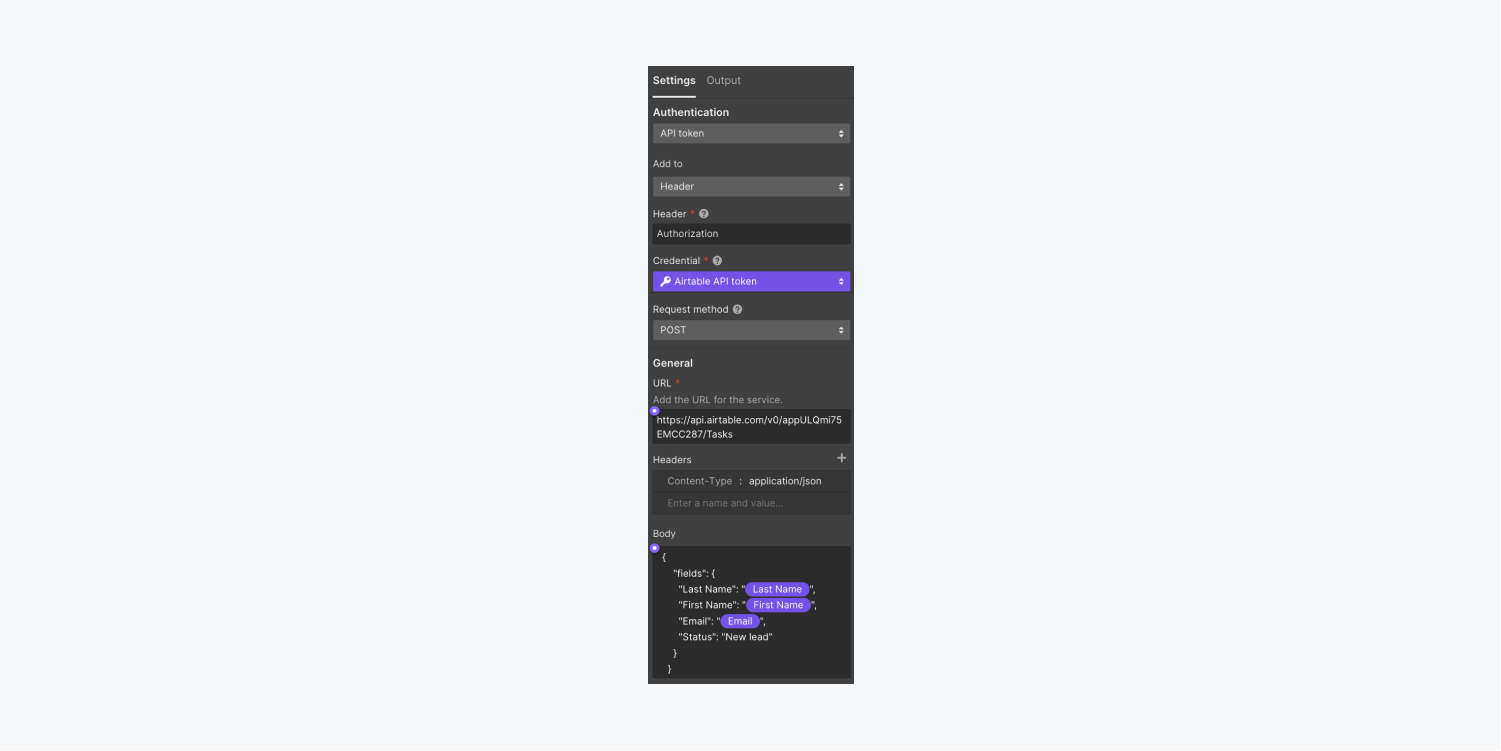
- Elect API token from the Authentication dropdown
- Opt for Header from the Add to dropdown
- Input “Authorization” into the Header field
- Click Select a credential > Add new credential
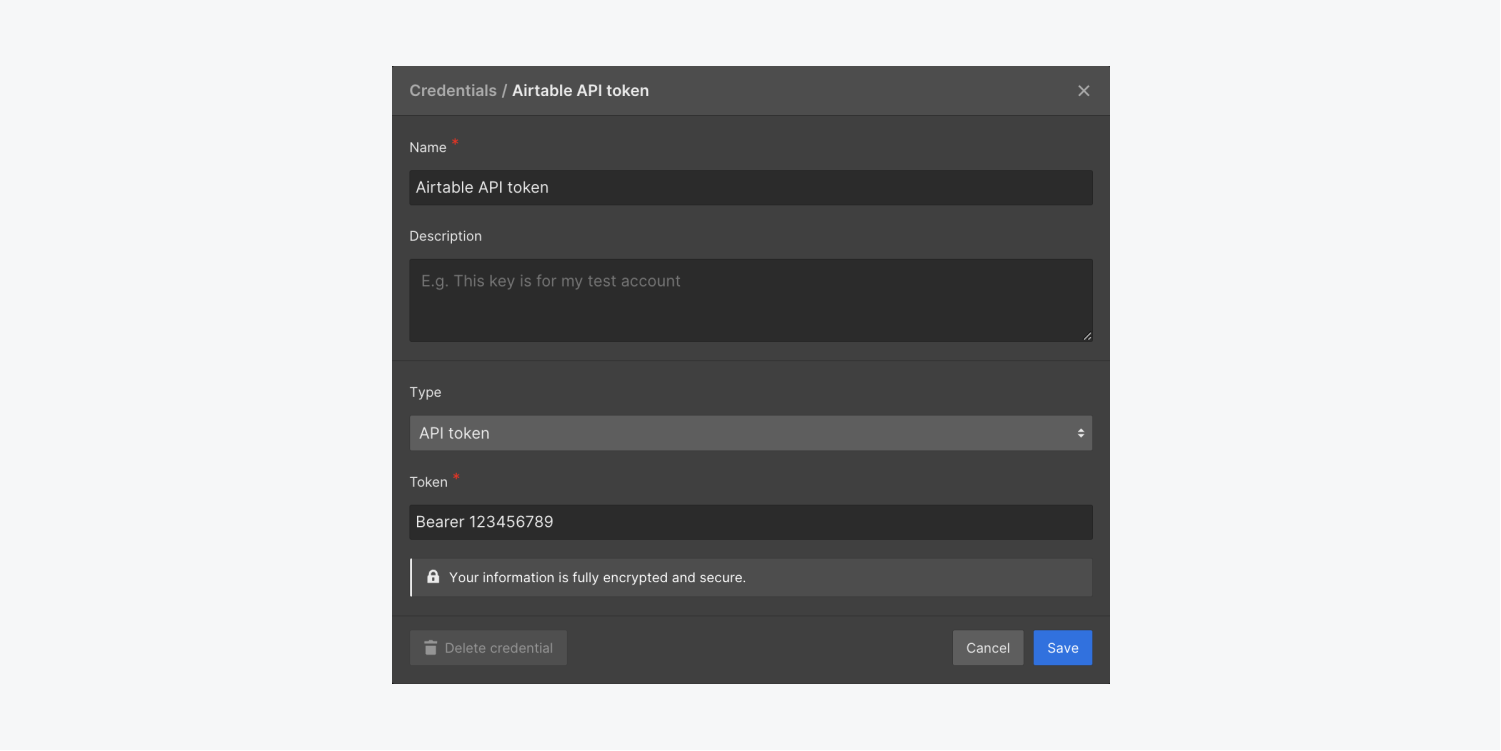
- Give your API token a designation (e.g., “Airtable API token”) in the Name field and optionally include a description in the Description field
- Enter “Bearer {API key}” in the Token field, replacing {API key} with the copied API key from Airtable
- Click Create to preserve the new credential and ensure you keep this tab open!
Pro hint: You also have the option to link your form to a new Logic flow through the Logic panel > Flows tab. Explore more about form submission triggers in Logic.
Finding Your Airtable Documentation
- Revisit your Airtable base
- Access Help and choose API documentation under Additional resources
- Select the table where you wish to create records
- Click on Create records — example API requests pertaining to your table will be visible on the right
Crucial: Airtable’s API documentation is tailored to each Airtable base, hence ensure that you’re working on the intended base for adding records.
Setting Up Your HTTP Request
Now that you’ve configured your Logic flow and Airtable authentication credentials, revisit Webflow to establish an HTTP request within your flow. This HTTP request setup will generate a fresh record in your Airtable table every time a visitor submits your site’s form.
Remember: In case you closed the tab where your Webflow site was open, navigate to Logic panel > Flows tab and select the flow configured in the prior steps. Click on the Make HTTP request block on the flow editor canvas to access block settings and follow the upcoming steps.
- Open the Request method dropdown and opt for POST
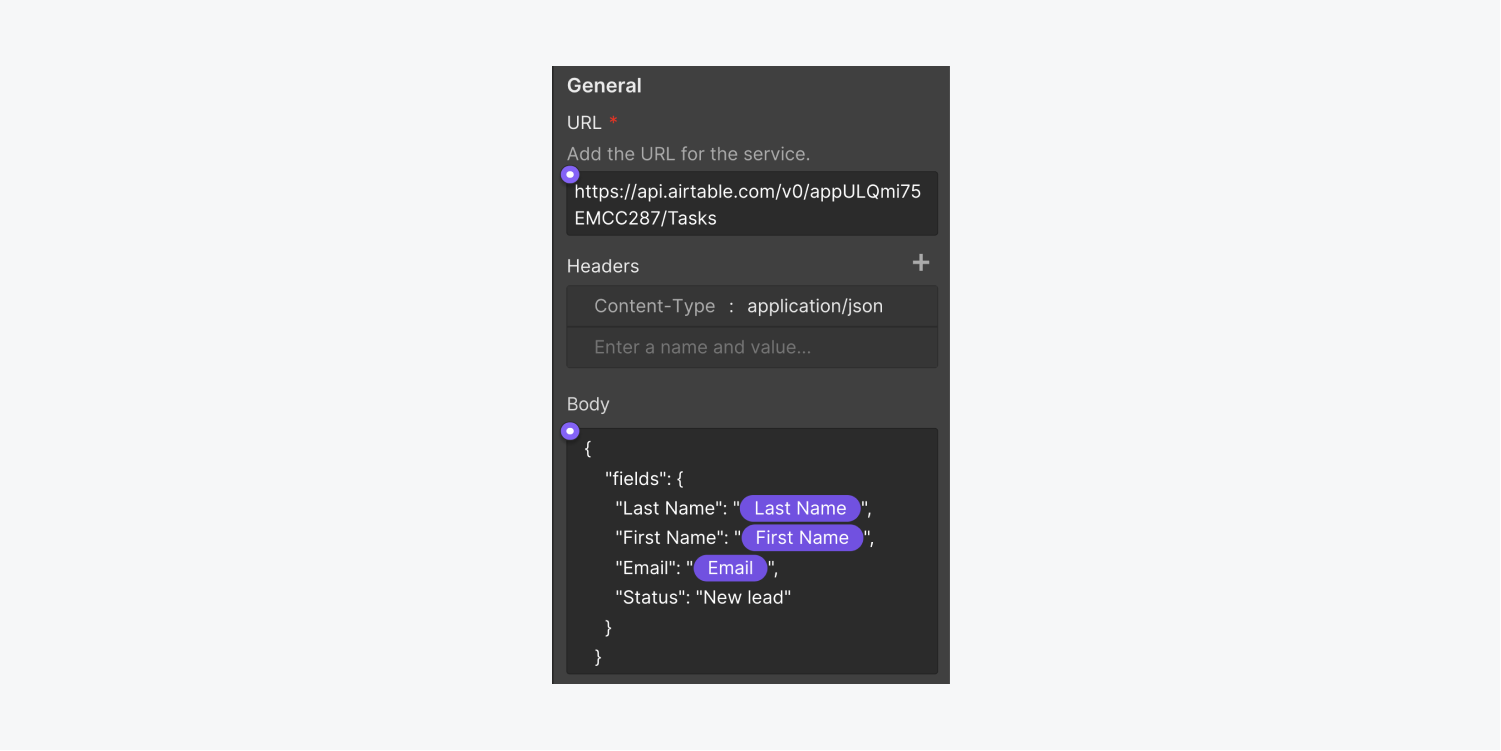
- Insert “https://api.airtable.com/v0/{id}/{name_of_table}” in the URL field, substituting {id} with your table ID and the {name_of_table}
- Provide the title for your table
- Press the “plus” symbol beside Headers to generate a fresh header
- Type “content-type” in the Name box and “application/json” in the Value box
- Insert the code block from your Airtable API documentation in the Body section — it will have a structure similar to this (but with data from your existing Airtable records):
Afterward, you’ll have to include live data in your HTTP request to capture details from your form submissions:
- Erase the values from your current Airtable record and position your cursor between the empty quotes in the Body area
- Tap on the violet “dot” icon and choose the related dynamic form field (for instance, name, email, etc.)
Essential: Ensure to encode any spaces or special characters in the table title in the URL section.
Steps for testing and putting your flow into action
- Press Run test to finish the setup
- Input sample values in the corresponding input box
- Press Run test
- Press Cancel or Apply data to close the testing window
- Hit Publish
- Click Stage flow for publish
- Publish your website
Reminder: If an error message pops up during the testing process, go through our troubleshooting steps, then repeat the above actions. Get more details about testing HTTP requests.
How to resolve problems with your flow
If you encounter an error while testing your flow, attempt the following steps:
- Ensure that you included “Bearer” (along with a space) before your API key when setting up your access credentials (for example, “Bearer 123456789”)
- Verify that your request URL has the accurate ID and name for your table
- Inspect for issues in your request body by using a complimentary tool like JSONLint
- Include or eliminate Workspace spots and members - April 15, 2024
- Centering box summary - April 15, 2024
- Store a site for future reference - April 15, 2024
