Memberships offer you the versatility to market recurring memberships to free or restricted content on your website, or to physical subscription services, like meal deliveries, or other tangible products that are delivered regularly. Customers who buy memberships from you can view and terminate their memberships, too.
Reminder: Discounts are not compatible with membership products, only one-time payment products. Memberships also necessitate Stripe. You must activate and link a Stripe account before you can utilize memberships and launch your site. Discover how to connect a Stripe account.
This guide will cover:
- How to establish a membership-based product
- How to include the Memberships element to your User account page
- How to comprehend the membership purchase flow for users
- How to personalize memberships emails
- How to oversee memberships
Creating a membership-based product
If you’re just starting with Webflow Ecommerce, you can initiate from scratch or pick a template. Discover more about Webflow Ecommerce.
Crucial: If you aim to sell membership-based products, you must first activate Ecommerce and User Accounts on your site, acquire an Ecommerce Site plan, connect your Stripe account, and allow checkout. Once you’ve enabled User Accounts, remember that deactivation or removal is not possible. You cannot delete User pages or Collections after activating User Accounts. Additionally, you cannot reuse the reserved URL slugs (e.g., /log-in, /sign-up, etc.) employed for User pages. Only enable User Accounts if you are certain you want to include user support on your site. For testing purposes, it’s recommended to create a trial site. Find out more about User Accounts.
Valuable Information: Membership products contribute to Ecommerce restrictions.
Once Ecommerce and User Accounts are enabled, you can set up a product with a membership billing method in the Designer of your site. The membership billing method allows you to establish a recurring fee for products or services, and users purchasing a membership-based product can view or cancel their memberships in their distinctive user account on the User account page if the Membership element is available.
To create a membership-based product:
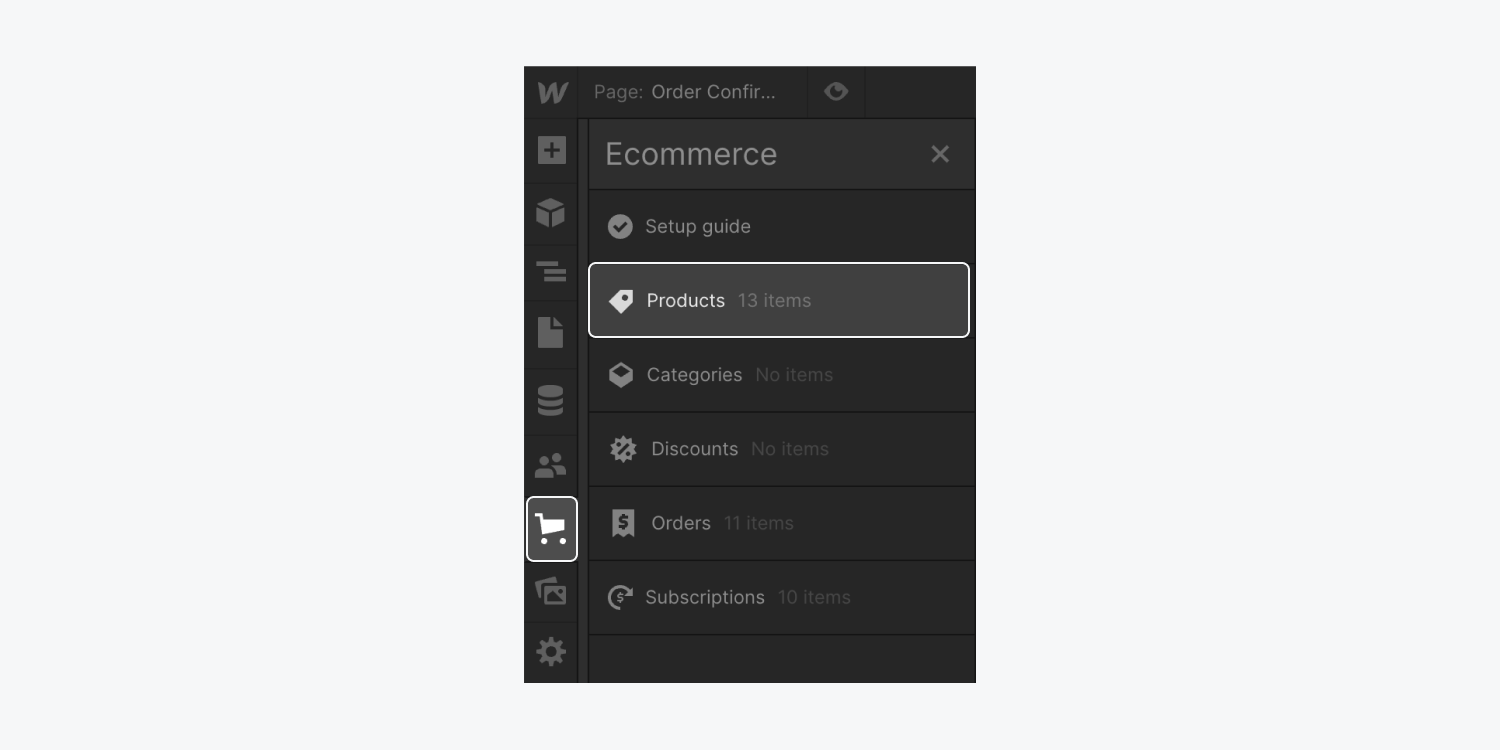
- Tap on the Ecommerce “cart” icon in the left panel
- Select the Products option in the Ecommerce section
- Pick an existing product or generate a new one by selecting New Product
- Designate any Product type (e.g., physical, digital, etc.)
- Navigate to the Billing section and opt for membership as the billing method
- Specify the Billing period (e.g., day, week, month, or year)
- Complete any other relevant fields for the product
- Click on Create to establish your new product, or select Save to update an existing product
- Publish your site to make your changes live

Reminder: If the Billing method option is not visible for your product, there might be product variations in place. To modify the billing method for product variants, scroll down to the Variants section and click on the settings “cog” icon for the variant you wish to edit. Select your Billing method as “membership,” and define your Billing period.
Incorporating a “start subscription” button to your site
Reminder: If you’ve designated the Billing method as “membership” for any of your products, upon site publishing Webflow automatically conceals the “Add to cart” and “Purchase now” buttons in the Add to cart element for those membership products.
You can integrate an Add to cart element to Collection lists linked to your “products” Collection. This allows shoppers to swiftly buy memberships from any of your product collection lists on your homepage and other pages.
You can also position an Add to cart element on your products template page. Find out more about the Add to cart element.
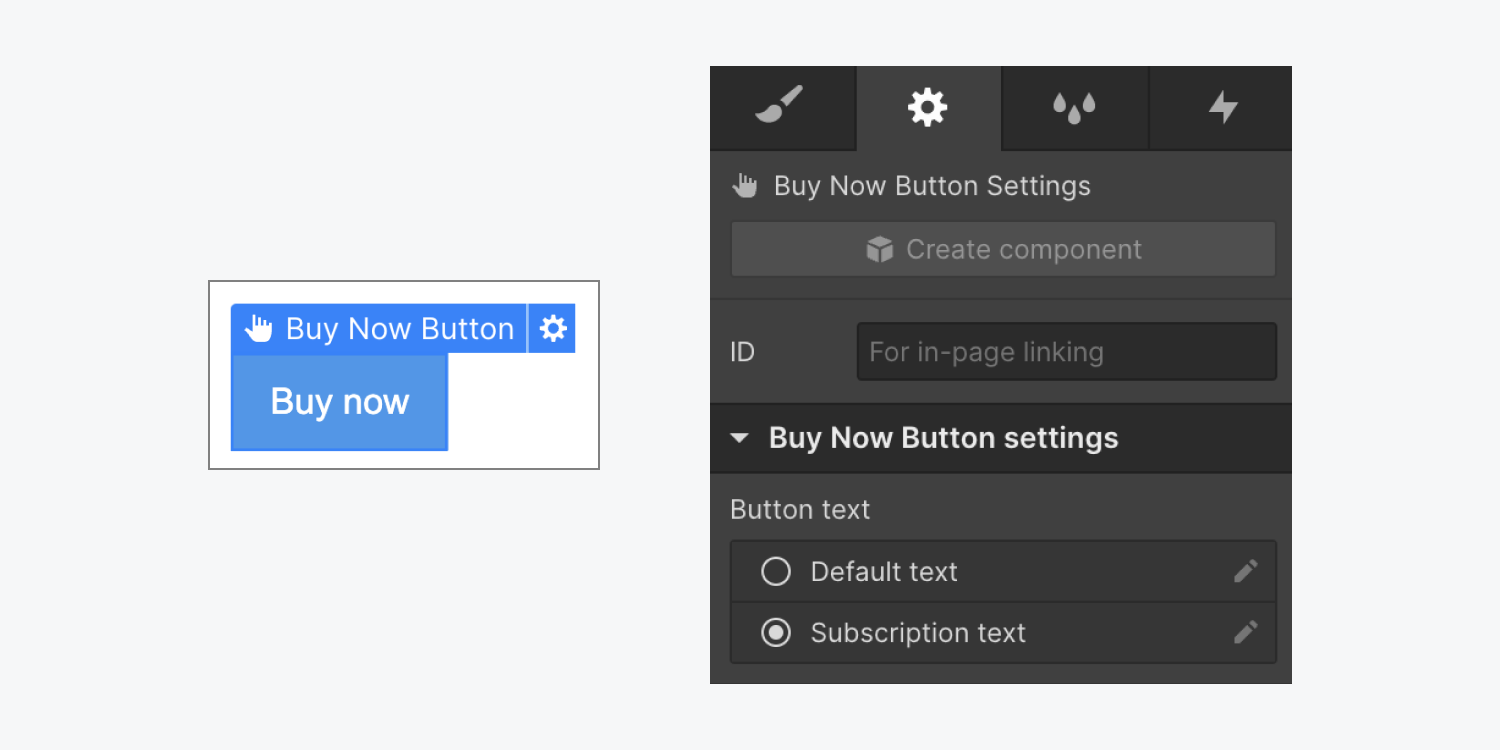
Upon publishing your site, if you’ve set the Billing method as “membership” for any of your products, Webflow automatically swaps the default button text (e.g., “Purchase now”) with subscription text (e.g., “Start subscription now”) for those membership products. Non-membership products retain the default “Purchase now” text.
To tailor the default subscription text:
- Choose the “Purchase now” button on the Webflow canvas
- Unlock Element settings panel > Purchase now button settings
- Opt for “Subscription text” and tap the “pencil” icon
- Amend the text and Save your adjustments

If you preference is to revert to the default button text, tap on “Restore default” at the base of the “Edit text” modal window.
Crucial: Since the “Add to cart” button automatically hides upon site publishing, refrain from hiding the “Start subscription now” button as well, or your customers won’t be able to purchase membership products.
Incorporating the Memberships element to your User account page
Reminder: If Ecommerce was enabled on your site prior to User Accounts, the Membership element is automatically appended to the User account page.
The Memberships element can solely be appended to the User account page. It can be utilized to display to your users the active memberships linked to their account, the purchase date, and the forthcoming billing date. Users can also terminate active memberships and receive a record of that alteration in their account.
In case a user cancels a membership, the cancellation takes immediate effect, and any content controlled via an access group remains inaccessible till the end of their last billing date. For example, a user might subscribe to content on June 1 with a monthly billing period, effectively granting
Grant the member access from June 1 through June 30. If the individual opts to terminate their membership on June 3, their access will be promptly revoked, and they will not be able to view their content for the remainder of June.
To insert the Element of Subscriptions into the User account page (if it’s not already present on the page):
- Navigate to the Page panel > User pages and launch the User account page
- Access the Add panel > Ecommerce
- Drag the Subscriptions Element onto the User account page
Customize the Subscriptions Element and its related elements as desired, then publish your website.
Although it is possible to remove the Subscriptions Element from the User account page, we suggest retaining it to facilitate user access to view or terminate their memberships, and we advise offering visitors a clear path to reach the user account page (e.g., via a button or a hyperlink).
Important: You must be in Designer mode with the User account page open to interact with the Subscriptions Element. Only 1 Subscriptions Element can be placed on the User account page.
Grasping the flow of user subscription purchases
Important: Clients can only purchase a single subscription of each type available. (The “Join now” button will be inactive if they have already subscribed to that service and it is actively billed in their account.)
When a visitor intends to buy a subscription from you, they will need to undergo several steps after clicking the “Subscribe now” button:
The checkout process varies based on whether:
- The user is logged into your website
- The user has an account but is not logged in to your site
- The user has not yet registered for an account on your website
The user is logged into your site
Upon selecting the “Subscribe now” button, if the user is logged into your site, they will proceed to the checkout process to finalize their purchase.
The user has an account but is not logged in to your site
Upon selecting the “Subscribe now” button, if the user possesses an account but is not logged in, they will be directed to the registration page. Here, they can opt to sign in to their account.
Post logging in, they will be redirected to the page exhibiting the subscription they intended to buy.
They will need to click “Subscribe now” again to acquire the subscription, subsequently entering the checkout process to complete the transaction.
The user has not yet registered for an account on your site
Upon selecting the “Subscribe now” button, if the user does not have an existing account on your site, they will be forwarded to the registration page.
Before proceeding with their subscription purchase, they must create an account. To register, they need to:
- Input their details into all mandatory fields on the registration page
- Select “Sign up”
Post registering an account on your website, they will be prompted to validate their account via the verification email sent automatically. Get more insights on customizing User Accounts emails.
Upon successfully confirming their email by activating their account, they will receive notification that their account has been successfully created, and they will be automatically logged in.
Subsequent to their auto-login, they will be directed back to the page advertising the subscription they wanted to purchase. They will need to click “Subscribe now” again to finalize the purchase, proceeding to the checkout process to finish the transaction.
Worth noting: Customers cannot buy a subscription along with other items. A subscription purchase must be a standalone transaction.
Customizing subscription-related emails
To modify the email dispatched to your clients regarding subscriptions:
- Tap on the Settings “cog” icon in the left panel
- Opt for Email within the Settings section
- Scroll down to Ecommerce emails > Subscription in the Email section
- Click on Payment failed, Payment successful, or Subscription canceled and make the necessary modifications
Additionally, you can adjust the titles and other textual components in Subscription email templates enabling customization of the content users will receive. Depending on the email template being edited, dynamic fields such as the following can be utilized to populate the email subject and other variables:
- Client name
- Shop name
- Subscription title
- Subscription cost
- Purchased on
- Subscription canceled on
- Current billing date
- Next billing date
- Credit card failed date
Note: The Payment successful email will be transmitted to the user independently from the Order Confirmation email (located under Ecommerce emails > Order), and will be dispatched only after the subscription has been renewed and the payment is successfully processed.
Supervising subscriptions
Monitoring and overseeing subscriptions and their corresponding orders can be done within the Designer.
Note: Subscriptions cannot be managed or viewed within the Editor. Nonetheless, they can be observed in edit mode.
With each successful subscription purchase, an “order received” email is sent to the shop supervisor(s). Orders can be viewed in the Orders tab of the Designer and Editor. Here, shop supervisors can gain insights into the total number of received orders, overall revenue from sales, average order value, and average order size. Explore further about Webflow’s Orders tab.
While operating in the Designer, navigate to the Ecommerce panel > Subscriptions to peruse a list of acquired subscriptions. This display provides an overview of each subscription’s details, covering:
- Order number
- Status
- Customer
- Purchased on
- Last billing
- Next billing
- Total
Users can sort their view by subscription status, including:
- Active
- Past due
- Unpaid
- Canceled
For further refinement of the subscription roster, filtering by order number is available.
Terminating a subscription
There might be instances where you need to cancel subscriptions due to user requests, deletion of an access group, or transitioning an access group from paid to free. Subscriptions can be canceled individually or in bulk.
To annul an individual subscription:
- Access the Ecommerce panel > Subscriptions
- Select the subscription you wish to cancel
- Click on “Cancel subscription” and confirm your decision
For bulk subscription cancellations:
- Navigate to the Ecommerce panel > Subscriptions
- Select Select and tick the checkbox adjacent to each subscription you wish to cancel, or mark the checkbox next to Order Number to choose all subscriptions
- Click on “Cancel subscriptions” and confirm your choice
Note: Cancelling a subscription does not automatically trigger a refund for the user. A refund must be manually processed. Find out more about refunding clients.
Users also possess the capability to end their memberships if a Subscriptions Element has been integrated into the User account page.
Worth knowing: If a subscription-based item is deleted from your products Collection, it will not automatically nullify a user’s active billed subscription linked to that product. Ongoing subscriptions persist even after the item has been removed and the website is republished. This feature enables honoring existing subscriptions while discontinuing new sign-ups. Explicitly canceling subscriptions is necessary to remove active subscriptions. However, you cannot disengage Stripe if there are active billed subscriptions.
Learn more
- Overview of User Accounts
- User pages insights
- Customizing User Accounts emails
- Adding and supervising products and categories
- Include or eliminate Workspace spots and members - April 15, 2024
- Centering box summary - April 15, 2024
- Store a site for future reference - April 15, 2024

