HubSpot is a widely-used Customer Relationship Management (CRM) system where you can monitor customer data and optimize sales and marketing strategies. By utilizing Logic, you can efficiently transfer contacts from a form submission to Hubspot and integrate your Webflow portal with your CRM.
To begin: If you have not done so already, set up an account on HubSpot. Additionally, ensure you have included a form on your Webflow site with fields that align with the required fields in HubSpot.
Within this tutorial, we will discuss:
- The process for generating your HubSpot API key
- Setting up the authentication for your Logic workflow
- Locating the HubSpot API documentation
- Configuring the HTTP request settings
- Testing and deploying your workflow
- Troubleshooting potential issues with your workflow
Generating your HubSpot API key
Keep in mind: HubSpot offers a choice between 2 authentication methods (OAuth and private app access tokens). This guide focuses on the private app access tokens method.
- Access your HubSpot account and proceed to create a private app, if not done already
- Select the Scopes tab and indicate the actions you intend to perform using this API key under the CRM dropdown (ensure to pick at least crm.objects.contacts.write to send contacts to Hubspot)
- Click Show token and copy your API key
Configuring the authentication for your Logic workflow
- Open your Webflow site in the Webflow Designer by launching a new tab
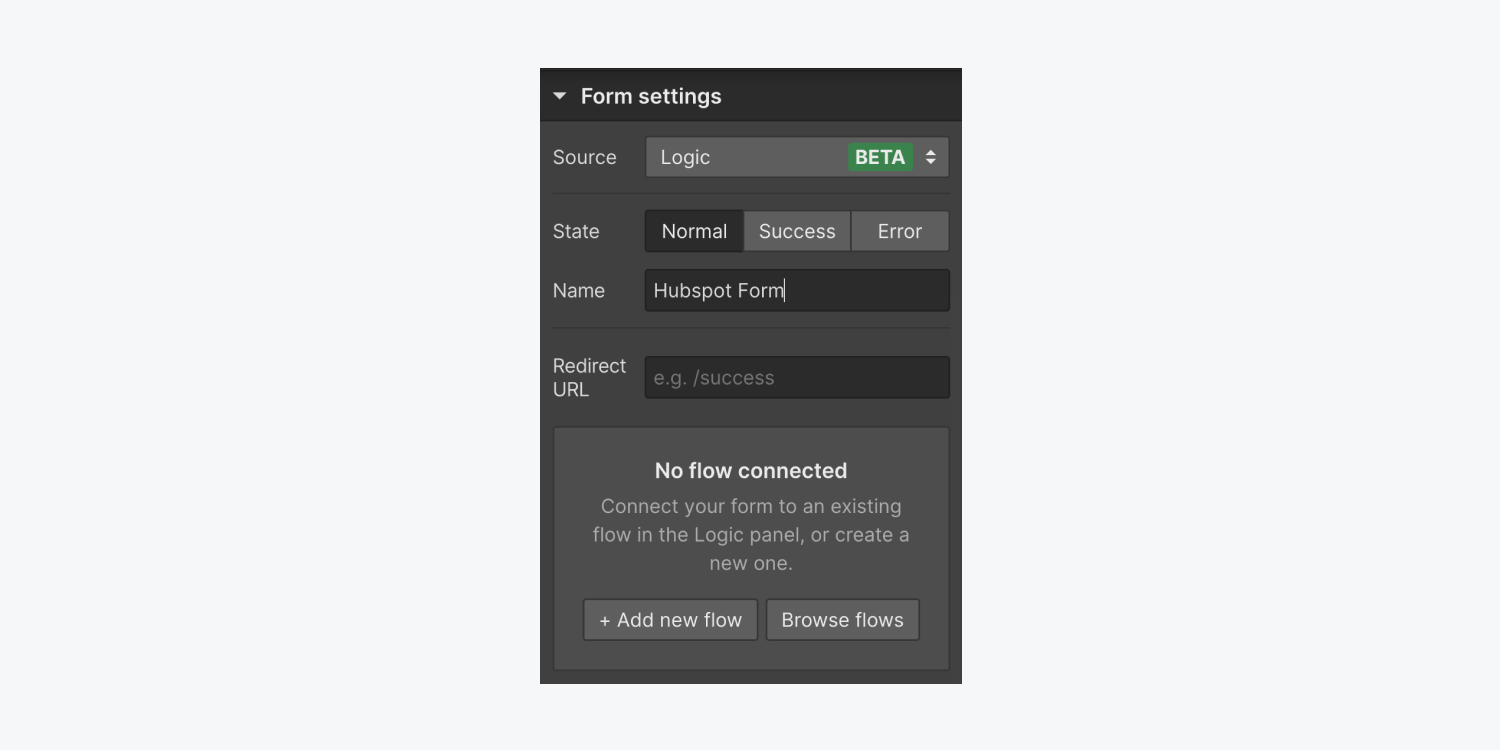
- Choose your form on the Designer canvas and access Form settings
- Select the Source dropdown and opt for Logic
- Click Add new flow
- Name your new flow (e.g., “Establish connections in HubSpot”) in the Name field and optionally add a description in the Description field
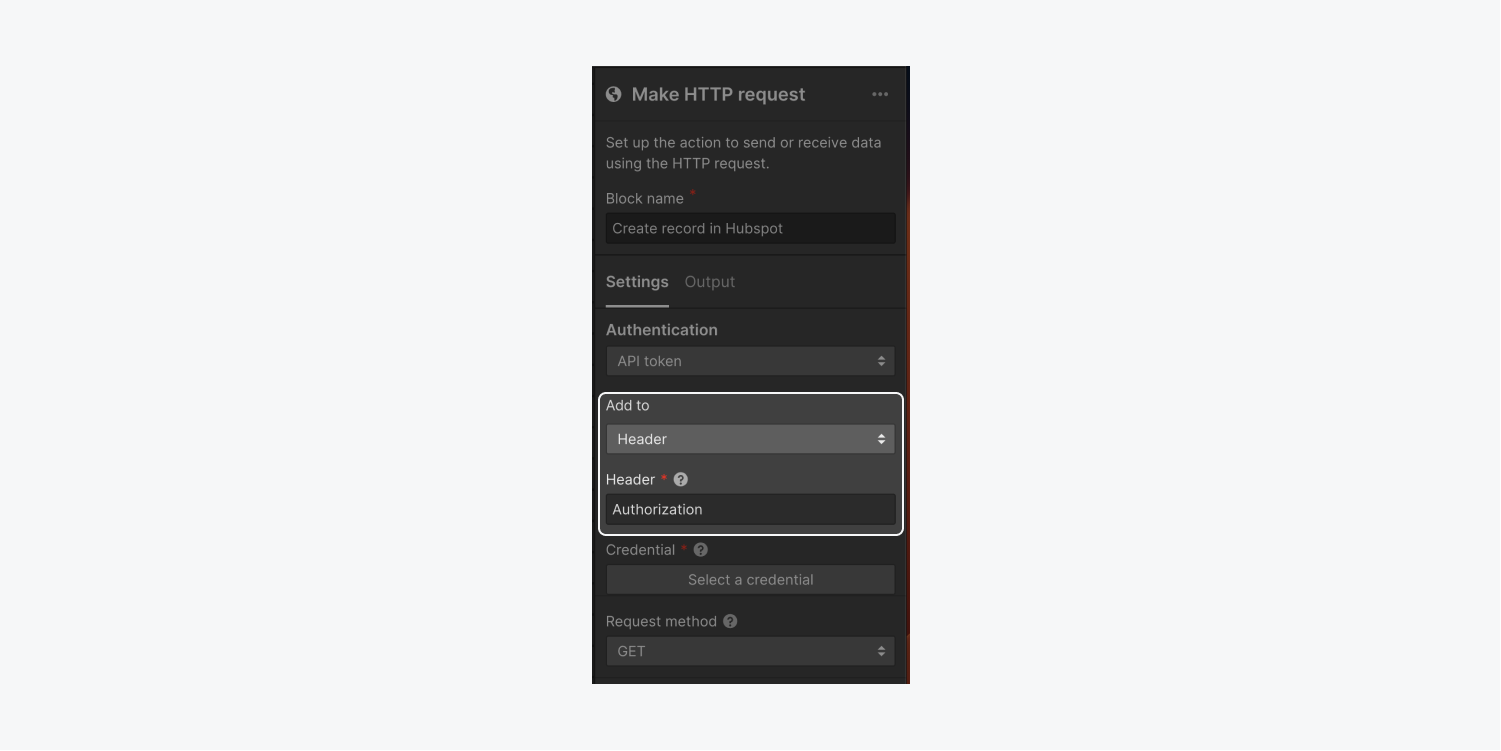
- Drag a Make HTTP request block to the flow editor canvas and assign a name (e.g., “Initiate new contact in HubSpot”)
- From the Authentication dropdown menu, select API token
- Choose Header from the Add to options
- Input “Authorization” in the Header field
- Click Select a credential > Add new credential
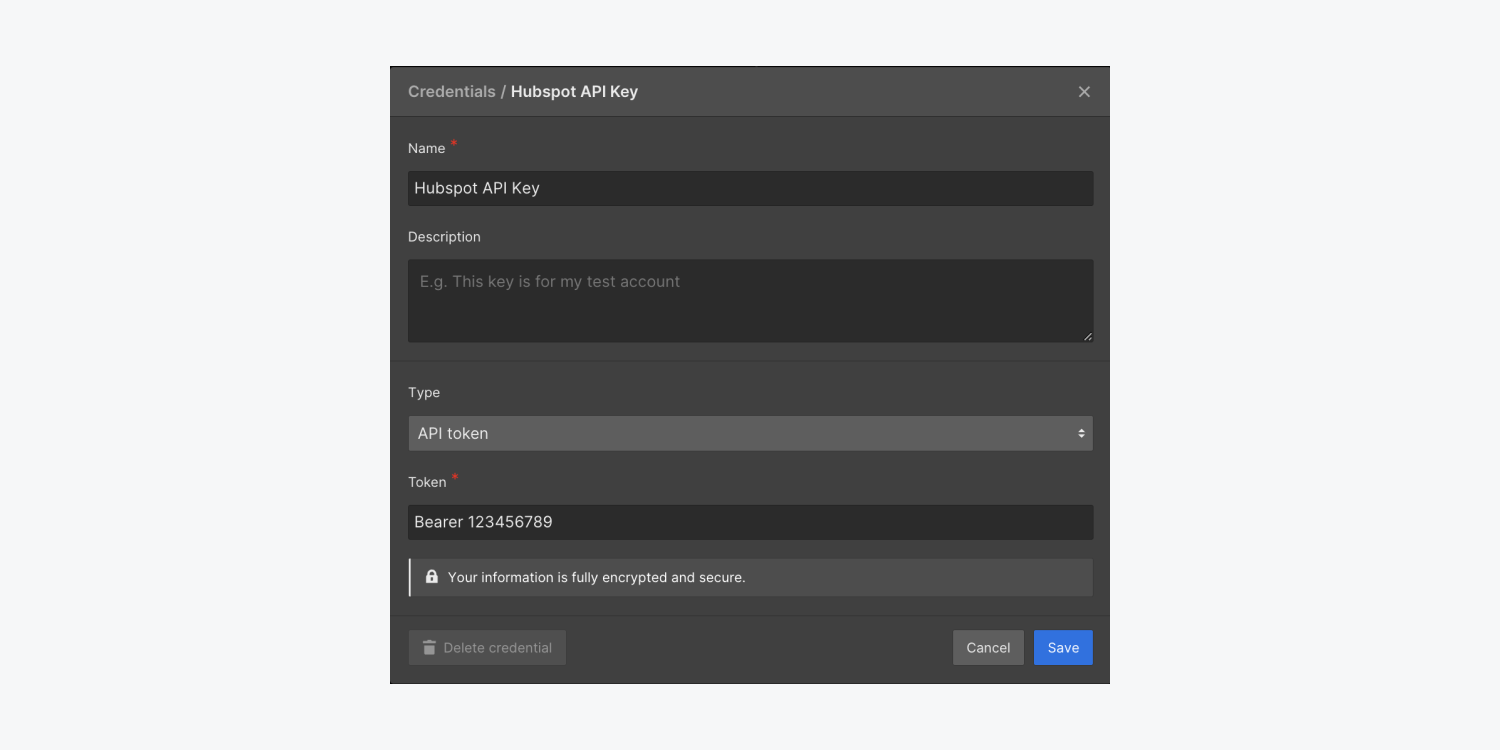
- Name your API token (e.g., “HubSpot API token”) in the Name field and provide a description in the Description field if needed
- Enter “Bearer {API key}” in the Token field, replacing {API key} with the copied API key from HubSpot
- Save your new credential by clicking Create and ensure to keep this tab open!
Pro tip: Alongside, you can link your form to a new Logic workflow from the Logic panel > Flows tab. Further insights about form submission triggers can be found in Logic.
Locating the HubSpot API documentation
- Visit the HubSpot API reference documentation
- Scroll down to CRM located in the left panel
- Navigate to Objects > Contacts > Create contacts and retain this tab open for guidance!
Configuring the HTTP request settings
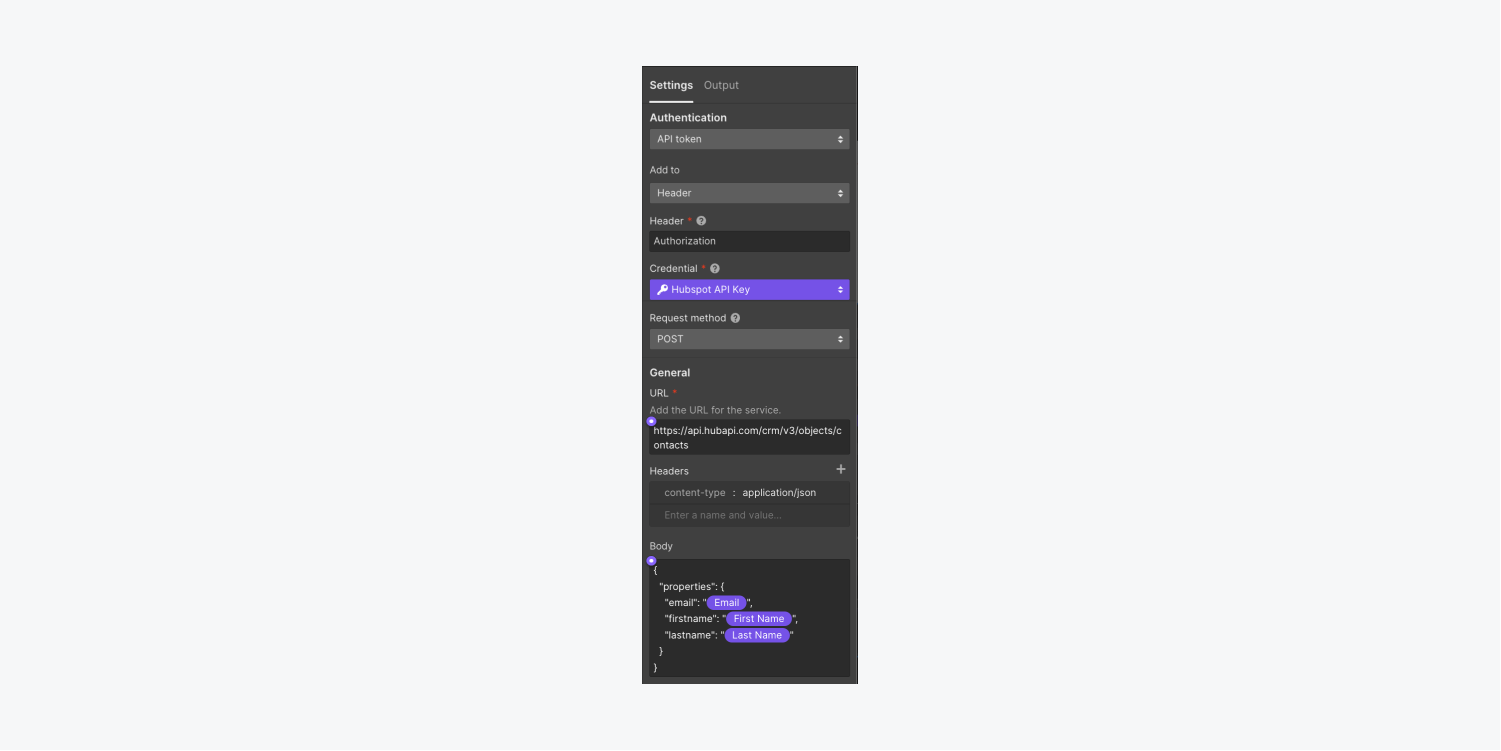
After setting up your Logic flow and HubSpot authentication credentials, return to Webflow to define an HTTP request in your flow. The HTTP request configuration at this stage will establish a new contact in Hubspot upon each form submission by a visitor.
Note: In case you closed the tab where your Webflow site was open, navigate to Logic panel > Flows tab and select the flow created in the previous steps. Click on the Make HTTP request block on the flow editor canvas to open block settings and proceed with the following steps.
- Choose POST from the Request method dropdown
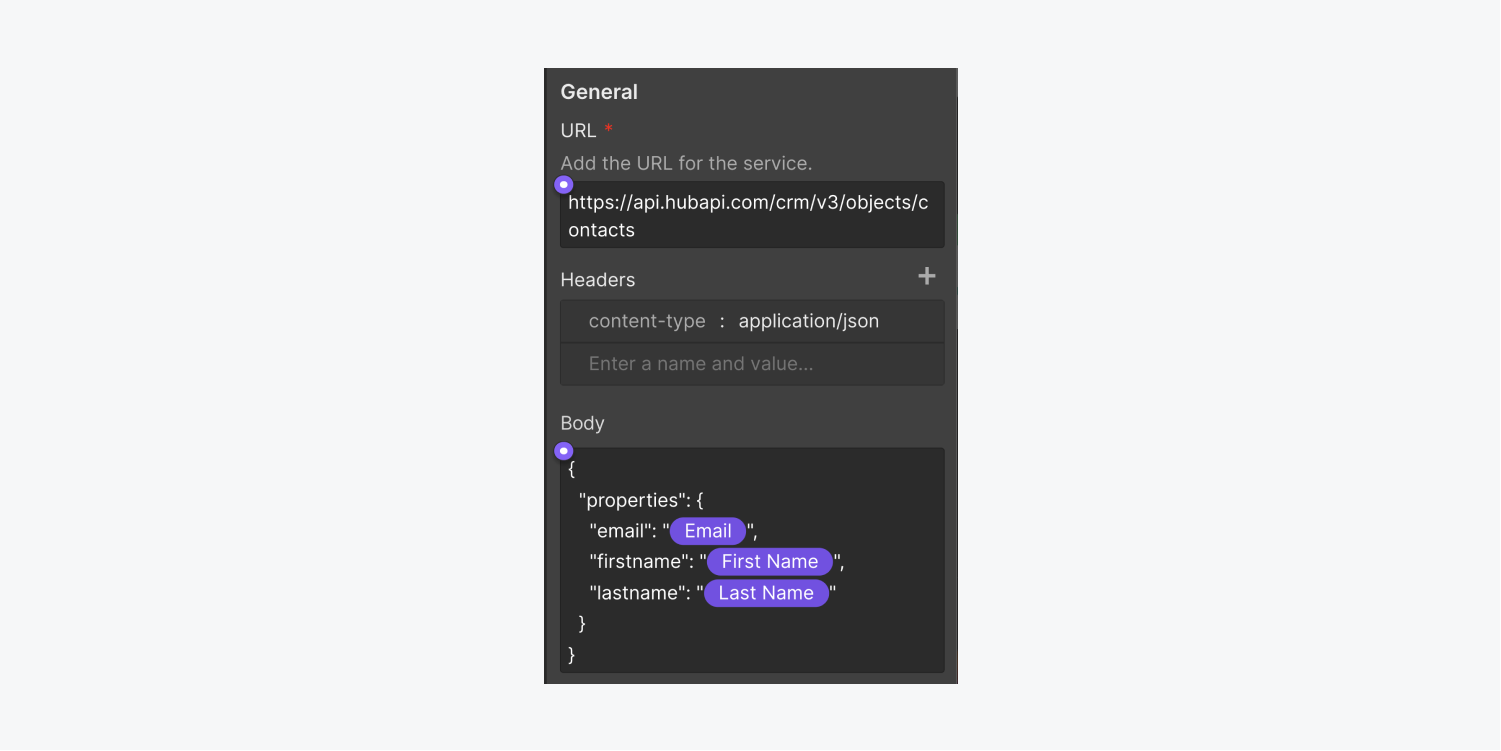
- Paste “https://api.hubapi.com/crm/v3/objects/contacts” in the URL field
- Click on the “plus” icon adjacent to Headers to add a new header
- Input “content-type” in the Name field and “application/json” in the Value field
- In the Body field, paste the code snippet for creating contacts provided in HubSpot’s API documentation — it will resemble this (yet contain properties
To proceed, you will have to incorporate live information into your HTTP request for collecting data from the submissions you receive via your forms:
- Erase the existing content from your HubSpot contacts, and position your cursor within the empty quotation marks in the Content section
- Choose the violet “dot” symbol and pick the corresponding dynamic form element (for instance, name, email, etc.)
The procedure to test and release your sequence
- Press Execute test to finalize configuration
- Input test values into their appropriate fields
- Press Execute test
- Tap on Terminate or Accept data to leave the test mode
- Click on Make public
- Hit Prepare flow for publication
- Proceed with publishing your website
Tip: If you encounter an error notification during the test process, address the issues by following our problem-solving measures, and then repeat the aforementioned steps. Discover additional details about examining HTTP requests.
Procedures for addressing concerns within your sequence
If you come across an error while testing your sequence, attempt the following measures:
- Verify that you have included “Bearer” (along with a space) before your API key while configuring your credentials (e.g., Bearer 123456789)
- Inspect for any errors in your request body utilizing a cost-free tool like JSONLint
- Include or eliminate Workspace spots and members - April 15, 2024
- Centering box summary - April 15, 2024
- Store a site for future reference - April 15, 2024

