Within this tutorial:
- Establish the layout in After Effects
- Create an orbital animation
- Export the project
- Integrate the animation into Webflow
- Configure an interaction trigger
Establish the layout in After Effects
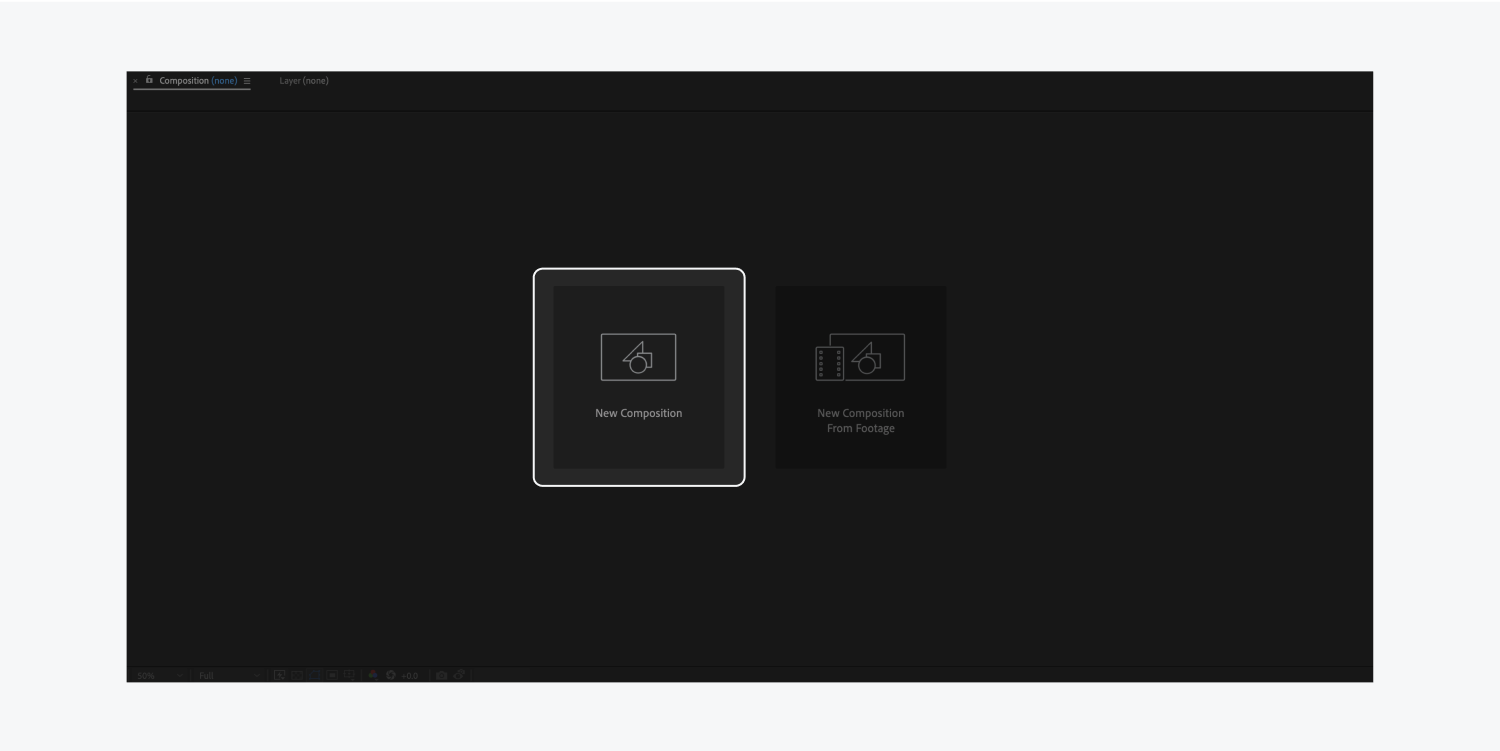
When setting up a layout in After Effects, keep in mind that this is the initial stage, but modifications can always be made later. You have the flexibility to adjust dimensions, timing, or frame rate. For instance, let’s form a 1000px wide by 1000px tall layout at 60 frames per second for this demonstration.
Establish a layout in After Effects:
- Launch After Effects
- Choose New Composition
- Input 1000px for the Width
- Input 1000px for the Height
- Input 60 for the Frame rate
- Input 5 seconds for the Duration
- Set the Background color to white
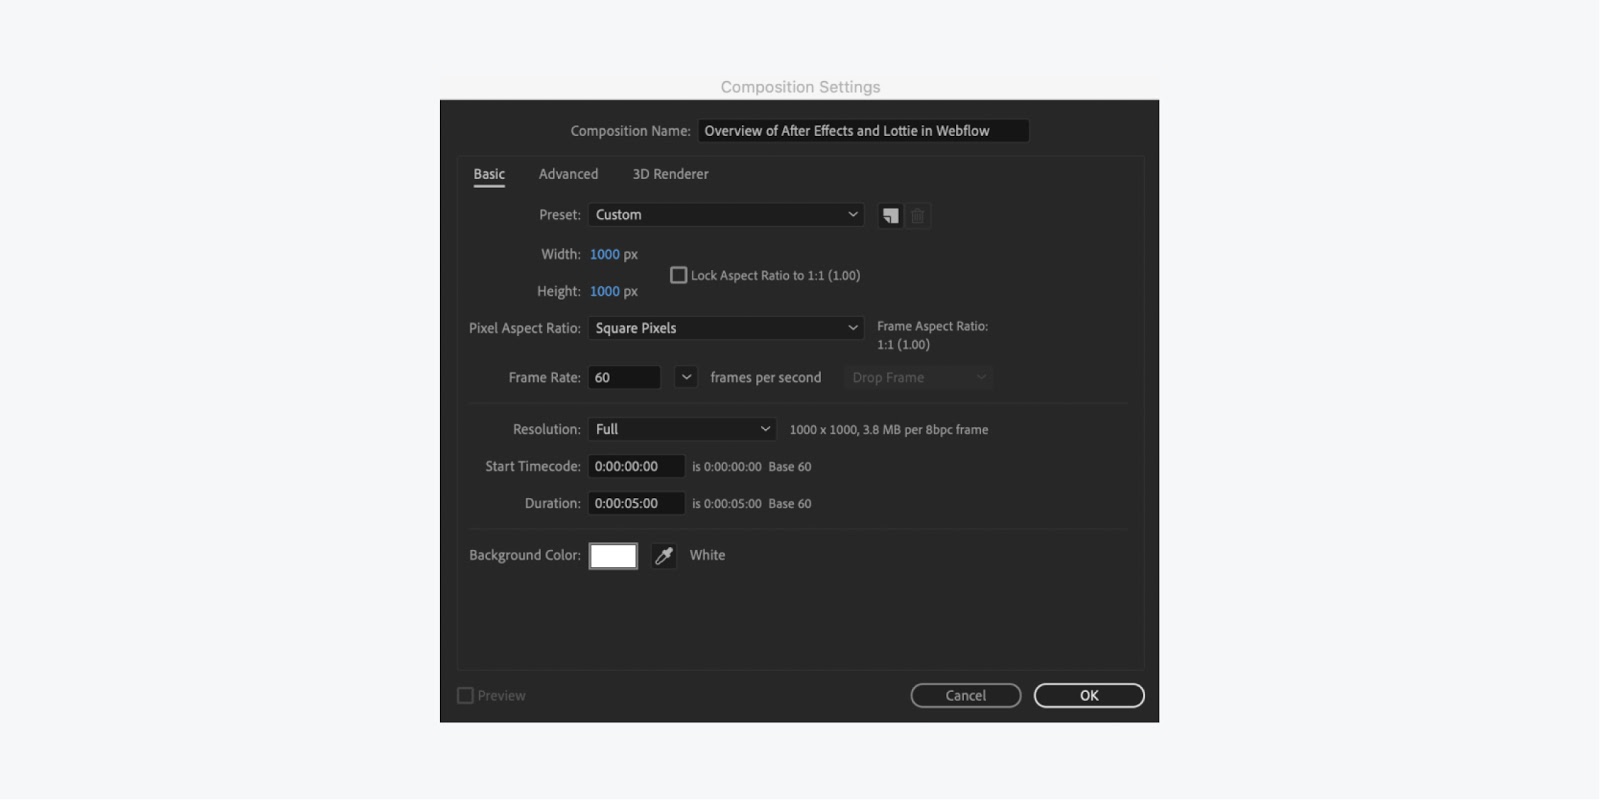
Note: make certain that Prevent Aspect Ratio to 1:1 (1.00) is not selected to design a bespoke dimension
Develop an orbital animation
The following step delves into intriguing territory. Let’s commence by incorporating a fresh shape layer into your layout.
Integrate a shape layer:
- Right-click within the layers panel
- Hover over New
- Choose Shape layer
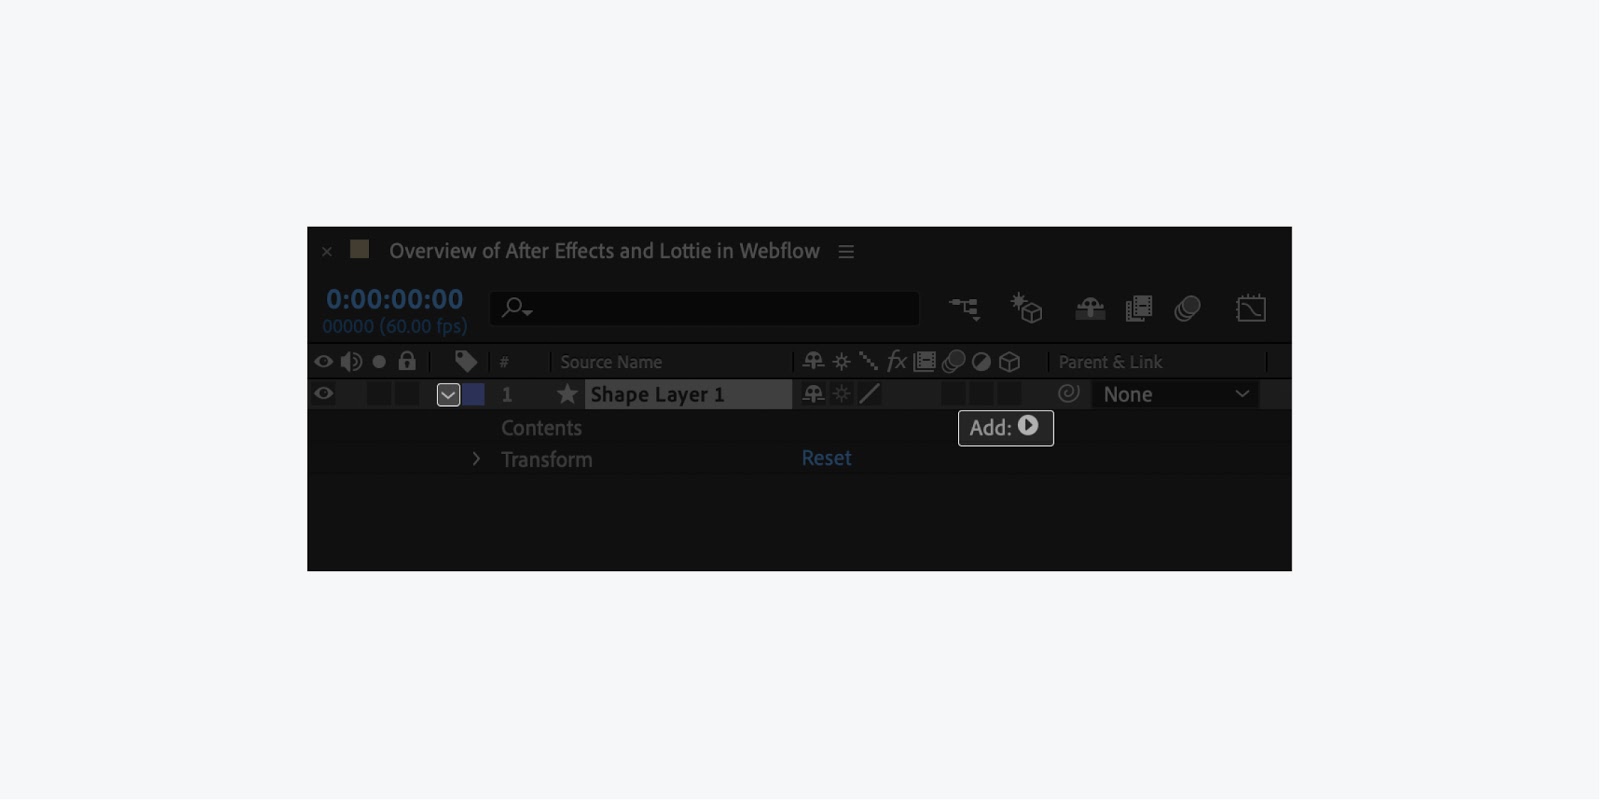
Incorporate a stroke and amplify the magnitude for visibility of the ellipse:
- Click Add on the shape layer
- Select Stroke
- Alter stroke color to grey or a shade distinct from your background color
- Adjust the stroke width to 1px
- Click the dropdown arrow of the Ellipse path
- Input 900 for the Size
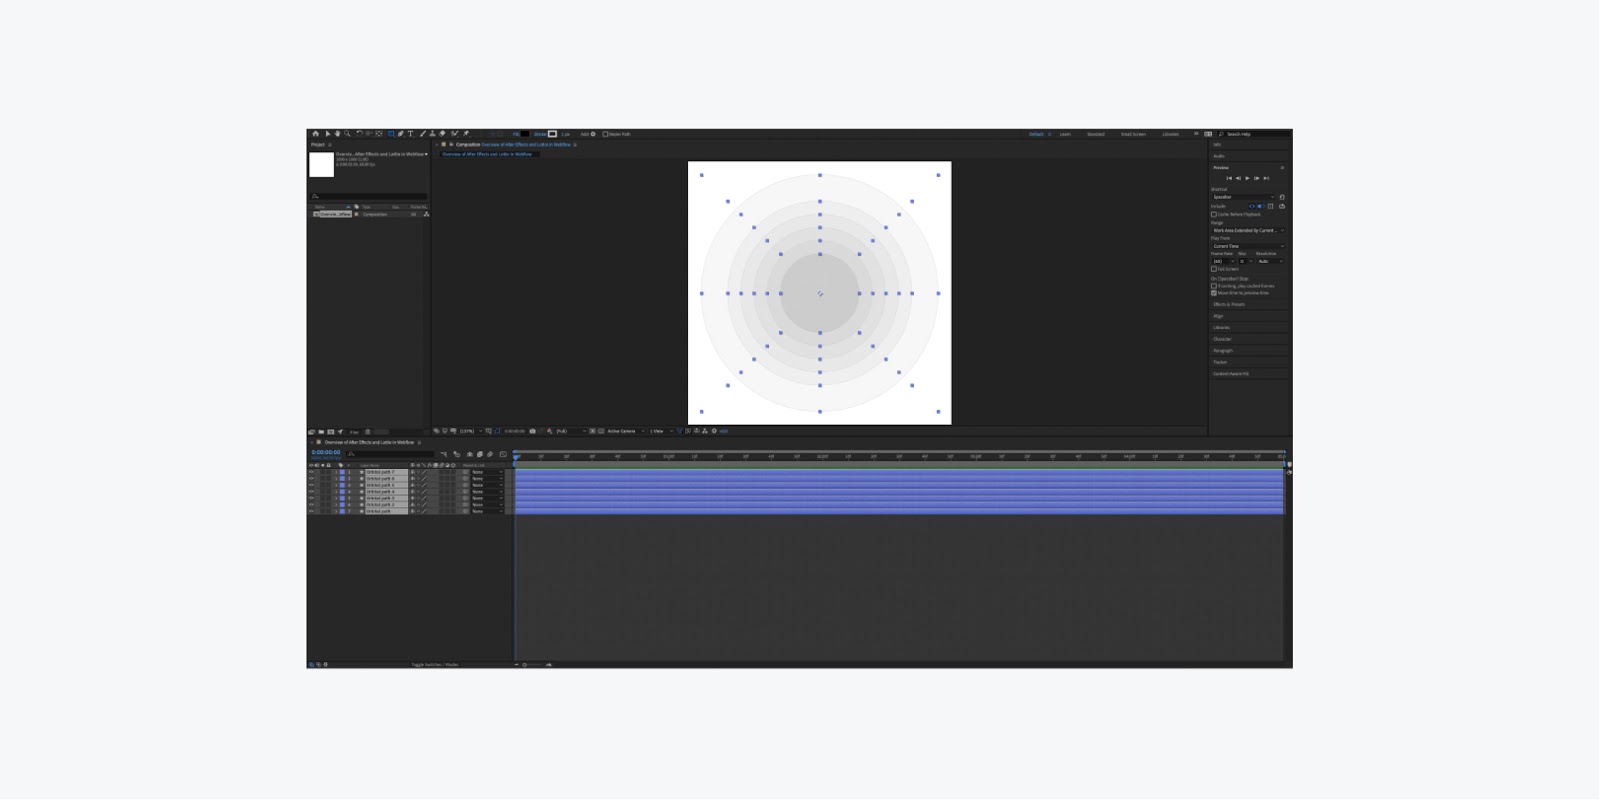
To proceed, simply press Command + A (on macOS) or Control + A (on Windows) to highlight all content. Subsequently, you can click the dropdown arrow adjacent to a layer for collapsing all entities. This procedure facilitates the arrangement of our paths in this illustration.
For the star element, instead of initiating from scratch, consider employing one of the duplicated orbital paths you’ve configured (e.g., Orbital path 7) as a blueprint.
Formulate a star:
- Highlight the recently duplicated layer (e.g., Orbital path 7)
- Tap Command + C (on macOS) or Control + C (on Windows)
- Proceed with Command + V (on macOS) or Control + V (on Windows)
- Expand the dropdown of the copied layer
- Expand the dropdown of the Ellipse Path within the copied ellipse layer
- Reduce the Size to 40
- Click on the label (e.g., Orbital path 8) and hit the return key
- Then, specify a name (e.g., Star)
You should maintain the same stroke color while altering the fill slightly.
Opt for a white color with 100% opacity.
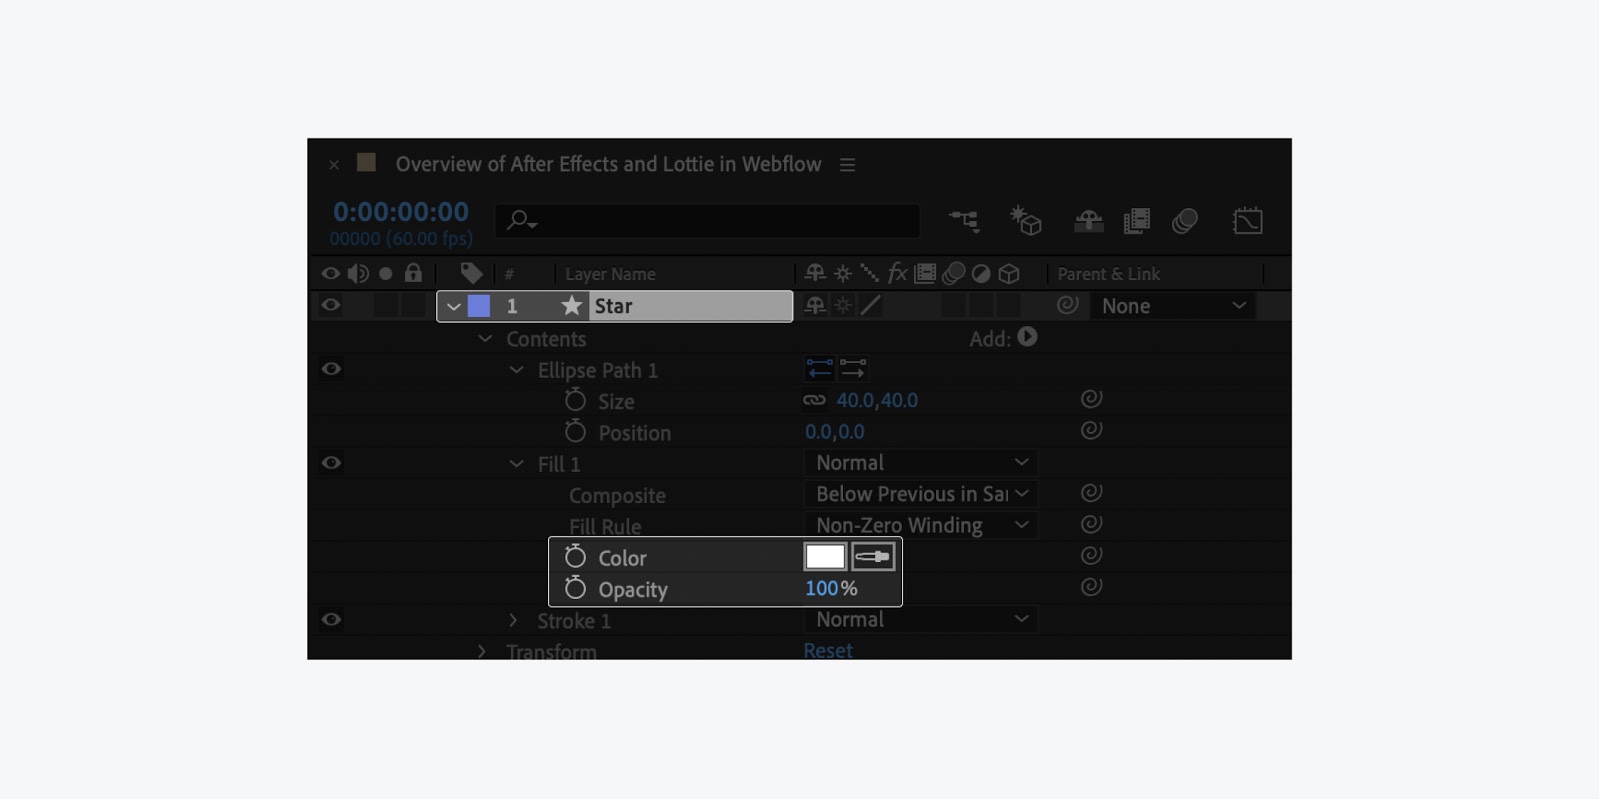
Your planet designs should follow a similar pattern, albeit with slight differences.
Formulate a planet:
- Replicate and insert the Star layer
- Dub the duplicated layer (e.g., Planet)
- In Contents > Ellipse path of the duplicated layer: adjust the Size (e.g. from 40 to 15)
- In Contents > Ellipse path of the copied layer: manipulate the first Position input (x-axis) until the Planet aligns with the first orbital path’s stroke
Generate an additional 6 planets by utilizing the first one as a guideline.
Generating more planets:
- Replicate the most recently duplicated planet.
- In the Contents of the duplicated layer: adjust the first Position input (x-axis) until the Planet aligns with the subsequent orbital path
Reminder: Opt to vary the Size differences of your duplicated ellipses for a more natural appearance, rather than scaling each one down by 100.

With proper placement, proceed to adjust the planetary rotation.
Adjust planetary rotation:
- Click the arrow of a planet layer to access settings
- In the Transform dropdown, click the stopwatch icon by Rotation to establish the first keyframe (ensuring alignment at frame 0)
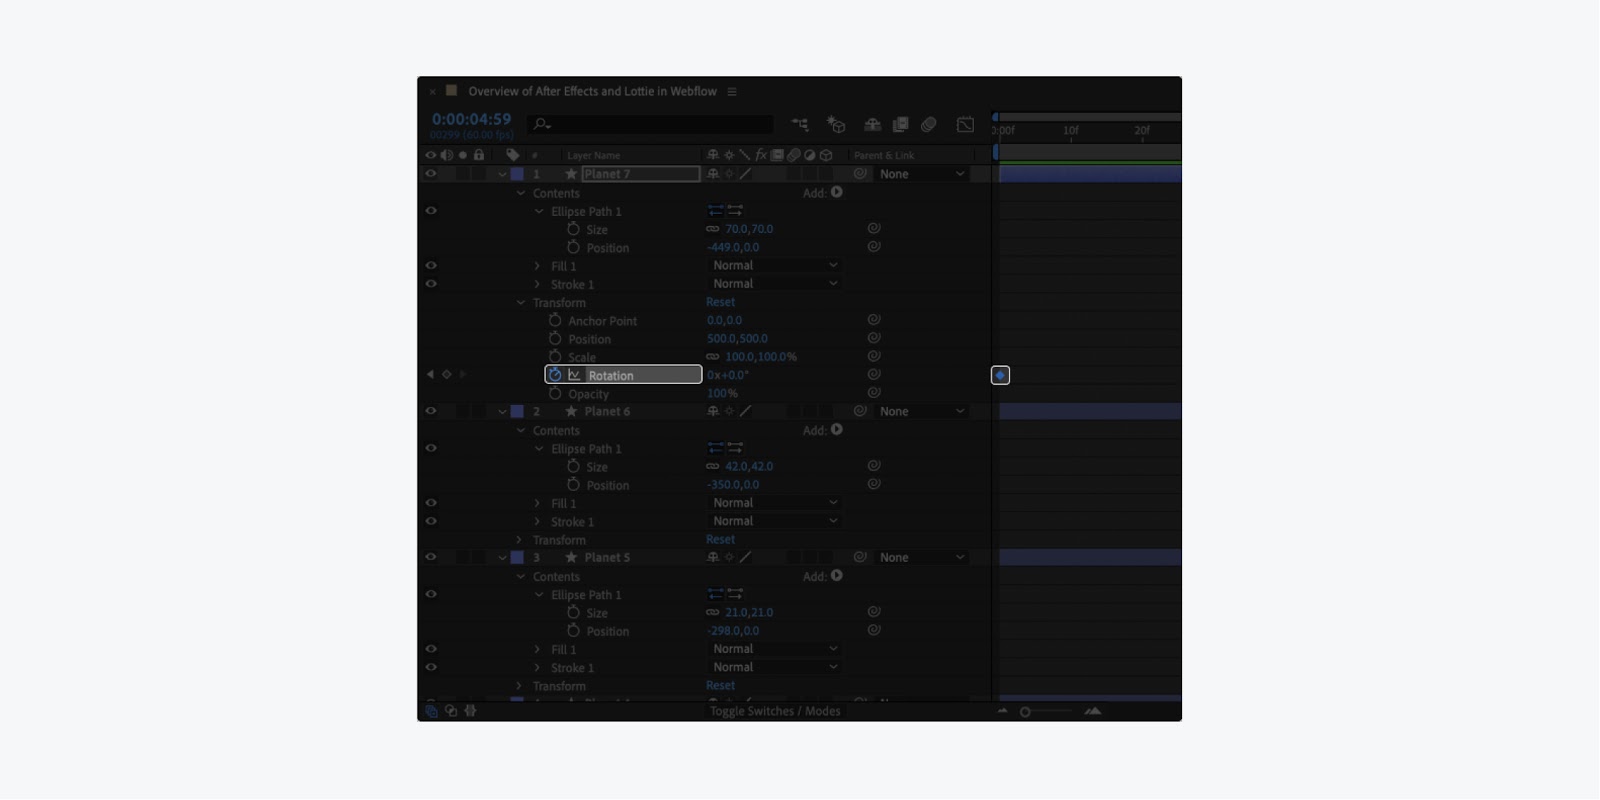
- Glide the timeline to the end
- Subsequently, engage the stopwatch beside Rotation for the final keyframe (ensuring alignment at the end of the timeline)
- Lastly, modify the Rotation value. The initial input designates the rotations count, whereas the second input sets the degrees within the rotation. (e.g. 1×70.0° equals 1 full rotation and 70 degrees)
Note: Customize the initial and final Rotation values to align with your animation scheme.
To synchronize rotation animations for the other 6 planets, replicate the above steps. Upon adding keyframes and rotations for all planets, use the space bar from the first frame to preview the animation sequence.
Export
Your animation is fashioned; now, you’re set to export it.
To export, leverage the Bodymovin plugin (refer to how to install the Bodymovin extension) to convert your After Effects composite into a consolidated JSON file. If the Bodymovin extension is pre-installed, locate it in your After Effects menu under Window, navigate through Extensions, and choose Bodymovin.
To commence the export process, ensure your composition is selected, designate an export folder, and tap render.
Incorporate the animation into Webflow
Now it’s time to import your exported file.
Integrate your After Effects animation into Webflow:
- Accessyour Webflow undertaking in the Designer
- Press the Assets symbol, or tap J on your console, to reveal the Assetspanel
- Tap the Upload button and choose your After Effects animation, or drop your After Effects JSON file into the Assetspanel
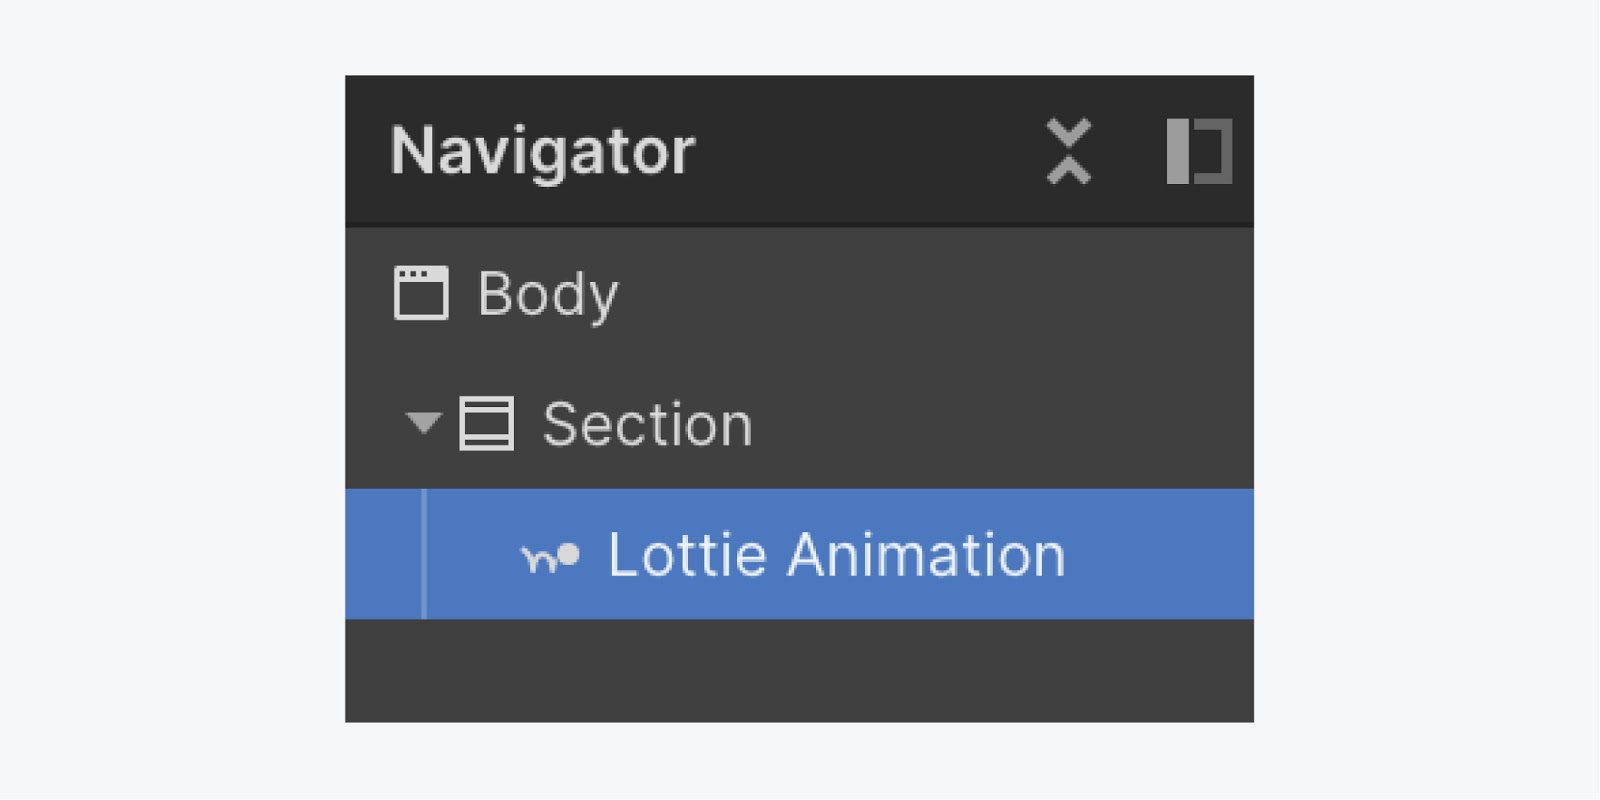
- Drop your animation into the canvas of your project
If you preview your project by tapping on the Toggle Preview symbol (the eye symbol), you’ll observe that the animation begins playing by itself. Following that, you can establish an on-click trigger to commence the animation upon being clicked.
Configure an interaction trigger
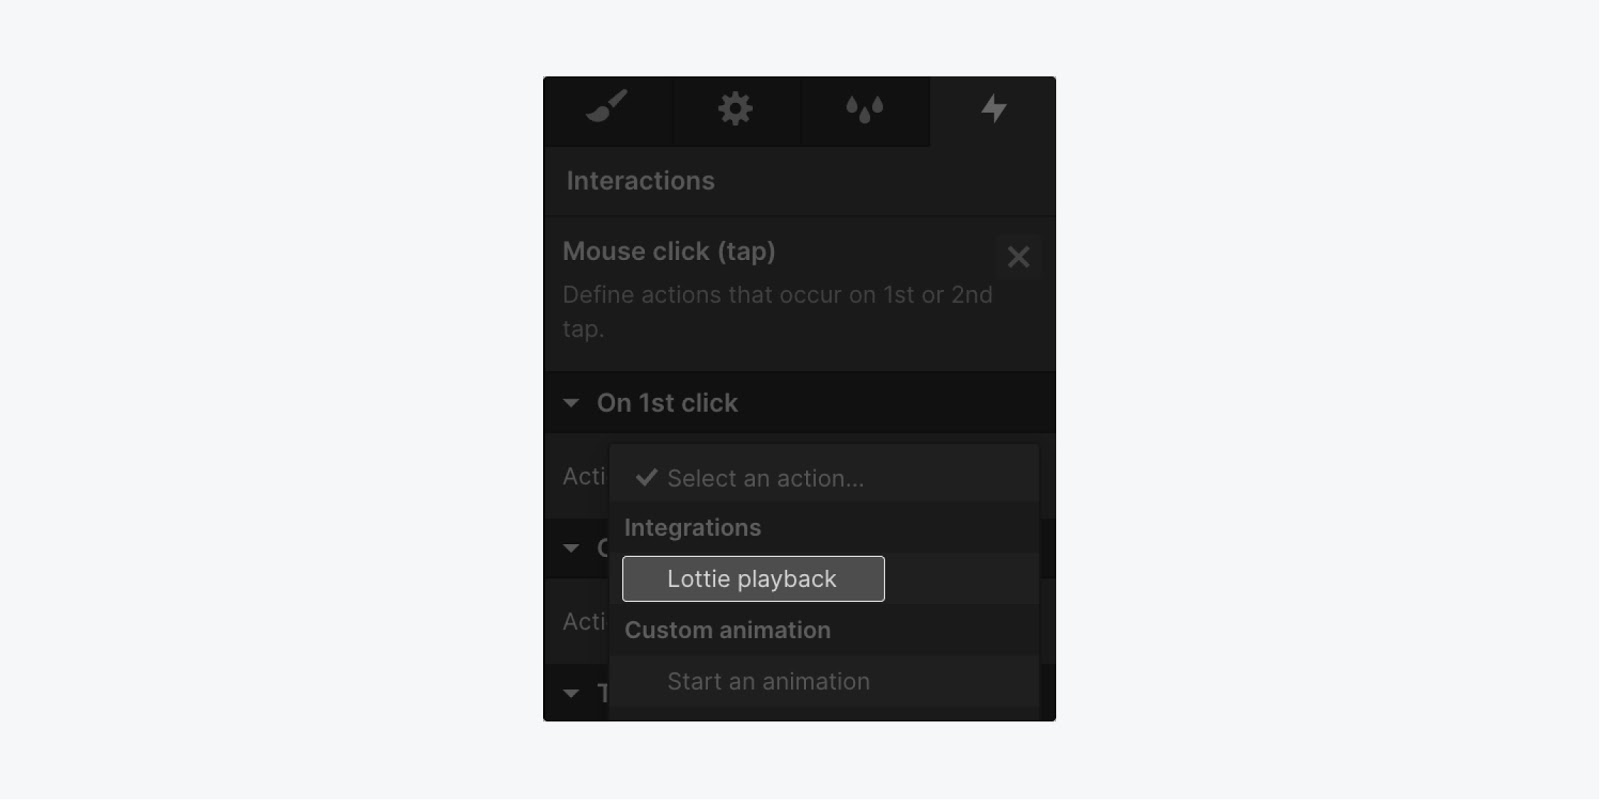
This constitutes the main part. We will configure an on-click trigger. Expand your understanding of triggers and animations.
To configure the trigger:
- Include or eliminate Workspace spots and members - April 15, 2024
- Centering box summary - April 15, 2024
- Store a site for future reference - April 15, 2024
