您的網站中可能有富含複雜細節的圖像,例如產品照片或藝術品。透過使用一些自訂程式碼,您可以讓訪客將滑鼠懸停在這些圖像的特定部分上並放大它們,而無需移動肌肉。
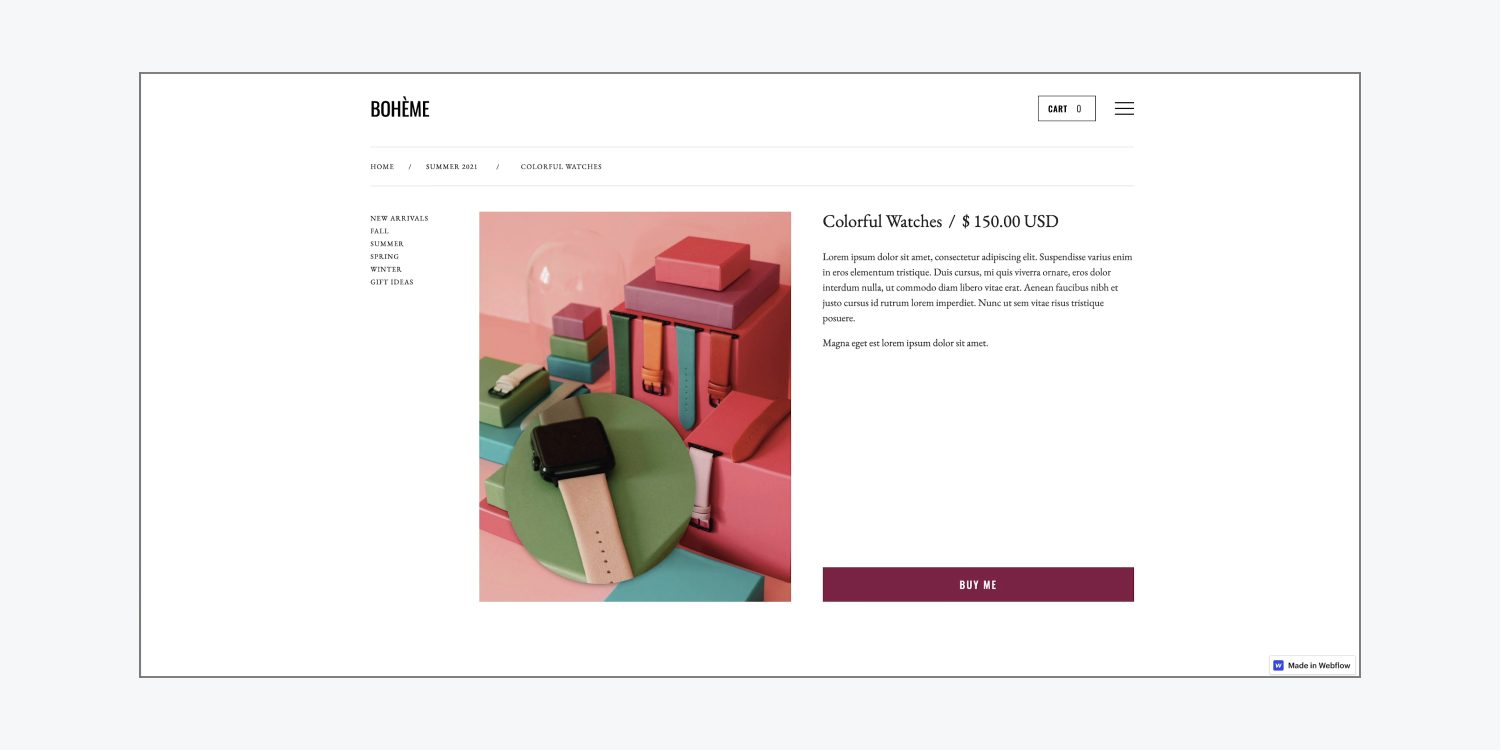
本教學將引導您完成透過按照以下步驟將自訂程式碼插入頁面或項目來放大圖像的過程:
- 插入自訂程式碼
- 指定一個類別名
- 自訂放大鏡
插入自訂程式碼
有兩種方法可以將自訂程式碼插入到您的專案中:
- 將程式碼包含在整個專案中
- 將程式碼整合到單一頁面中
要將程式碼插入整個專案中:
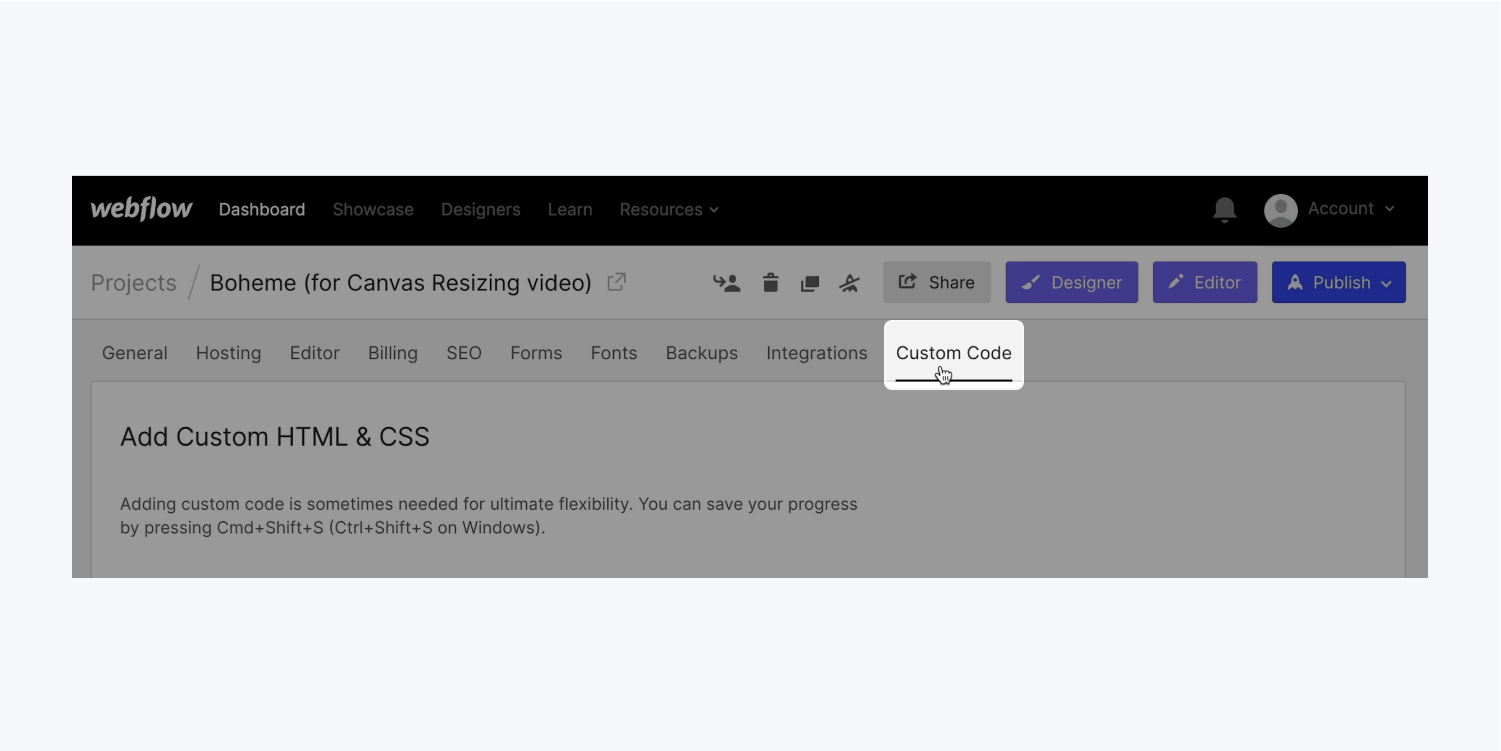
- 訪問您的項目 設定
- 選擇 自訂程式碼 標籤
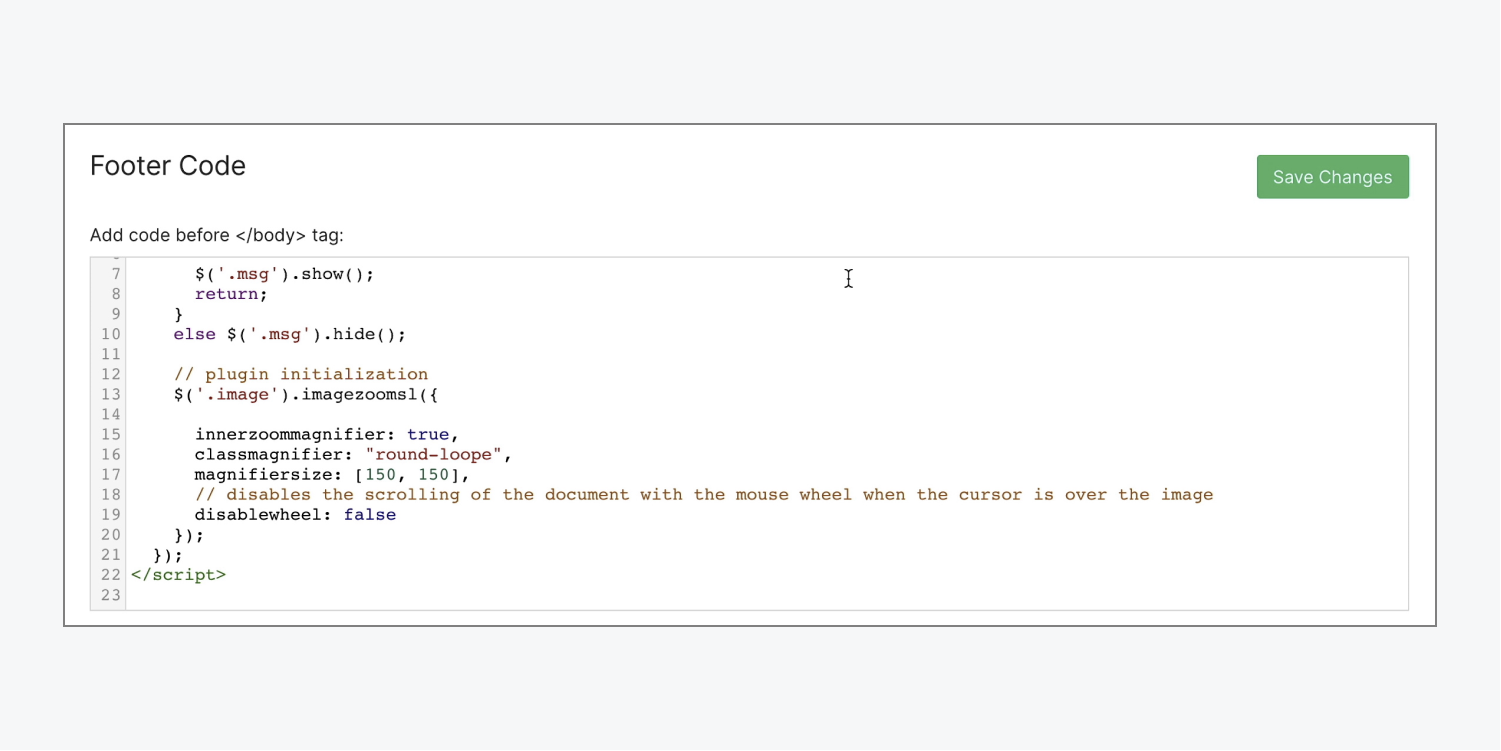
- 將程式碼插入到 頁尾碼 部分(例如,「之前 </body> 標籤”)
- 點選 儲存變更
筆記: 您可以使用熱鍵將程式碼插入您的專案中 指令+V (在 Mac 上)或 控制+V (在 Windows 上)。
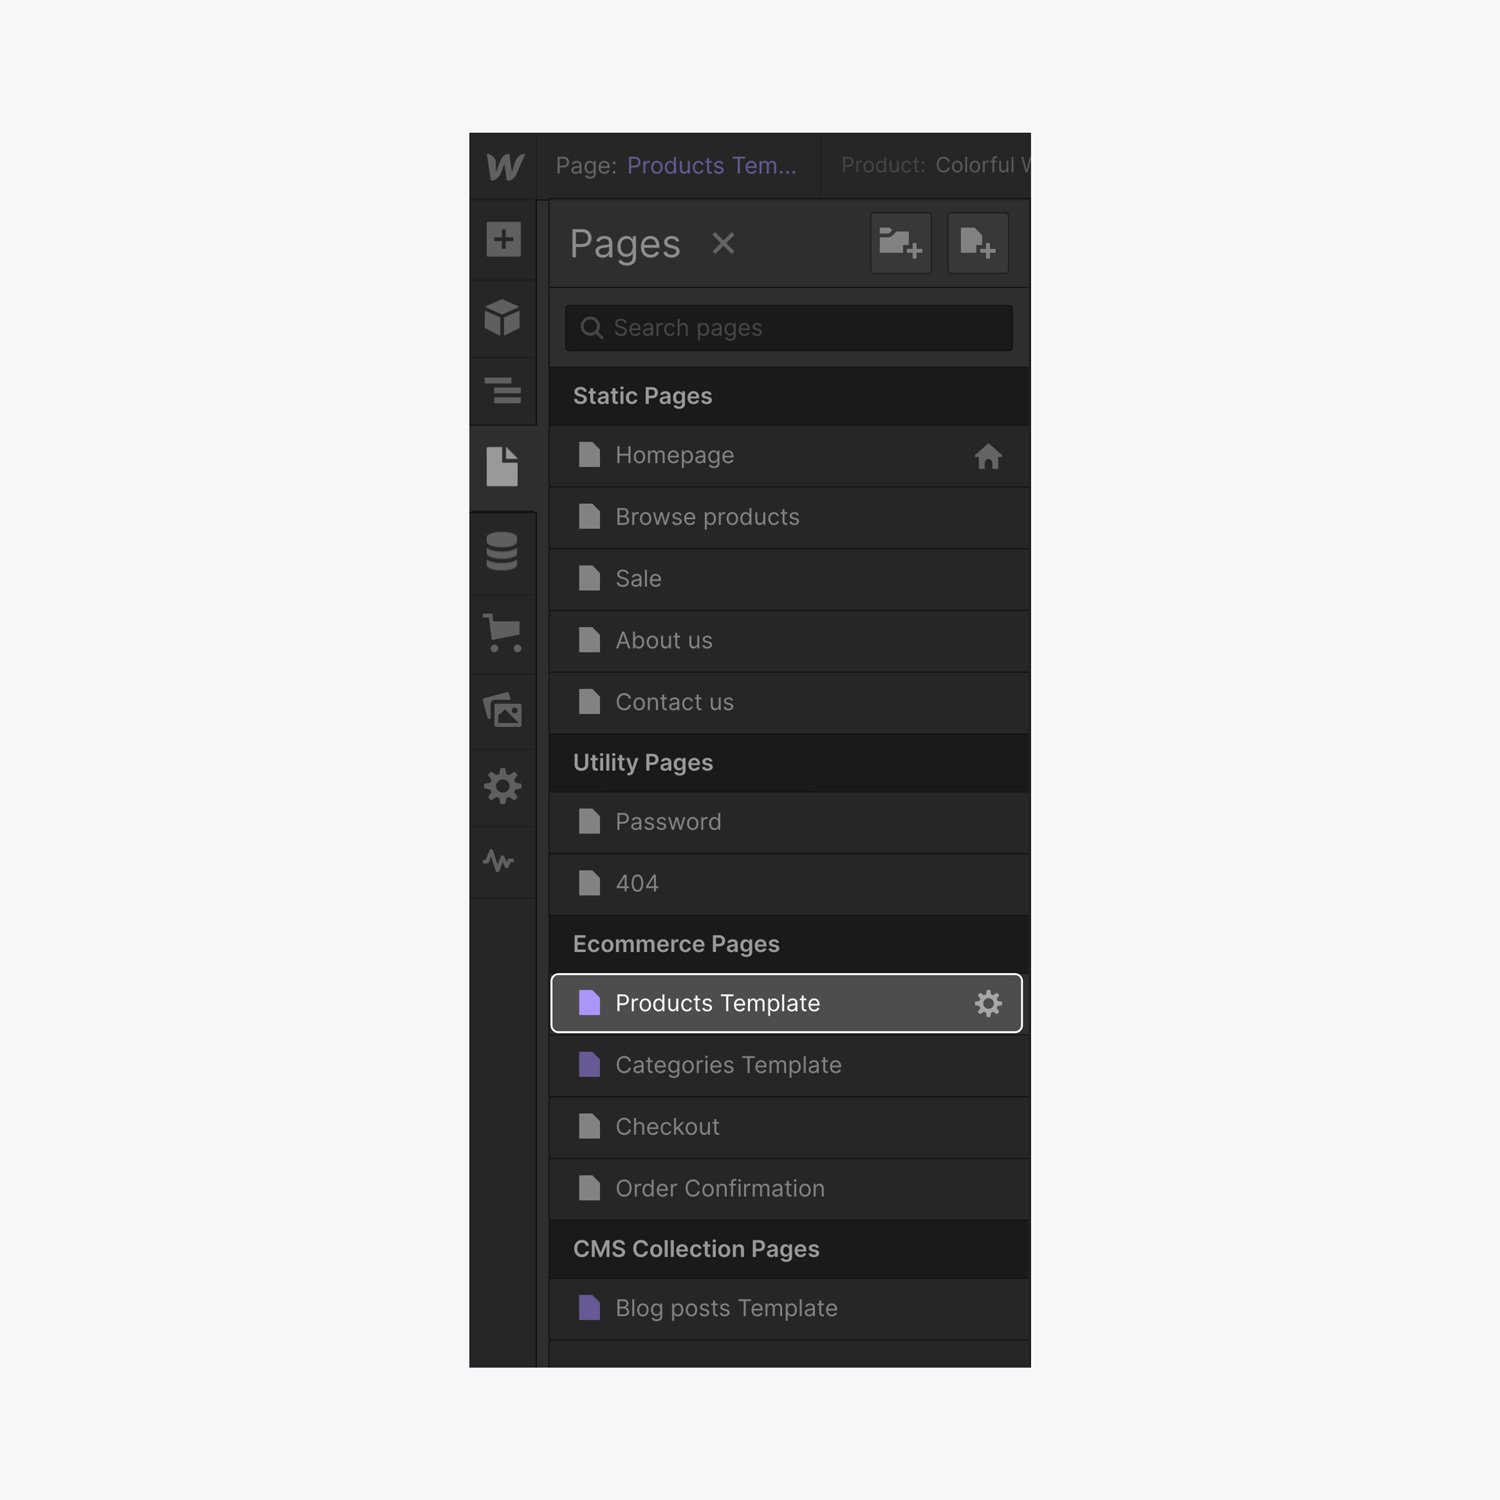
要將程式碼插入到單獨的頁面中:
- 啟動 設計師
- 訪問 頁面面板 並選擇所需頁面的頁面設定齒輪圖標
- 捲動到 自訂程式碼 頁面設定中的部分
- 將程式碼插入到 前 </body> 標籤 部分
- 點選 節省
筆記: 您可以使用熱鍵將程式碼貼到您的專案中 指令+V (在 Mac 上)或 控制+V (在 Windows 上)。
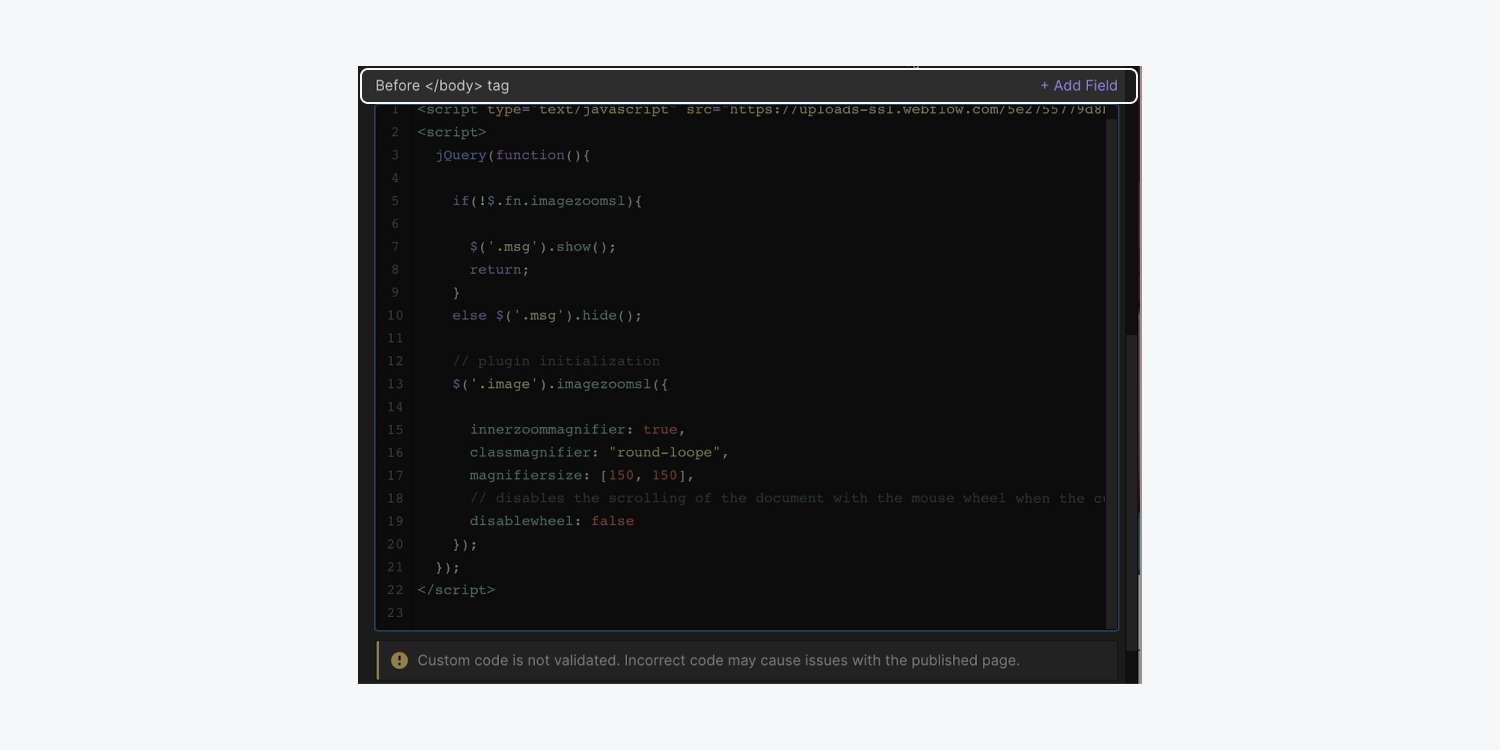
您已成功將自訂程式碼整合到您的專案中!
指定一個類別名
讓我們為要套用放大效果的圖像分配一個唯一的類別名稱:
- 選擇 影像 你想放大
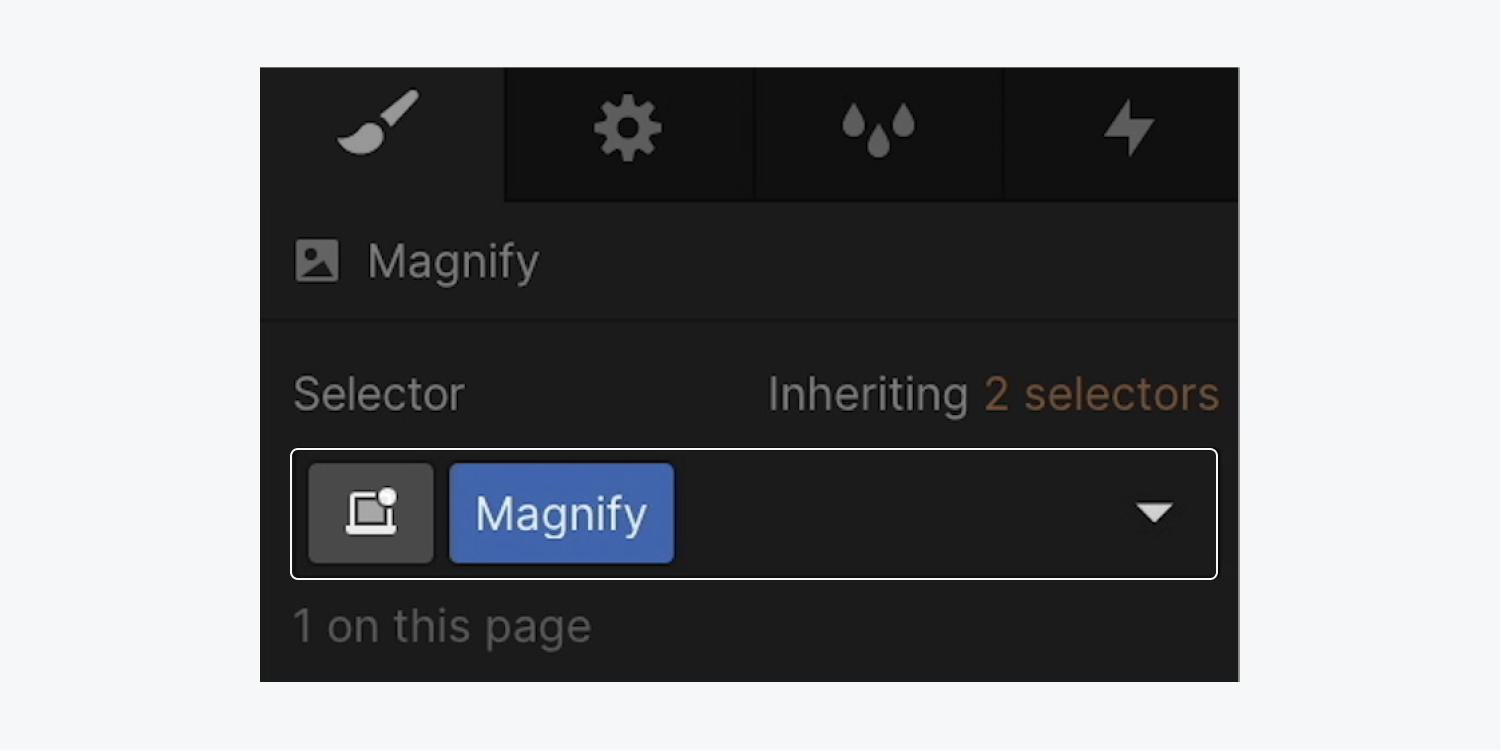
- 訪問 風格面板 並點擊 選擇器字段
- 給它一個 班級 (例如“放大”)
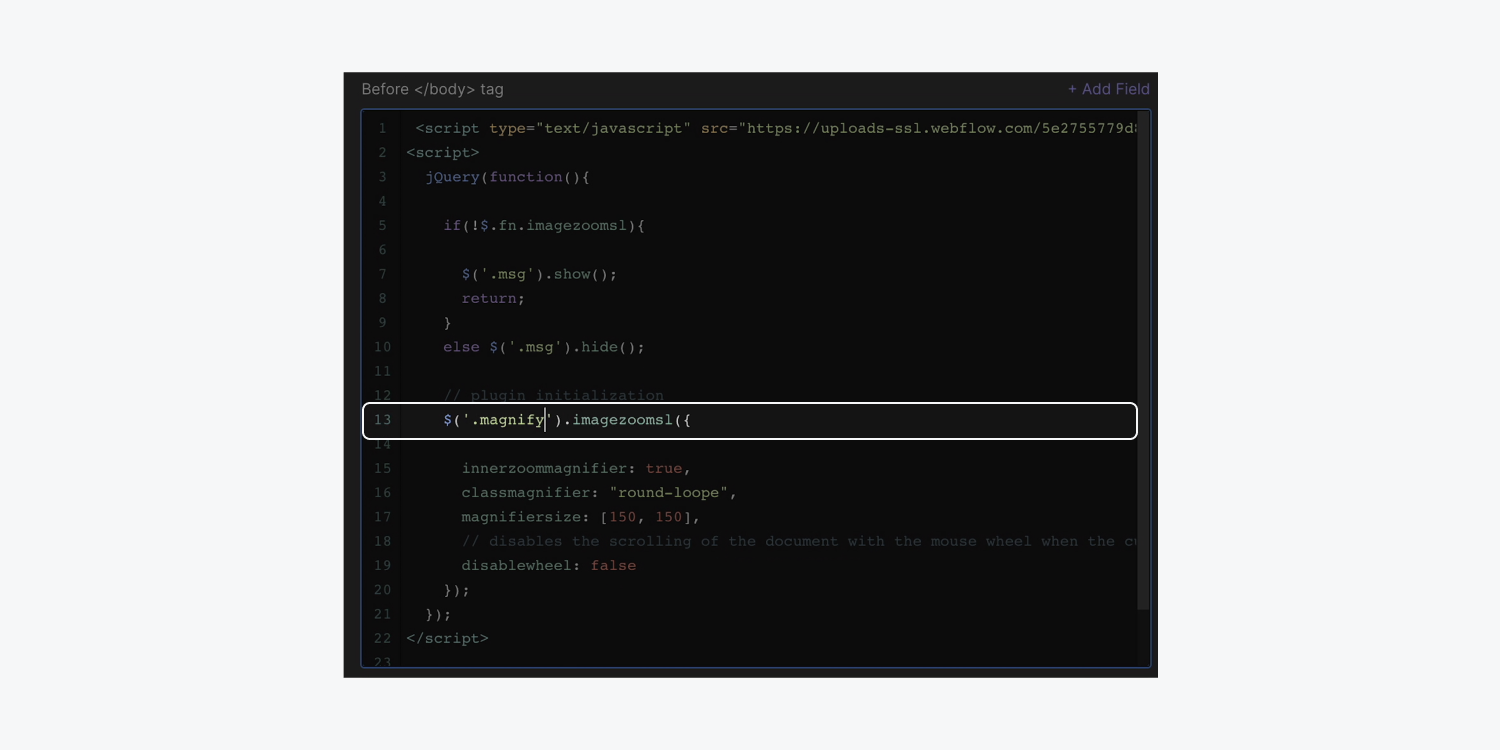
讓我們在程式碼中包含“Magnify”類別:
- 訪問 頁面面板 並選擇放置自訂放大鏡代碼的頁面的頁面設定齒輪圖標
- 捲動到 前 </body> 標籤 頁面設定中的部分
- 代替 」。影像」 加上你的班級名稱(例如,「.放大”)
- 點選 節省
有用的提示: 不要在正在進行的專案中複製或複製類,而是考慮使用 全球級 或一個 組合類 為用於放大的圖像建立一個獨特的類別。確保根據前面概述的步驟將不同的放大等級名稱包含在您的自訂程式碼中。了解有關全域類別和組合類別的更多資訊。
繼續發布您的專案並導航到您的即時網站以見證您的個人化程式碼的運作。只需將滑鼠懸停在已套用類別名稱的圖像上(例如以類別名稱“Magnify”標識的圖像),然後觀察放大鏡在您將遊標滑過圖像時追蹤您的遊標移動。
自訂放大工具
預設情況下,放大鏡是一個 150 x 150 像素的正方形。讓我們修改它的尺寸、形狀並引入投影效果。
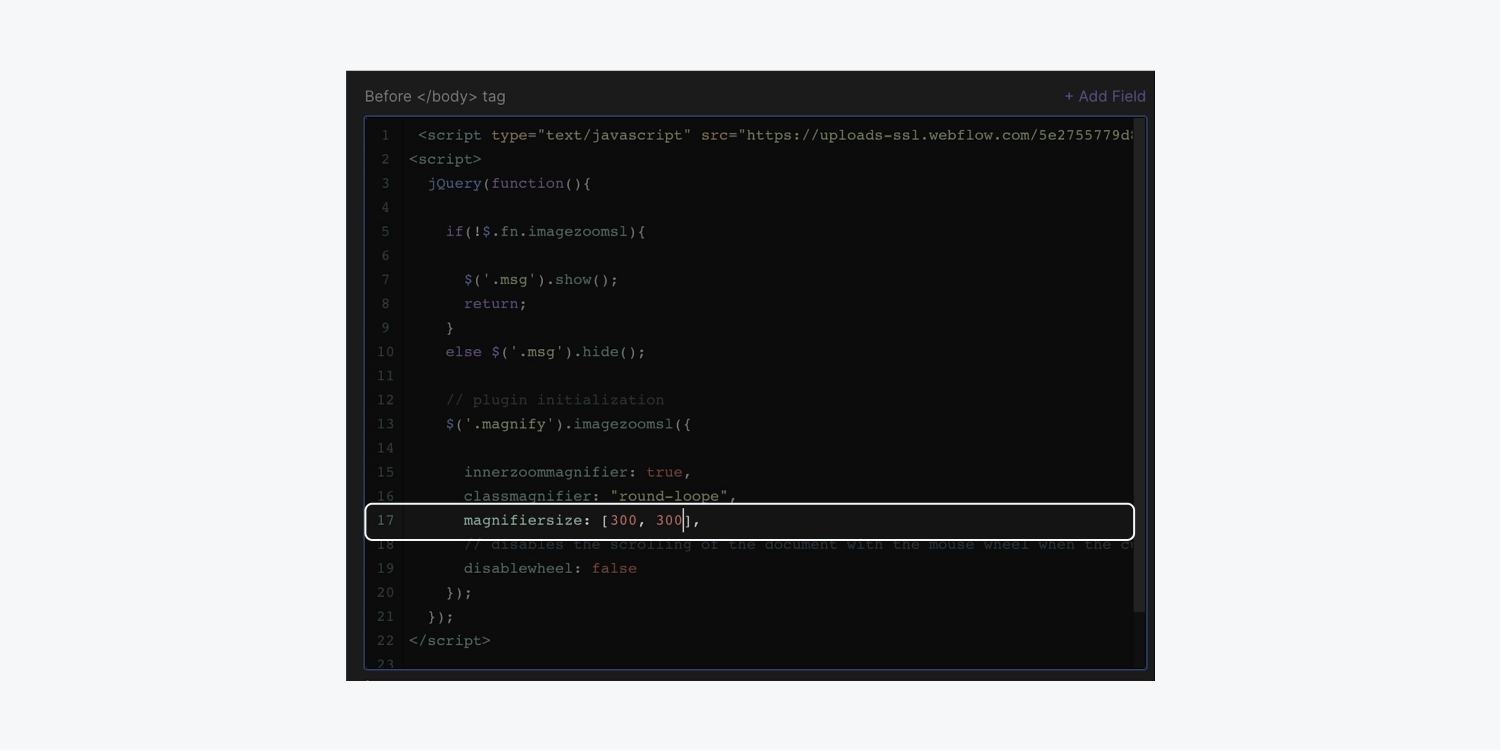
我們的自訂程式碼中的預設設定將放大鏡尺寸指定為 150 x 150 像素。我們放大一下:
- 訪問 頁面面板 並選擇包含您自訂的放大碼的頁面上的頁面設定齒輪圖示。
- 向下捲動到 前 </body> 標籤 頁面設定中的部分並精確定位「magnifiersize: [150, 150]」程式碼片段。
- 將兩個 150 像素值調整為更大的數字(例如,每個 300 像素)。
- 儲存您的變更。
讓我們透過在新的基礎上設定基本樣式,將放大鏡形狀從方形變成圓形。 分區塊:
- 打開 航海家 並選擇 身體 元素。
- 利用 快速尋找 插入一個 分區塊 作為頁面上的結束元素。
- 選擇 分區塊,啟動 風格面板,然後點擊進入 選擇器字段.
- 指定一個類別名 分區塊 使自訂程式碼能夠識別新的放大鏡形狀(例如“圓環”)。
- 使用權 風格面板 > 邊框 並定義一個 半徑 50%。
在此階段,Div 區塊可能會顯示為橢圓形,但放大鏡的大小由您先前設定的 300 像素控制。
內幕提示: 按 命令 + 乙 (在 Mac 上)或 控制 + 乙 (在 Windows 上)觸發 快速尋找 並及時將元素添加到您的項目中。
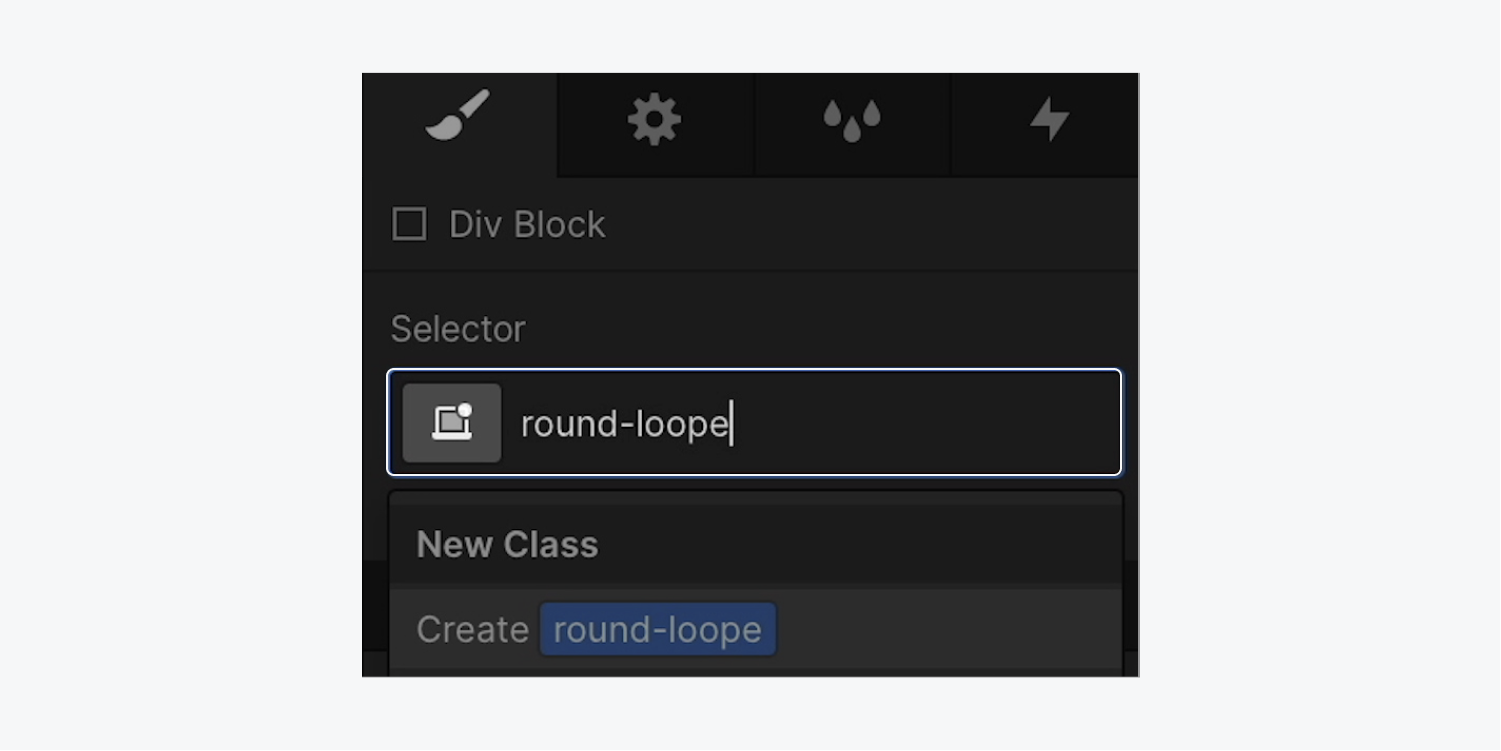

為了給放大鏡帶來更多的深度,讓我們在它後面添加一個陰影:
- 選擇 分區塊.
- 訪問 風格面板 > 效果.
- 納入一個 盒子陰影 透過選擇加號圖示並根據您的喜好自訂陰影。
自從我們的“循環” 分區塊 僅影響我們的放大鏡的樣式,我們不希望 分區塊 在我們的頁面上可見。讓我們將其隱藏起來:
- 選擇“圓環” 分區塊.
- 打開 風格面板 > 佈局.
- 調整 展示 到 沒有任何.
- 發布 該項目並瀏覽您的網站以預覽新樣式的放大鏡。

此放大工具也可以在行動裝置上使用。使用者可以點擊影像來查看特寫鏡頭,尤其是在平板電腦和智慧型手機等裝置上。
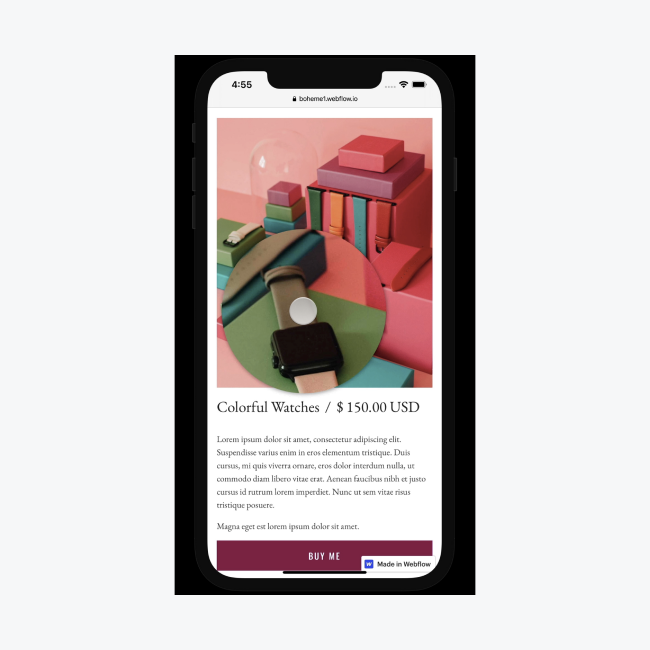
恭喜!您已經透過放大功能增強了影像的潛力!
- 包含或消除工作區點和成員 - 2024 年 4 月 15 日
- 定心框總結 - 2024 年 4 月 15 日
- 儲存站點以供日後參考 - 2024 年 4 月 15 日
